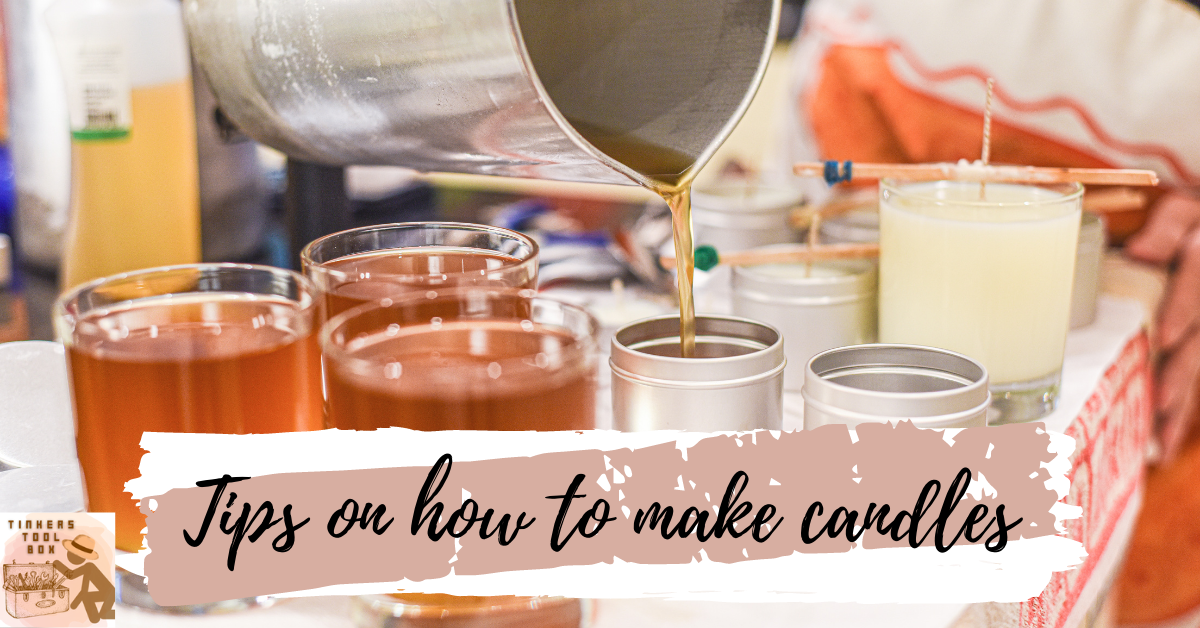
When you are starting your journey in the candle-making world, you need to have a mindset that is easy for you to do. Candle making is a passion for plenty of people and can be a great hobby to enjoy during your free time. You can even turn this into a business where you will get enough profit. It offers a sense of fulfillment and added benefit of creating a cozy atmosphere in which you can relax.
Create Notes as You Go Along the Way of Candle Making

Candle-making is a result of science, and to get the same result every time, and you would need to do the same thing each time. With this said, you would need to know what works so that you can have the same results every time you make a candle.
Make sure that you keep a log of notes from each batch that you make, from each batch your pour to the test-burn you did. Some of the important things that you should note with every pour are the date and time, wax type, fragrance type, wick size, glass size, and room temperature.
Also, you need to take note of the highest melt temperature of the wax. You can check the manufacturer’s recommendation on this as each wax is different. You wouldn’t want to go higher than the heat necessary for the type of wax that you are using for your candle.
Aside from these, you also have to note the temperature you added the fragrance, the temperature you poured the candles, and the percent of fragrance you used in each candle you made.
The best and easiest way to do this is to create a template for every test candle you make. Once you’ve done this, you can look back on the notes you have made to make the perfect candle for your home or your business.
It’s Always Okay to Get it Wrong: Candle Making is Trial and Error
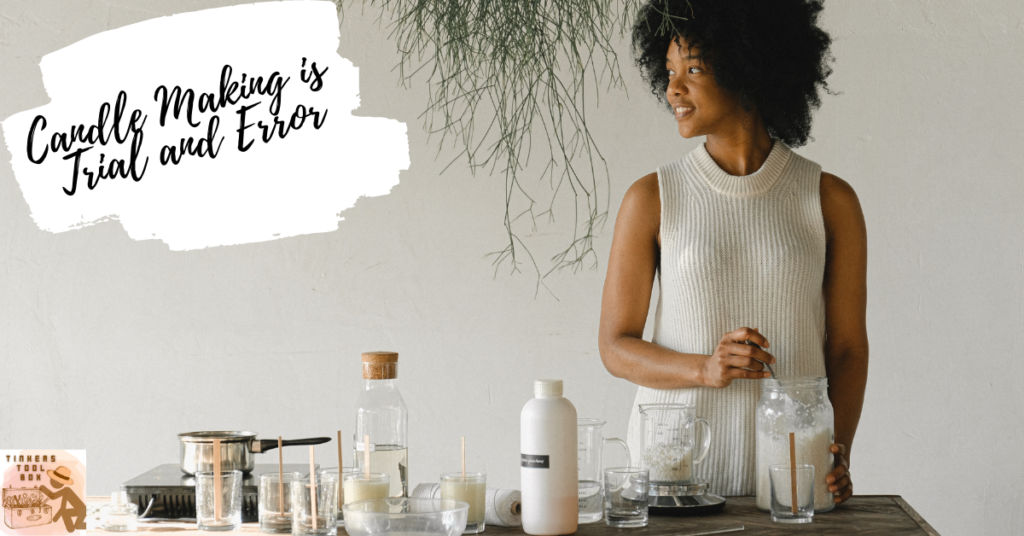
Plenty of beginner candle makers can get frustrated or discouraged when their first batch of candles doesn’t work. When this happens, you may think that candle-making is not for you, or it can be a waste of wax melted and materials you have used.
You don’t need to worry about this because it’s okay to mess up during your first few tries since that’s how you will truly learn and understand the nature of ingredients when it comes to candle-making. It is best to trust the process, and you will enjoy discovering the new craft.
The best thing about candle-making is you can re-melt the wax when you made a mistake. You can reformulate it by adding more of your raw materials and experiment on how you can improve your candle. There are plenty of ways to reuse your failed batch so make sure you don’t let it go to waste.
Remember, when it comes to candle-making, you don’t want to waste any materials that you’ve used on your failed batches.
Practice and Patience is the Key to Candle Making
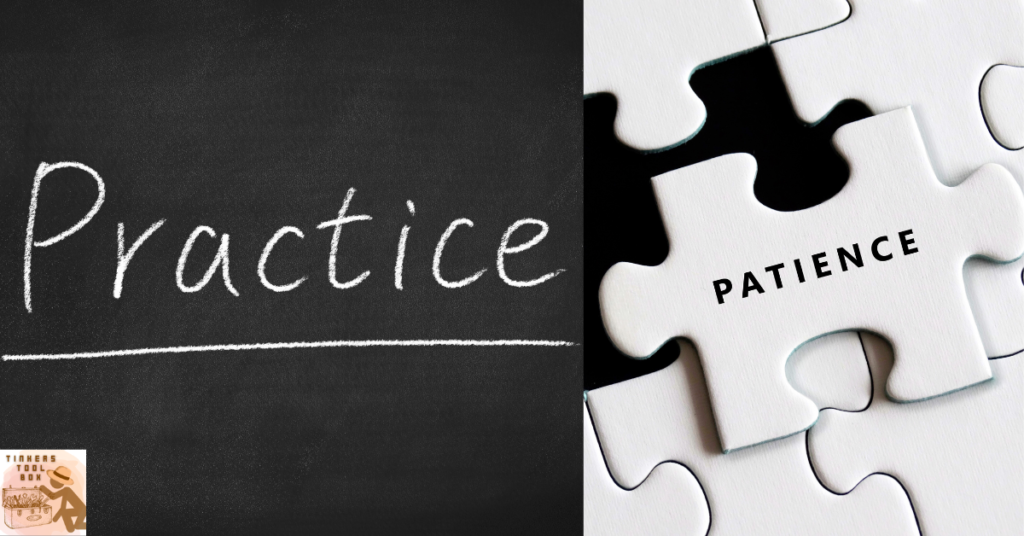
As I’ve mentioned above, candle-making takes time, effort, and the right tools as well as materials to create the ideal candle that you want. Whether you are creating coconut candles or scented candles, you have to practice and reinvent your formula. This is the time when you shouldn’t be discouraged so quickly since it does take time and practice to make the perfect candle.
You have to be patient and keep practicing to get the quality candle you want for your home or your business.
Use the Right Tools and Ingredients for Candle Making
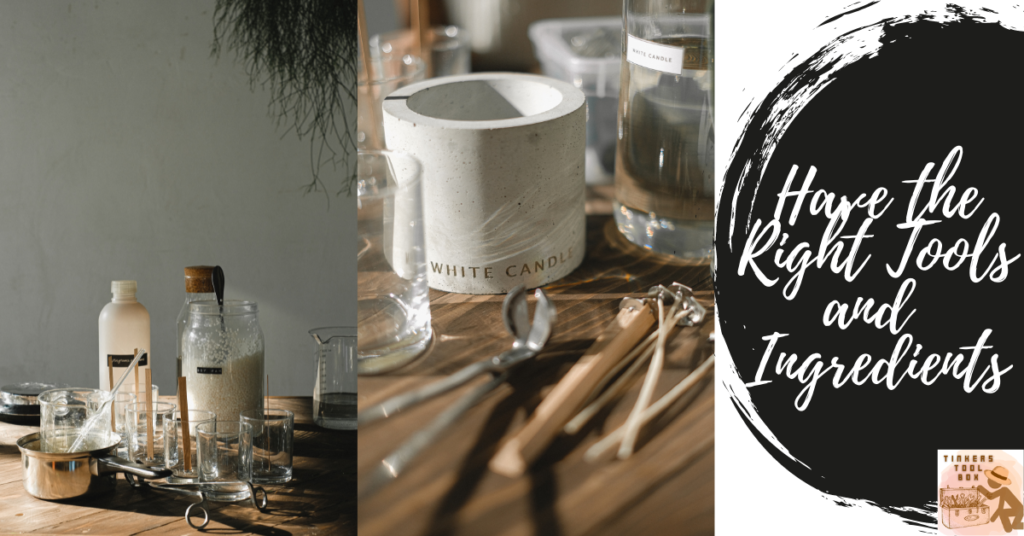
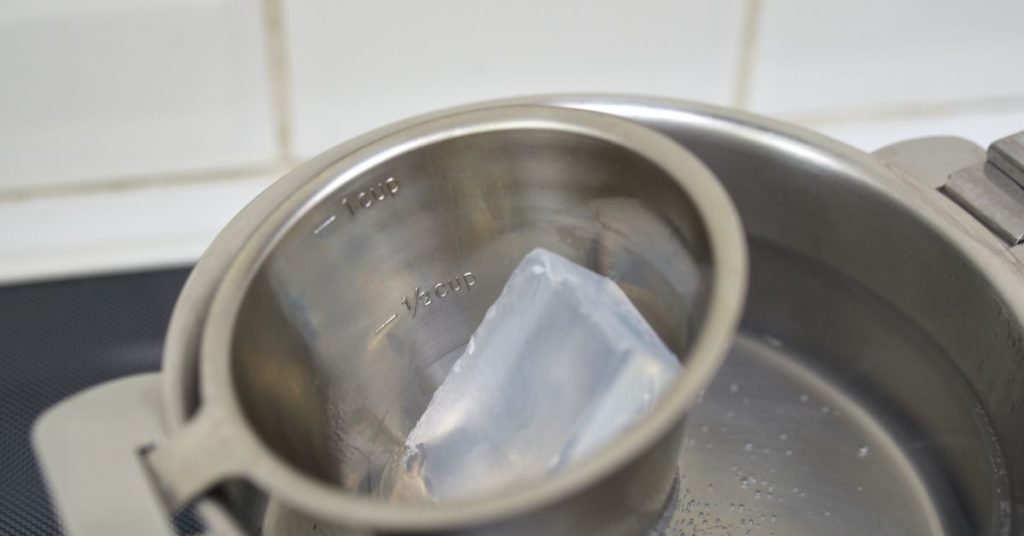
Before you start with your candle-making hobby or business, you will need to have the right tools. You would need to have a double boiler that can melt your choice of wax. You also need a microwave oven as a piece of alternative equipment to melt your wax.
You would also need a heat-resistant bowl or microwavable bowl so that you can put it over the double boiler or into the microwave to melt the wax. Aside from that, it would be best if you had a wooden stirring stick to mix the wax that you are melting and a measuring scale to measure your wax.
You also need a heat source such as an electric stove, induction, or a hot plate. Lastly, you would need a thermometer to measure the temperature of your wax and scissors to trim your wicks.
Aside from these materials, you also need to pick the right wax material and wick for your candles.
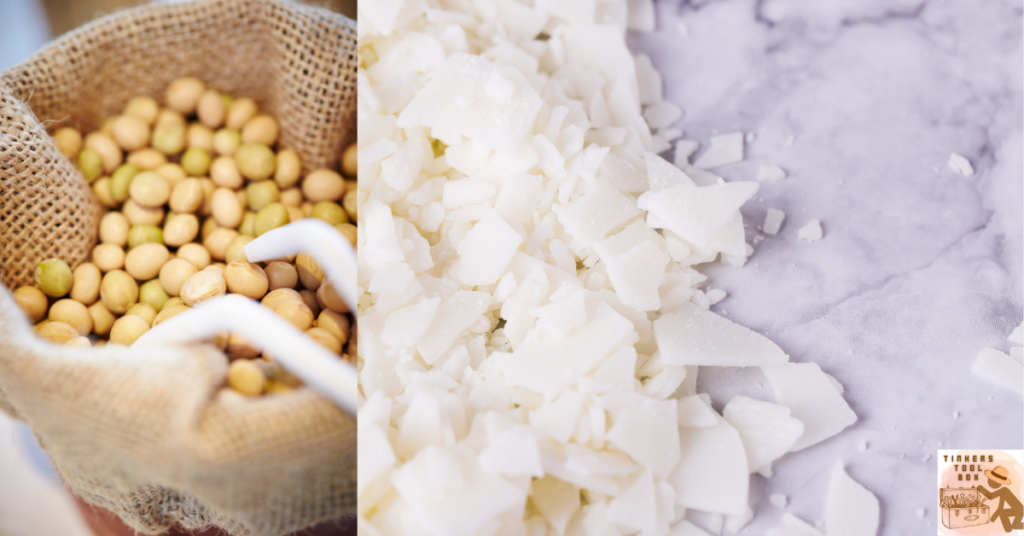
Know and Choose the Right Wax to Use for Your Candles
When it comes to candle-making, the first choice that you have to make is choosing the wax that you would use. Wax is the primary component when it comes to candle-making, and there are plenty to choose from, so knowing which one best suits your needs is important.
Soy Wax. Sox wax is 100% natural wax that is derived from hydrogenated soybean oil. This wax is ideal for candle-making as it holds scents and it is easy to handle. Also, it is perfect for container candles, votives, tealights, jars, and so much more. You would need to keep in mind that soy wax is not a good option for pillar candles.
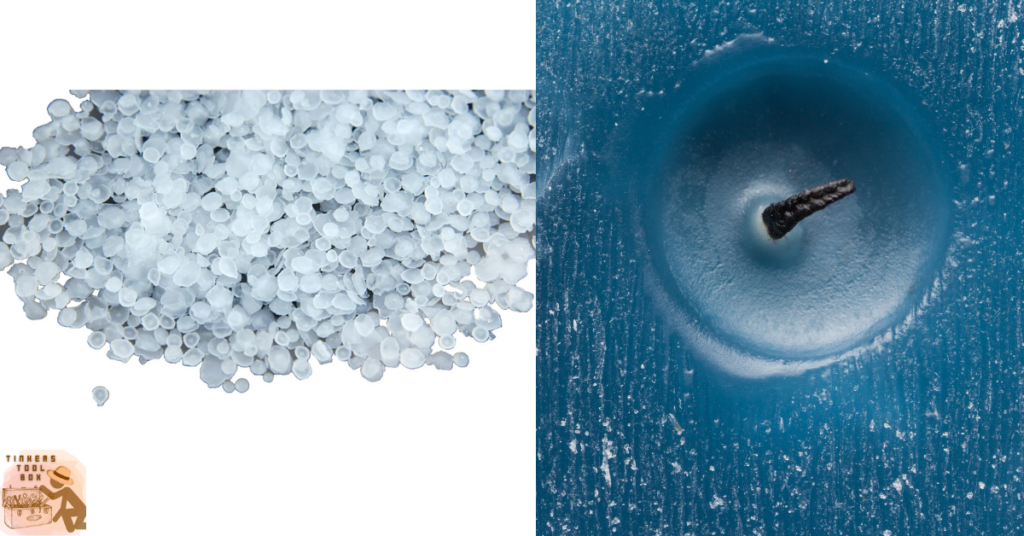
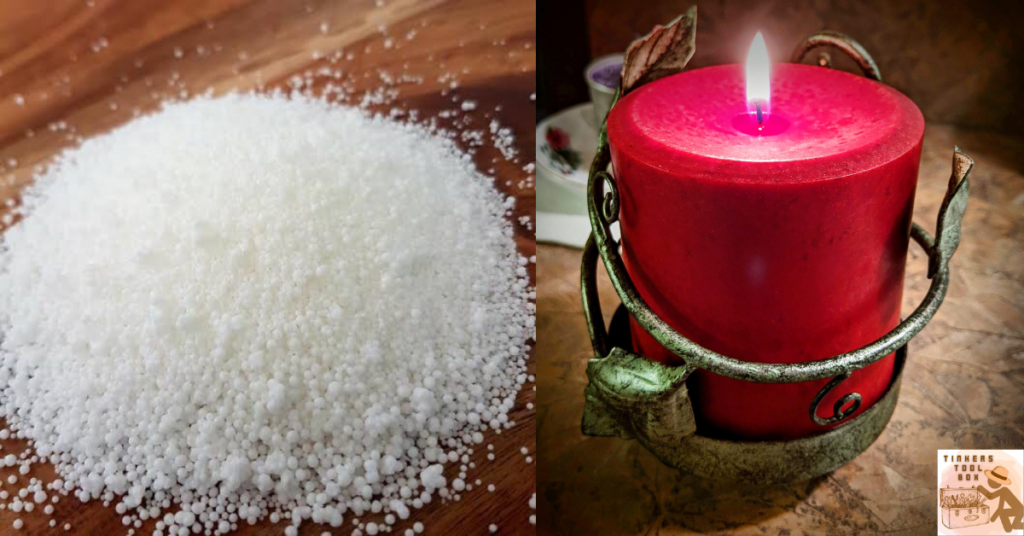
Paraffin Wax. This type of wax is commonly used in commercial candle making. It is a synthetic wax that is comparatively cheaper than other options on the market. It’s a good choice for different types of candles which include pillars, votives, containers, tealights, etc.
People avoid using this material since it’s not made of natural origin and is known to give off carcinogens when burning.
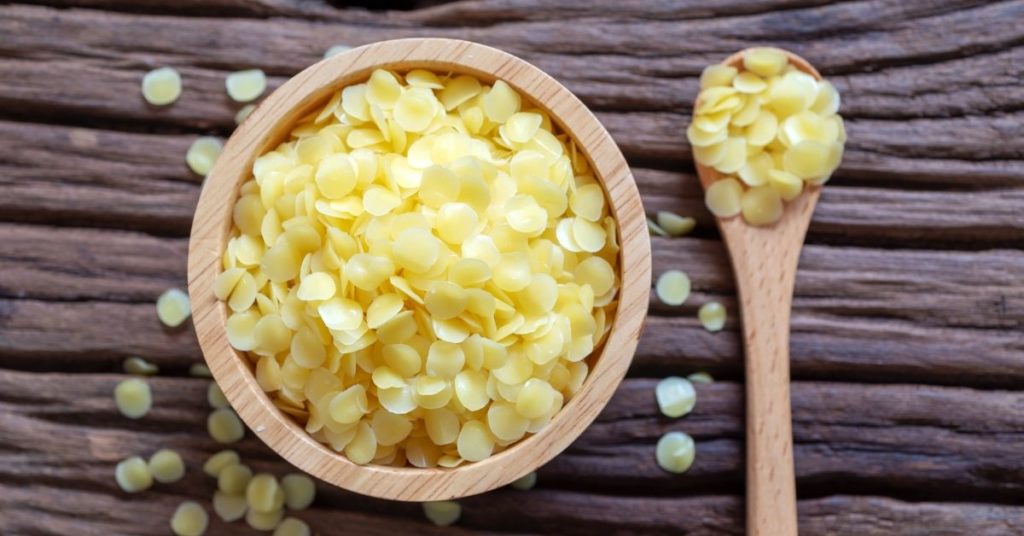
Beeswax. Beeswax is known to be a natural wax but more expensive than soy or paraffin waxes. When it comes to DIY candle making, this is the best choice since it is available in sheets and it can be mixed with other types of wax.
Whether you are making pillars, votives, and container candles, using beeswax is easy since you don’t need to melt it.
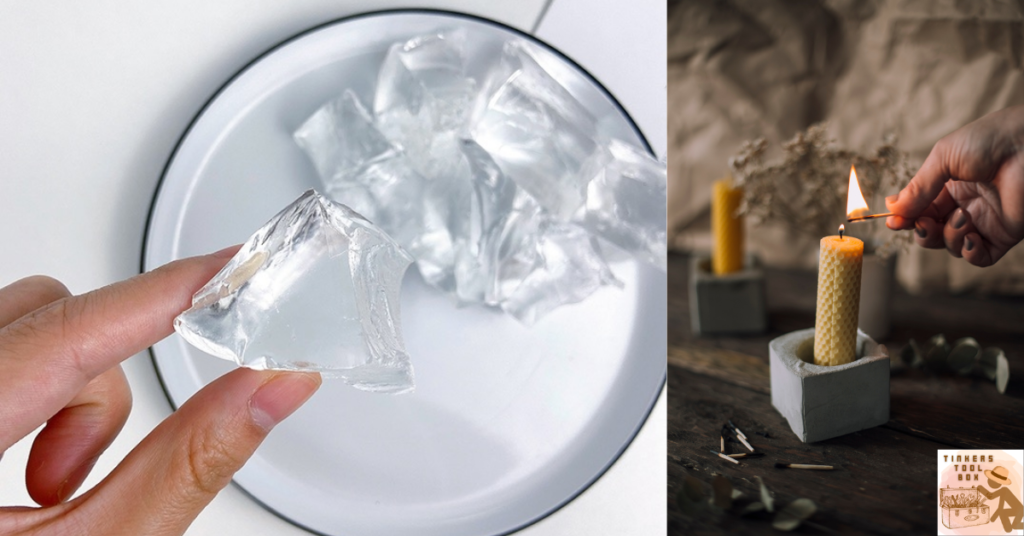
Gel Wax. Now, gel wax is not actually wax since it is a synthetic combination of resin with mineral oils. It functions the same as any other type of wax, but it has a transparent and jelly-like feel. This type of wax is best to use for different non-flammable decorations such as gel votives or container candles.
Palm Wax. This type of wax material is another natural wax that is derived from palm oil. It is more brittle and harder than soy wax which is ideal for pillar and votive candles.
Familiarize Yourself With the Wicks
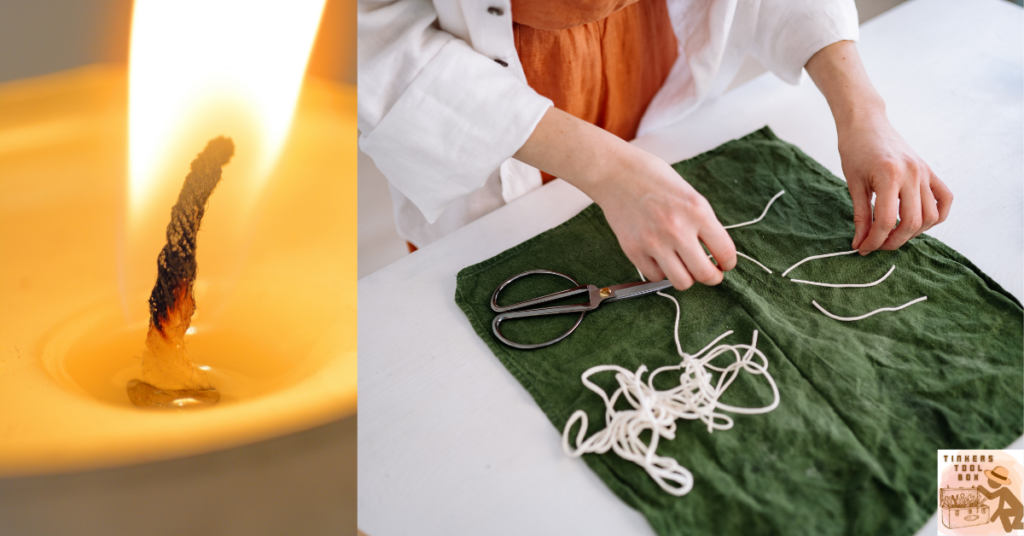
The core of any candle is the wick, and there are plenty of types to choose from, and you need to determine which wick is perfect for you. Your wick choice would depend on different factors such as the wax type, size, and shape of the candle, type of candle, whether you are using fragrance or not, and if you will be using any coloring agents.
Wood Wicks. These wicks are made from wood, and they are a good choice for soy as well as paraffin-based container candles. However, they are not suitable for pillar candles or votives.
Paper-core Wicks. Paper-core wicks are made from natural fibers and can burn intensively. They are a good option for non-scented pillars, votives, and container candles. However, they are not ideal for candles that have added fragrance.
Zinc-core Wicks. These are the most commonly used wicks in candle-making. Now, they have a tendency to burn uniformly with the wick remaining steady because of its hardcore. These are best when making medium-sized paraffin and gel candles.
HTP Wicks. The HTP wicks are coreless, braided cotton wicks that are good for preventing any mushrooming and soot from happening. These wicks are excellent for soy, gel, and paraffin wax candles.
Eco Series Wicks. These wicks are designed for natural wax candles but also work well with paraffin wax. They burn with lower soot and smoke levels than paper-core ones since they have a unique braiding. The eco series wicks are perfect for both pillars and container candles.
CD Wicks. These are a favorite among the wicks that are used in scented candles. The base provides a smooth and consistent burn in all waxes and is perfect for a pillar, votive, or container candles.
Remember that different wicks can react differently to different wax melts. It can affect the life of your candle, your candlelight, the safety of the candle and can provide different burns, so you need to match the wick with the type of wax you use.
The Best Way to Melt Candle Wax
There are different ways on how you can melt candle wax, and one option is to use a double broiler. Double boiling wax uses heat from boiling water to melt something placed on top in a separate container. You also need either a hot plate or an oven to double boil your wax.
If you don’t want to spend extra money on a double boiler, you can make your own by using a pot and a heat-resistant bowl.
Melting Your Wax with a Double Boiler. All you need to do is fill your pot with 3/4 of water and bring the water to a simmer. Then, put your wax into a heat-resistant bowl and place it in the pot over your simmering water. After that, use the wooden spoon to stir the wax while melting.
Now, it’s not necessary to keep the water boiling at all times, and you can add more water from time to time so that you can keep the water from boiling down or getting too hot. Make sure to monitor the temperature using a thermometer and do not exceed 108 degrees Fahrenheit while melting the wax.
Once you’ve reached that temperature, you can mix in any color that you want. Lastly, cool the wax to 160 degrees Fahrenheit before pouring it into your containers.
Another way that you can melt wax is through your microwave. This process is convenient, simple, and easy.
Melting Wax with the Microwave. You can place a small amount of wax into a microwavable bowl and keep the heat on normal or high. Microwave the wax for one minute, take it out, and stir the mixture. Microwave the wax again for another two minutes.

Repeat this process until the mixture reaches the temperature of 180 degrees Fahrenheit. If you want to add scent or color, make sure to do this when the temperature reaches 180 degrees. When needed, you can reheat the mixture and stir if the color hasn’t blended evenly.
Lastly, cool the mixture and then pour it into your chosen container. The entire process should take about five to ten minutes which would depend on the amount of wax you are melting.
Always Take Note of the Wax Temperature
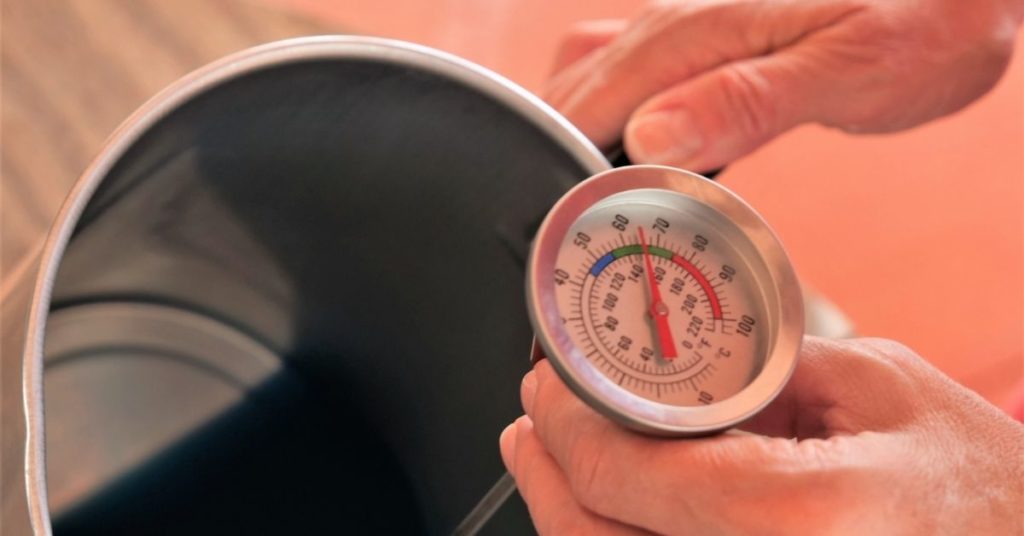
Paying close attention to the temperature of your wax is important when it comes to candle making. As I’ve mentioned above, there are different types of wax that you can use for candles. Each type has different melting and pouring temperatures, so it’s important to keep an eye out for the temperature.
To prevent cracking, it is best to pre-heat your containers to 140 to 170 degrees Fahrenheit before pouring your wax mixture.
Paraffin wax is best to be melted until it reaches the temperature of 180 to 185 degrees Fahrenheit. That’s the only time when you can add any fragrance and color that you want. When that’s done, pour it into your molds or containers at 140 to 160 degrees Fahrenheit.
On the other hand, Soy wax has to be heated in a double-boiler until it reaches 180 to 185 degrees Fahrenheit before mixing in any fragrance and colors. Once that’s done, wait for it to cool between 140 to 160 degrees Fahrenheit before pouring it into the containers.
Lastly, for palm wax, the melting point is a bit higher than the ones mentioned above. This type of wax should be melted until it reaches 205 to 210 degrees Fahrenheit until you can mix your fragrance or color in. Make sure to pour the wax as soon as possible to prevent it from hardening.
Know What Essential Oils to Use and How
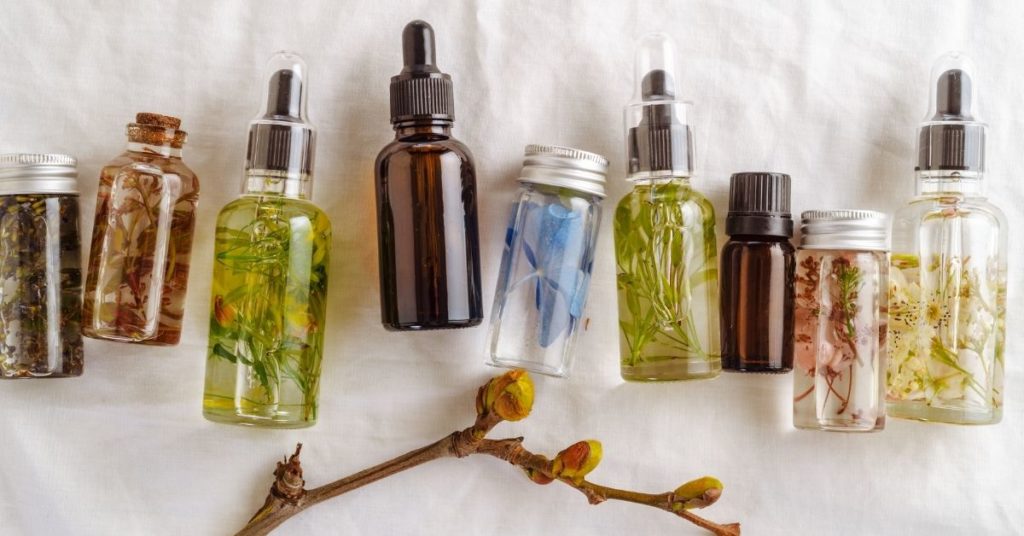
Any type of essential oil can be used in candle-making. However, having the best combination will put the cherry on top of your beautiful and good-smelling candles. Before you place the essential oils, you would need to know the right measurements.
Remember that you would need one ounce or 40 drops of essential oils for every eight ounces of liquid wax.
For relaxation and stress reliever candles, it is best to use lavender, jasmine, bergamot, lemongrass, chamomile, ylang-ylang, and frankincense essential oils. For rejuvenating energy, the best to use are peppermint, sweet orange, spearmint, lemon, and rosemary essential oil.
Here are some of the recipes that you can do for four-ounces scented candles:
- Fifteen drops of sweet orange essential oil and ten drops of rosemary essential oil
- Mix ten drops of sweet orange essential oil and ten drops of spearmint essential oil
- Blend ten drops of lavender essential oil, seven to eight drops of chamomile essential oil, and five drops of ylang-ylang essential oil
- Mix seven to eight drops of rosemary essential oil, seven to eight drops of lemon essential oil, and seven to eight drops of peppermint essential oil
- 15 drops of vanilla mixed with ten drops of lavender essential oil
These are just some of the mixtures that you can do with the essential oil scents. Now, if your candle isn’t giving many scents, there may be different reasons for it. Make sure to measure the oil and wax perfectly before you mix the fragrances together.
Poking Your Candles can be a Lifesaver
Poking your candles may sound like a weird trick, but if you want to avoid underburning and make sure you have beautiful candle lights, it is best to ensure there are no air pockets in your candle while you are making them.
Whether you are making a pillar or container candle, especially those with a wide diameter and deeper height, it is best to take a sewer and poke holes before pouring the next layer. These are also called relief holes and will eliminate any air pockets present in your candle as the wax cools down and shrinks.
Doing this will also help the candle become more compact and lessens the risk of tunneling and under burning your candle.
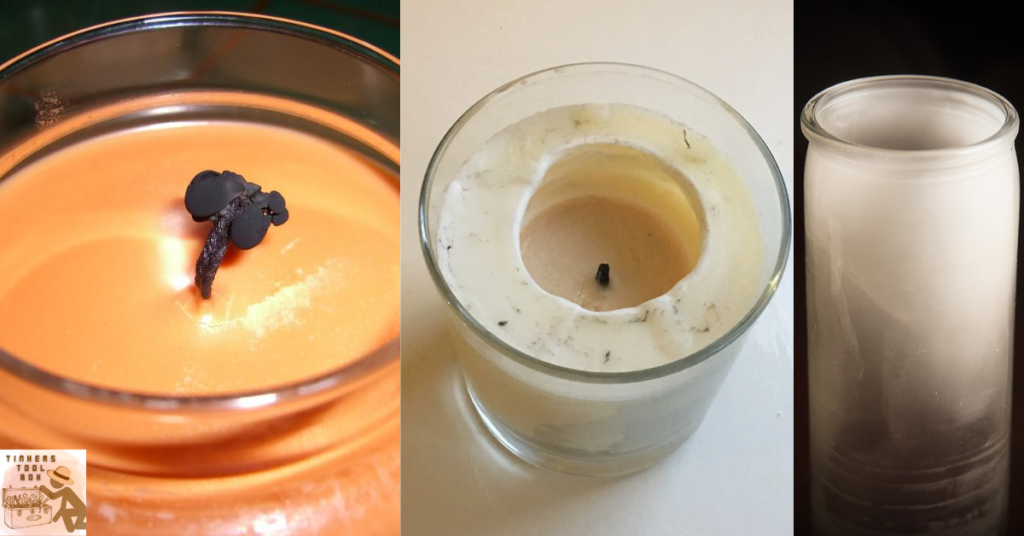
Make Sure to Anchor Your Wicks During Candle Making

For the beginner candlemaker, not anchoring the wicks can be a very common mistake for a beginner candle maker. You can place the metal tabs at the end of your wick so that they can be kept from being pulled out of the candle. However, it doesn’t guarantee that it will stay in place.
You can anchor your wick at the top and the bottom of your candle mold. One of the tricks that you can use is to use putty or sticky tack to keep it in place and avoid any leaks.
Blow Dryers can be Your Best Friend in Candle Making
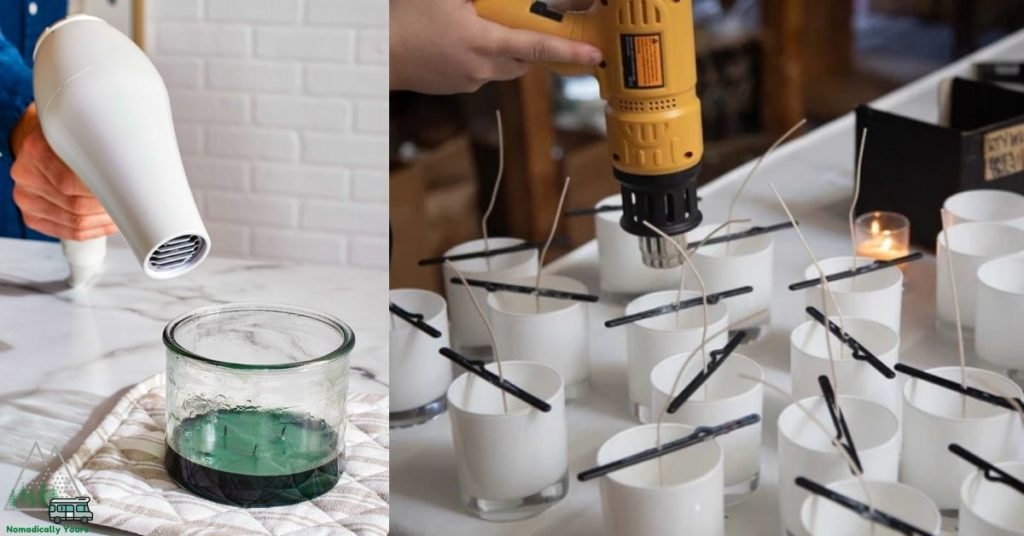
Now, there are times when the surface of your candle will come out with bubbles or uneven edges on the top part. There is no need to scrape the top or redo the entire candle, but you use blow dryers instead. All you need to do is just turn on your blow dryer on the lowest setting and do circular motions on top of your candle.
Let the heat of your blow dryer melt the top layer, let it cool, and then the bubbles will disappear. Your candle will look perfect and ready for you to keep in your home or sell to your customers. With a blow dryer, it can smoothen the surface of your candle and will come out so smooth!
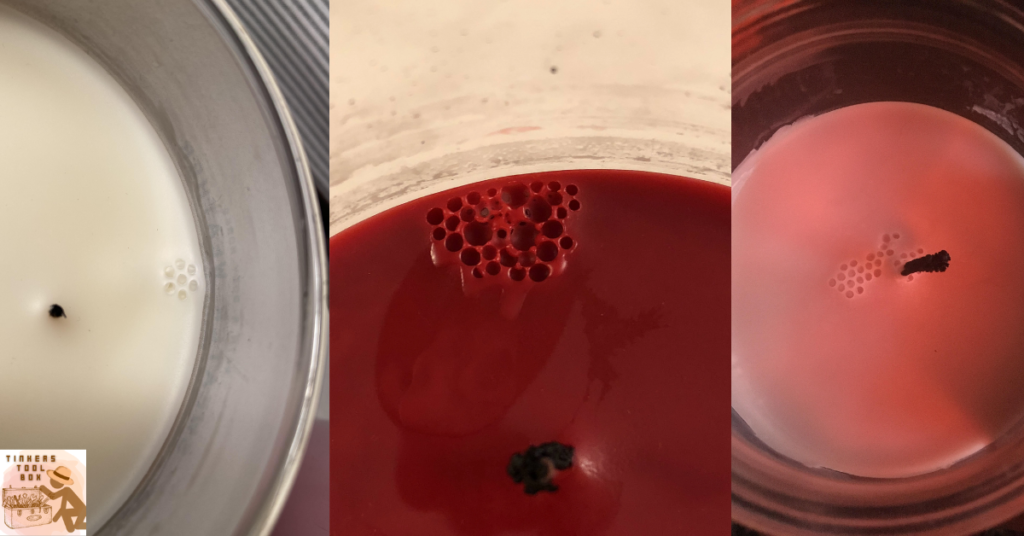
How to Deal with Soot, Mushrooming, and Tunneling
These are just some of the things that you have to deal with when it comes to candle-making. They are both concerns for the beginner and novice candle makers, which include excess soot, mushrooming, and tunneling.
Dealing with Soot. Soot is usually caused by the wick not being the correct size. When you use too big of a wick, the burn rate will cause higher soot production. It is always important to measure out and use the correct size of soot for your candle.
When you add synthetic colors or fragrances to your candles, it can also cause excess soot. So, it is very recommendable to use essential oils if you want to add fragrance to your candles.
Mushrooming. As the name suggests, mushrooming takes place when the wick burns too fast, and the wax begins to become absorbed by the wick. It will then create a buildup that resembles a mushroom, where the buildup consists of excess carbon.
To prevent mushrooming from happening, you need to make sure your candle wicks are smaller in size.
Tunneling. This is one of the primary concerns of candle makers. When the candle burns excessively at the center, it will create a dent. It is what is referred to as tunneling. It can reduce the burn-time of the candle and decreases the candle’s productivity.
To prevent this, you need to make sure the first burn is done in a draft-free area and ensure to keep an eye on it. If you see that the candle still creates a tunnel, make sure to check your wick size. Another reason is that your wick may be too small for your candle size.
In Candle Making, Less Can Be More!
You may be tempted and get crafty so that your candle can look extra pretty. You might also want to add plenty of decorative elements such as flowers, stones or add different fragrances that will create a scented candle that can leave your entire home smelling good.
The best tip that you can have is not to go over the top. Going over the top and adding too much with your candles may not always be the best way to go, and sometimes, a simple minimalist candle is the best thing that you can ever make.
Aside from that, the elements that you might add to your candle can be a fire hazard, so you need to be careful with all the elements you choose to add. Remember, less can be more!