Christmas, it’s the most wonderful time of the year, made even special by candles made for the season. With the wide range of decoration ideas you can incorporate with your candles, you’ll never run out of design ideas that would make your gathering extra special. You could also make these candles as giveaways to your family and friends. Now, let’s get started making Christmas candles for the holidays.
- Step 1: Preps and Planning Before Anything Else
- Step 2: Fix the Candle Wick to the Container
- Step 3: Measure the Amount of Wax Using a Weighing Scale
- Step 4: Melt the Candle Wax
- Step 5: Mix in Your Preferred Fragrance Oils
- Step 6: Layer Candle Colors Using Color Dyes
- Step 7: Pour the Melted Wax into the Candle Mold or Container
- Step 8: Let the Candle Harden and Cure
- Step 9: Decorate Your Candle Container with These Creative Ideas
- Step 10: Test Burn and Proper Candle Storage
- Conclusion
Step 1: Preps and Planning Before Anything Else
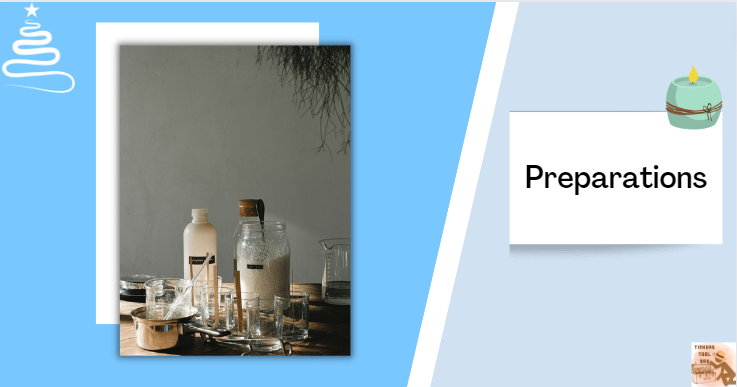
Planning and preparation is always the first step in candle making. In this step, we prepare all the materials, tools, and equipment needed for the process and have them ready on your working table to minimize unnecessary waste of time in looking for things.
Choosing Premium Candle Ingredients
The outcome of your Christmas candles highly depends on the ingredients used. You must choose ingredients specifically manufactured for candle making and of premium quality to produce well-burning candles for the season.
Candle Wax: The Base of the Candle
We’ll cover the industry’s four most commonly used candle wax. Each wax has pros and cons, which you should consider when choosing.
Soy wax is a great wax option for pastel-colored candles. It burns slowly and cleanly. Its cheap and organic source makes candle makers praise it. Plus, you can incorporate your favorite Christmas scents in it because it’s generally odorless and great at accepting fragrances.
If you’re looking for a less expensive option, try paraffin wax. Although inexpensive, this versatile wax is used by known candle brands because of its ability to adapt to any color and fragrance. It also comes in various melting points, an advantage for making different types of candles. You may have to be careful to trim its wick constantly to prevent soot production.
Other eco-friendly options are beeswax and palm wax. Beeswax is known for its natural sweet scent and is a good choice if you want a sweet-smelling candle. This wax is sootless, smokeless, and has properties that help purify the air. However, beeswax is expensive because of its high demand and low supply.
Palm wax provides you with a beautiful scent throw and is perfect for scented Christmas candles. It is an eco-friendly wax that is more expensive than other natural candles.
Fragrances and Essential Oils for Scented Christmas Candles
Christmas candles are a great way to add a more festive ambiance to your home. Pair your creative Christmas candles with scents of the season and delight your guests with these comforting and refreshing aromas. Here are some recommendations for you.
If you are a fan of sweet delights, chocolate, vanilla, cookies, and candy scents are the fragrances you should have for your candles. Spices like cinnamon and clove are great scents for the Christmas season. Of course, fir, pine, and cedar aromas are also perfect for giving that warm vibe during the cold Christmas night.
A personal favorite is the scent of firewood and ash, added with some fruity scents like apple and orange. These smells would bring a woody feel and vibe to your home and are perfect for a cup of coffee near the fireplace after the Christmas dinner.
Choose the Candle Wick
Wicks are the drivers of candles. They are the key to well-burning candles and are available in various types and sizes. Three of the most common and appropriate wicks to make your Christmas candles burn better are cotton, hemp, and wooden wicks. These wicks are also eco-friendly, making your candles burn clean and fresh.
Cotton wicks are all-rounder for any type of candle. When placed in draft areas, these easy-to-light wicks are less likely to extinguish with strong winds. Just be mindful to trim them in the correct size, as cotton wicks are prone to mushrooming when exposed to excessive carbon buildup.
For an all-out camp vibe, wooden wicks are perfect for patio decorations and near the fireplace. These 100% natural wicks are your best choice for non-toxic Christmas candles.
The rigid composition of hemp wicks coated with beeswax is another great choice for candles. Hemp wicks burn hotter and slower and are perfect for pillar candles because of their unbending body.
Candle Dyes for Added Colors (Optional)
Adding colors to candles is an optional step. You can incorporate many colors into your candle and layer colors for a more festive one. You could keep the original color of the wax as your candle color or use color dyes to bring life to your Christmas candles.
Candle color dyes come in chips, blocks, or liquid forms. You could also use spices and herbs to extract liquid dyes to color your candles. Either way, color dyes are a perfect way to showcase the colors of the holidays.
Some common colors you can use are green, red, and blue. For white Christmas-themed candles, colors like silver, white, and gold are a great addition to your candle decorations.
Honestly, there are tons of colors you can use depending on your preference. You can even mix and match color dyes to create your tone. Just note that adding enough of these ingredients is essential, as excessive color dyes may destroy your candles.
Gather Tools and Equipment for Candle Making
Prepare the tools and equipment for candle making ahead of time. You don’t want to start the process and leave the table every time, rummaging through cabinets to look for tools. This would be time-consuming and not do good, especially if you’re missing a candle jar and your melted wax is ready to pour. You’ll probably miss the appropriate pour temperature and may need to start over.
Candle Containers or Candle Molds
If you are making container candles, you’ll need to prepare containers. A candle container can be anything from glass jars, pots, cups, or mugs that could hold high amounts of heat and are non-flammable. Since they will hold the melted wax until it is hardened, these containers should withstand long exposure to heat.
As for candle molds, these are specially shaped molds made for candle making. You can purchase them at your local candle store or online. Christmas tree-shaped molds and other artistic figures are perfect for Christmas candles.
Double Boiler
In melting wax, proper temperature is very important. Hence, we recommend using a double boiler where you can easily control the amount of heat that would reach the candle wax. A double boiler melts the candle wax and mixes the fragrances and color dyes. A double boiler also helps prevent moisture from mixing into the wax, which is not good and may result in wet spots on candles.
Suppose you don’t own a double boiler. You can create an improvised one by placing a pan on top of a pot of boiling water. This would also melt the wax at a controlled heat.
Spatula
Prepare a spatula or spoon for stirring the melting wax on the double boiler. You may also use this in mixing the color dyes and fragrances with the melted wax.
Pouring Pot
When the pouring temperature is right, we use a pouring pot with a spout to transfer the melted wax into the containers or molds. Of course, you could use an ordinary cup to pour, but using a pouring pot ensures that no hot liquid is spilled over you as you pour the hot melted wax. A pouring pot also has exact measurements, which helps you quantify the exact amount needed for each container.
Wick Holder, Chopsticks, or Pencils
A wick holder attaches the candle wick to the container and stabilizes it through the pouring and curing stage of candle making. You could use an improvised wick holder by using a pair of chopsticks or pencils horizontally placed on top of the container, squeezing the other end of the wick in between.
Wick Sticker or Tape
A wick sticker or tape fastens the other end of the candle wick attached to the container.
Weighing Scale
Prepare a weighing scale for measuring solid and liquid such as the candle wax, fragrances, and color dyes. In candle making, we measure every ingredient by weight and not volume. It has been the industry standard in candle making for too long, and there is a good reason for this. If you want to learn more about candle-making measurements, you can visit this article.
Thermometer
Temperature is an important factor in candle making. We use a thermometer to monitor the wax’s heating and pouring temperature and the appropriate temperature to mix the fragrances and color dyes.
Scissors and Newspapers or Scratch Papers
Additional materials you might need are scissors for cutting the wick and scratch papers or newspapers as a protective cover to your working table in case of spills and mess.
Step 2: Fix the Candle Wick to the Container
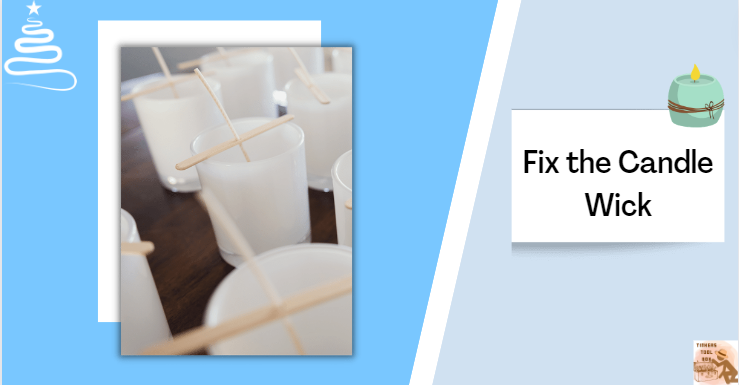
Before diving into the melting process, we must ensure that our container and wick are ready for pouring at any minute. We don’t want our melted wax waiting to be poured while we fix the wick and miss the correct pour temperature.
Place the container on your working table and measure the length of the candle wick. It must be the same height as the container. Then, leave an additional inch or two to be lit later during the test burn. Ensure the container is free from dust or moisture before proceeding to the next step.
Use a wick sticker or tape to attach one end of the wick inside the bottom center part of the container. You could also skip using wick tape by dipping the end of the wick into a melted wax which would act as glue.
Secure the other end of the wick at the top of the container using a wick holder. You can use a pair of chopsticks or pencils to steady the wick at the container’s center and keep it straight while pouring the hot wax.
Remember that a stable and centered candle wick makes a candle burn evenly on all sides.
Step 3: Measure the Amount of Wax Using a Weighing Scale
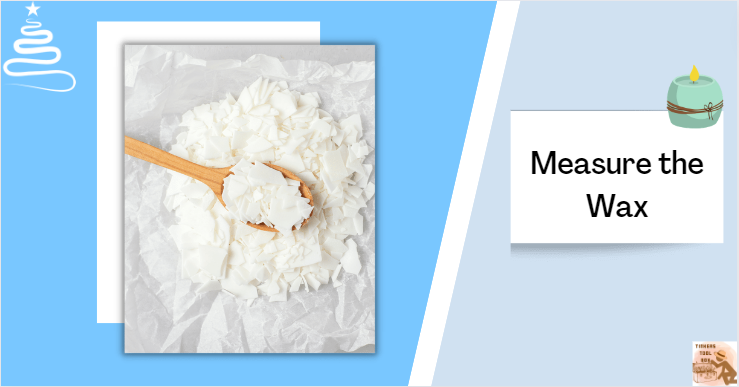
Start by measuring four cups of wax, which could make a large candle of size four by four, or three small candles sized three by four inches. Use a weighing scale to measure exact amounts per container.
If you haven’t calculated how much wax you need, you can use the container’s size as a reference. An ounce of wax is equivalent to a fluid ounce the container holds. Ensure you leave enough space at the top of the container to prevent overflowing when pouring the melted wax.
Step 4: Melt the Candle Wax
Place the measured wax on a double boiler and start heating. Remember to have your thermometer within reach as we will check the wax’s temperature from time to time as we melt. Take note of the appropriate melt temperature for different types of candle wax to not overheat the wax.
Melt the wax for 10 to 15 minutes while stirring using a spatula. Check the wax’s temperature and remove it from heat once it reaches its melting point. For your reference, beeswax melts around 143 to 149 degrees Fahrenheit, soy wax is at 120 to 180 degrees Fahrenheit, and paraffin wax is at approximately 115 to 154 degrees Fahrenheit.
Step 5: Mix in Your Preferred Fragrance Oils

After removing the melted wax from the heat, we will add fragrance oils to match the feeling of the Christmas season. You may pour the scents for soy wax when the melted wax has cooled down to 140 degrees Fahrenheit, 160-165 degrees for the beeswax, and 170-180 degrees Fahrenheit for paraffin wax.
We must follow these pour temperatures when incorporating fragrance oils as these scents have flashpoints and would combust when exposed to excessive heat. You’ll need about an ounce of fragrance oil per pound of wax.
One tricky part in candle making is measuring the amount of fragrances you’ll incorporate into your candles. Sure the is a recommended amount, but the scent throw of each candle will also depend on the strength of the fragrance oil and the preference of the candle maker.
Some fragrance oils are naturally stronger in the aroma, while others are on the lighter side. This means you can increase or decrease the amounts depending on the fragrance oil’s natural scent strength and your preference.
Step 6: Layer Candle Colors Using Color Dyes
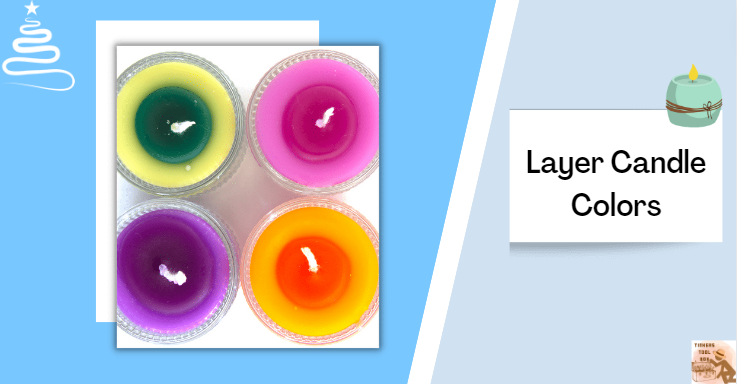
Christmas is all about festivities, colors, and gathering. Make it more alive by giving your candles a splurge of colors paired with the soothing scents of Christmas fragrances. And if you can make a single-colored candle, you can make a layered one featuring all the hues of the holidays.
Choose two or more colors you want for your candles. Then, divide the wax into separate containers, depending on the number of colors you’ll use. Melt each color in a separate container with the melted wax. Ensure that the wax and dye are mixed properly by using a separate spatula or stirring rod for each colored wax.
Once the colors and wax have blended well, it’s time to pour.
Step 7: Pour the Melted Wax into the Candle Mold or Container
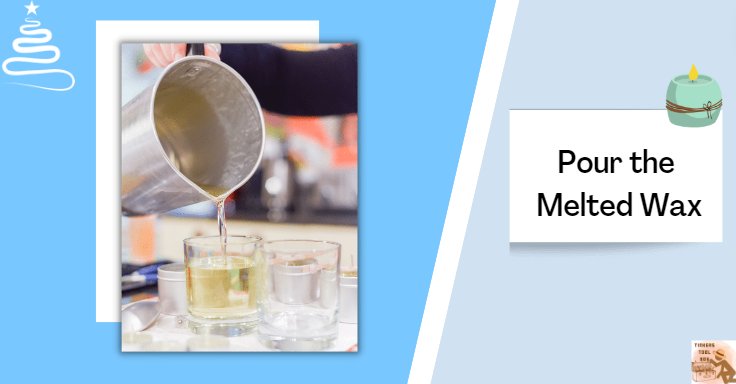
Candle wax is very sensitive to temperature. When poured into a container, they tend to cool very quickly, making them deformed and shrink in size. Before pouring the melted wax, it is recommended to preheat the container using a microwave or any heating equipment. The heated material helps slow down the wax’s cooling process, preventing the presence of wet spots.
Take note of the recommended pour temperature specific for each type of wax. Soy wax is best poured at 120-165 degrees Fahrenheit, beeswax at 155-160 degrees Fahrenheit, and paraffin wax at 180 degrees Fahrenheit.
If you’re producing a single colored candle, you can just pour all the melted wax into the container, using a pouring pot with a spout to reduce the chances of spills. For a layered candle, pour the first color you want for the candle. Then, wait about 30 to 60 minutes for the first layer of wax to completely set and cool before pouring the second layer.
The time interval when you pour each layer of colored wax is very important. You don’t want to pour the succeeding layers while the wax is still hot. When you do this, the colors will mix up, and you won’t achieve the layered colors you desire. Depending on the number of layers, the pouring time would take hours to accomplish.
Step 8: Let the Candle Harden and Cure
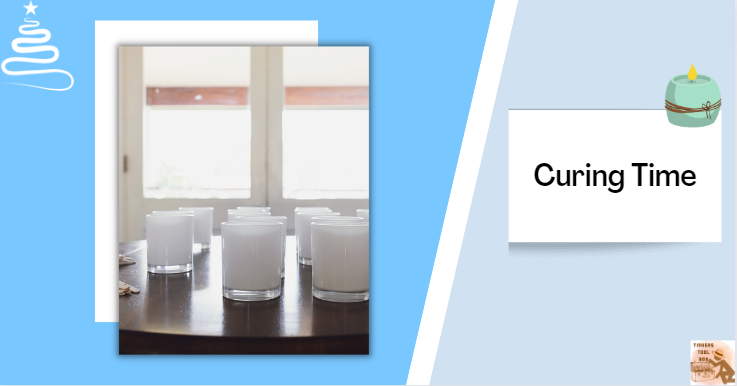
After the last layer of colored wax is poured, wait 30 minutes to an hour for the wax to settle. Then trim the wick, leaving ¼ to ¼ inch of the wick to burn. You can now store the candle and let it cure overnight in a cool and dark place. After 24 hours of curing, you can now decorate the candle and prepare it for a test burn.
Step 9: Decorate Your Candle Container with These Creative Ideas
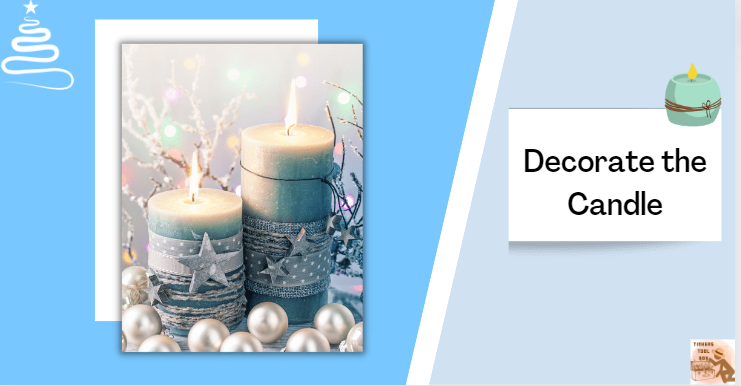
One of the most fun parts of making Christmas candles is the decoration part, mostly done in the candle container. Let your imagination fly with the wide variety of decorations available in the market. Using things found at home, you could also improvise designs for a more personal touch to make your project budget-friendly.
Decorating the candle jar with a sparkle of glitters is an awesome way to showcase your candles. I admit this could get messy, but once done well would create a dreamy look to your normal candles. The glittery design would look great when you light the candle in a dark room, giving it a gleaming effect.
Wrapping the candle jar with festive red and green ribbons (the signature colors of Christmas) is a perfect way to decorate candles for the holiday season. You can never go wrong with ribbons. These versatile decorations are present in any wrapped gifts and would look great on your candles.
Purchase some cute little Christmas candle molds and containers to have uniquely shaped candles. You can have pine tree-shaped molds or containers in the shape of circles and decorate them as Christmas balls. These molds and containers do not need more, as they are creative and perfect for the season.
There are also these Santa candle molds available in the market where you can create colored layers referencing the color of Santa Claus. I also came across a mold shaped like a Christmas gift, complete will all the ribbons and side designs. Of course, we could not forget candy cane molds, which children would love.
Painting the container is a very intricate and minimalist design idea you can adapt to your candles. Get your clear glass jar and start painting small decorative flowers or any design of your choice using pastel colors to create a cooler look. I love scribbling feather-like designs on my container. When lit, it creates a look of innocence and calmness that suits my personality.
Honestly, there are limitless ways you can decorate your Christmas candles. Name your candles and have them as Christmas gifts. Use decorative paints to paint names on the candle container. You can even paint the owner’s image on it if you feel extra artistic and have the skills to do so. I’m certain you have more clever design ideas in mind that you’re excited to bring to your candles.
Step 10: Test Burn and Proper Candle Storage
A burn test is done after the candle has completely cured for 24 hours. The first burn determines if the candle will burn well throughout its height. Light the wick and allow it to burn for four hours before extinguishing the flame. You notice if the candle burns equally on all sides in these burning hours and can assess whether you need to make more adjustments to the candle.
After the burn test, you can keep the candle burning for another four hours or store it for future use. Note that in storing candles, you want them to be away from direct exposure to sunlight. UV rays can cause your candle colors to fade and may easily deteriorate the candle’s physical appearance.
Furthermore, if you produce a scented Christmas candle, ensure that it is kept with a lid on when not burning to prevent the scents from escaping the candle. When left in the open, these fragrances may disperse easily into the air, causing your candle to have a poor scent throw.
Since we are talking about candles for an occasion, you may also want to try making halloween candles, which you can enjoy with your family and friends. Here is an article on making halloween candles, including all the easy steps and materials to creatively design your candles.
Conclusion
Celebrate the season and add more light to the holidays with this easy-to-follow tutorial on making Christmas candles. Following these simple steps guides you in producing your Christmas candles, complete with all your favorite scents and colors. It is a perfect holiday gift and would make your occasion more vibrant and special. You can enjoy this candle-making time alone or with family and friends.