Maybe you’re past the beginner level and are looking for a bit more challenging leather projects. Nothing too difficult, just half a step up in complexity. Then you’ve come to the right place! Let me show you some useful and challenging leather projects that will take you to the next level.
What are some basic leatherworking projects? A file folder, a pencil case with a magnetic flap, a leather tool roll-up case, and an asymmetrical clutch purse are examples of basic leather projects. They are more difficult than beginner projects like cord clips but not too complicated.
If you’re curious about how to make these projects, I’ll take you through the step-by-step and the materials needed to start the next level in your leather crafting journey.
File Folder
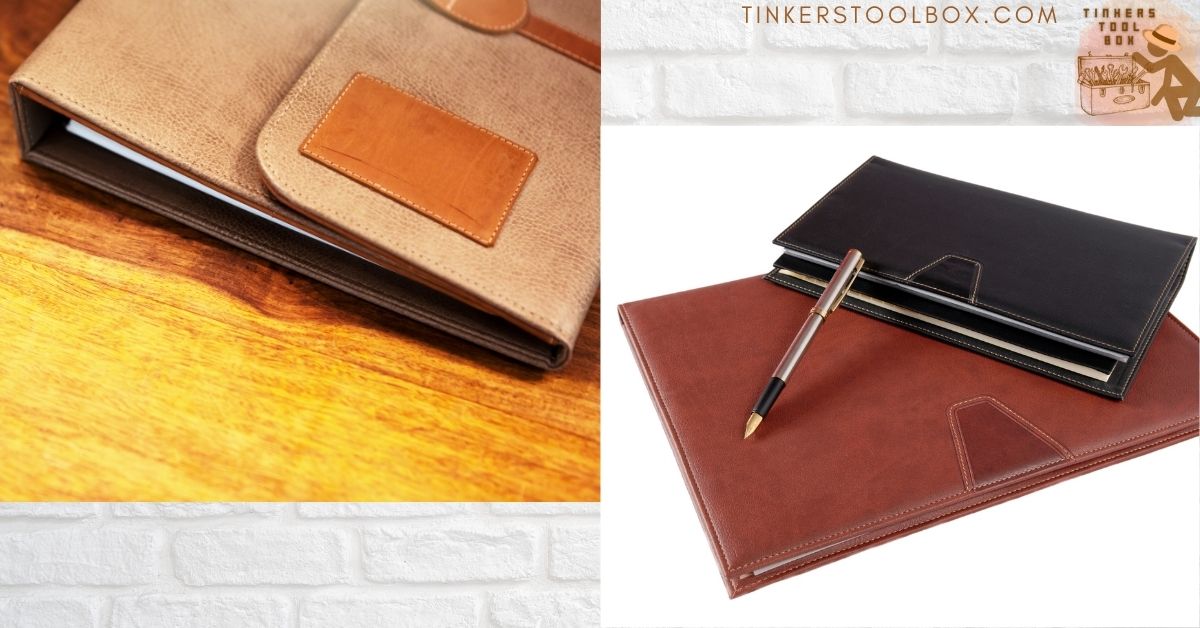
If you wanna look more professional and step away from the usual cardboard folder, one made of leather might just be the thing for you. I personally love the look of a black one but it’s up to you to customize depending on your taste. A more sturdy leather is preferable for this project to avoid wrinkles on your files.
Materials
- Leather
- Waxed Thread
Tools
- Pencil
- Cutting Tool (utility knife, x-acto, rotary cutter)
- Cutting mat
- Ruler
- Mallet
- Chisel
- Needles
- Lighter (for the thread)
Step-by-step

Step 1 – Draw and Cut the Pattern
Choose the dimensions of the file size you want to store in the folder. Shorter bond paper measures 8.5” x 11″ piece and the long ones are 8.5” x 13″.
Mark these measurements on the backside of the leather. For the length, have an extra ½” for the stitches later. Make marks for twice the width since the leather will be folded.
On the upper-right edge of the bottom fold, draw a pattern for a tab 1” thick x 3” long. Have an angle for the tab so it looks like a long trapezoid extending from the side of the folder.
On the upper right edge of the top fold, draw a pattern in front of the tab ⅓” thick x 3” long. This strip will be removed. You may now cut the whole pattern.
Step 2 – Fold Over
Fold the leather in half until the edges of the top and bottom layers almost line up. Have the bottom layer stick out a tiny bit. Pound the crease lightly with a mallet to better keep its form. Use a soft cloth on top of the leather while pounding to protect the leather from marks.
Step 3 – Stitch
On the short sides of the folder, mark where you want the stitch lines. They will be about ¼” from the edges. Pound the stitch holes using a chisel. Make the stitches using waxed thread and needle. In the end, seal the stitch by burning the excess thread using a lighter.
Step 4 – Finishing
Apply some beeswax or water on the edges of the folder. Rub the edges with canvas cloth or a burnisher until it’s sealed and shiny. Now you can put your first files inside!
Drawstring Pouch

For some reason, having a leather bag (or pouch) makes someone feel more like a legit leatherworker. They are useful and beautiful and you made them yourself! Make one today with just a few easy steps.
Materials
- Leather (thin, pliable leather preferred)
- Waxed Thread
- Rivets
Tools
- Cutting tool
- Cutting mat
- Needles
- Leather glue
Step-by-step

Step 1 – Make and cut the pattern
On the back of the leather, mark a pattern that is around 7” x 7”. Round the bottom corners to make a soft pouch-like bottom. Cut two of these. Want a medieval feel? Try using the flesh side of tan leather.
Step 2 – Stitch the body
Inside out, hold the two pieces together with craft clips. You can use a chisel to make stitch lines to make stitching easier for you. You can also pierce the holes as you go if it’s easier. Leave about a ½” seam allowance between the stitches and the edges. Make the stitches but leave the top for the pouch opening.
Cut some snips on the seam allowance for a softer curve around the pouch. Turn the pouch right side out.
Step 3 – Drawstring and holes
Using a ¼” hole punch, make 6 holes on each side of the pouch about ½” from the edge.
To make the straps, cut two strips of leather about 18” long x ½” wide. With the strips together, right side facing out, tie one end in a tight knot. Cut the tails at an angle for aesthetics.
Step 4 – Put the pouch together
Insert one tail of the string into one of the holes near the corner. Do the same for the other tail but in the hole on the opposite side of the pouch. Continue lacing the strips until you reach the other corner. Pull the string and tie it in a loose knot. You now have a very basic but cool drawstring pouch!
Pencil Case with Magnetic Flap

This is another great gift idea. It’s useful, it’s pretty and it snaps! Imagine how satisfying that would be. And it’s not just for pencils! You can even use it for paint or makeup brushes.
Materials
- Leather
- Leather glue
- Contact cement
- Thread
- Small flat magnets
Tools
- Cutting tool
- Cutting mat
- Ruler
- Chisel
- Mallet
- Needle
Step-by-step
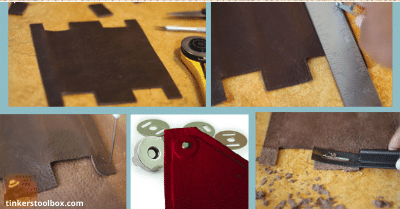
Step 1 – Draw and cut the template
Score a 20” x 2.5” rectangle pattern on the leather. Cut the pattern with your ruler as a guide.
Step 2 – Form the pencil case body
Fold 8”, leaving an extra 3” for the flaps. Glue the long side of the body of the pencil case. Leave the 3” flap free. Press with a heavy object to secure the glue.
About ⅛” from the edges, punch stitch holes. Do your stitches. You can even include the flap. A cool idea is to use rivets instead of stitches. Just make sure to add extra space for the rivets when you measure the leather.
Step 3 – Attach the magnets
About ½” from the end of the flap, cement half the number of magnets. It would be good to make sure almost the whole flap width is covered by the magnet. Cement a strip of scrap leather on top of the magnet. Make sure it’s hidden.
On the body, close the flap to mark where you want the corresponding magnets. Attach the rest of the magnets and cover with scrap leather, just like on the flap.
Step 4 – Seal the edges
Rub the exposed edges of the leather on sandpaper to remove fibers. Apply a little water to wet the edges. Rub with canvas cloth until the edges feel sticky to the cloth.
Leather Tool Roll-up Case

As you create more leathercraft and try different techniques, you’ll accumulate more tools. Of course, you can store them anywhere you want like jars, boxes, and drawers. But wouldn’t it be great if you had a leather organizer for them? You are in leatherworking after all so it makes great sense. You can also make one for your tools used in painting, carpentry and more.
Materials
- Leather
- Waxed Thread
- Leather Glue
Tools
- Utility Knife
- Cutting mat
- Ruler
- Mallet
- Chisel
- Needles
- Pencil
- Tracing Film
- Punch Hole or Awl
- Stitching Pony (optional)
Step-by-step

Step 1 – Lay out the tools and make the pattern
Decide on the overall size of your tool roll and the size you want once it’s folded. This will affect how you lay out the tools for the pockets inside. Cut this size on a tracing film.
On top of the tracing film, lay out the tools you want to keep in the case. It would be a good idea to keep smaller tools together so you can have one straight piece of leather for their pockets and a separate one for the bigger ones. It all really depends on your preference.
Mark the tracing film where you want them to be placed. Imagine making small pockets for each tool depending on their width and height. Make sure to leave a couple of inches so that the head of the tools are free from the pockets. Transfer the patterns to the leather and cut.
Step 2 – Stitching
On the flesh side of the leather, mark lightly where you want to place the pockets. This will be your guide when you stick them with glue. Leave about ⅛” as a margin between the body’s edge and the pockets. Make it a little bigger if you plan to stitch the edge of the body.
Stick the pockets to the body using leather glue to make it hold long enough for comfortable stitching. Remember to keep the top edge free from glue. You might not know it, but it’s a very common mistake for leather craftsmen. Scribe or mark each pocket where you want to make the stitch lines that will separate the tools from each other. Remember your original layout as you make measurements for these stitches.
Punch out the stitch holes with a chisel. Remember again to keep the top side open where the tools will enter. Stitch using a stitching pony if available to make things easier for you. This will likely be a big area of leather so it’s good to have that support.
Step 3 – Lace to secure the tool case
In the middle of the body, punch two ⅛” holes about ½” apart. Cut a thin strip of leather that can wrap around two or three times the case when it’s folded. Pull the strip through the holes so that the tails are outside the tool case.
Step 3 – Finishing
If your leather will permit, seal the edges by burnishing using water and canvas cloth. Just wet the edges a little and rub with the cloth until it’s sealed. If not, try to stitch the edges. Make provisions for the stitches when you’re planning the dimensions of the body. You can now store your tools in one place!
Asymmetrical Leather Clutch Purse
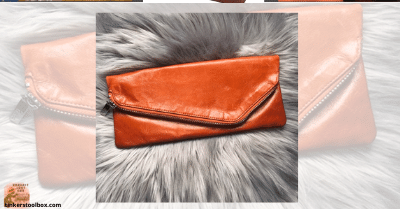
This is a pretty easy pattern compared to other bags that you might encounter. This purse is like a flap bag but with the top of the body being the flap. It’s basically a long pouch that you fold over. Because of this, thin, pliable leather is preferred for this project but you can also choose thicker ones if you prefer.
Materials
- Leather
- Zipper
- Thread
- Contact Cement or Glue
Tools
- Cutting tool
- Cutting mat
- Needles
- Awl (optional, only if doing hand stitching)
- Chisel and Mallet (optional, only if doing hand stitching)
- Sewing Machine
Step-by-step

Step 1 – Make your pattern
Make a pattern that is 11.5” wide. Measure one side as 8.5” and the other 11.25”. Connect the two sides with a diagonal line. This will be the flap section. Cut out two pieces of leather using these dimensions.
Step 2 – Sew the zipper
If you have thin leather, you can fold the top a little before sewing the zipper in. Bond the zipper and leather with some glue to hold it in place while sewing. Stitch using a sewing machine with a basic topstitch. If a sewing machine is not available, try using thinner leather that can easily be pierced by an awl.
Step 3 – Sew the rest of the body
Turn the inside of the two leather pieces out in preparation for stitching or sewing. Leave the zipper partially open so you can pull the right side out after stitching. Sew the edges of the pieces by hand or using a sewing machine.
Trim any excess leather beyond the stitches. Turn the bag right side out through the zipper opening. Poke into the inside corners to give the bag a more defined shape. Do your final checks and go strut your purse outside!
Leatherbound Book

There’s really something about a nice leather-bound book that gives it an air of gravity, even if it’s just a Harry Potter volume. It’s also very beautiful on your coffee table or bookshelf. Aesthetics aside, it’s a good way to take care of your books, especially those in paperback.
Materials
- Leather (choose something pliable)
- PVA glue (or other crafts glue)
- Cardboard
- Parchment or Wax Paper
- Masking tape
- A book or notebook
Tools
- Cutting tool
- Cutting mat
- Ruler
- Pencil
- A heavy object (weight for drying)
Step-by-step
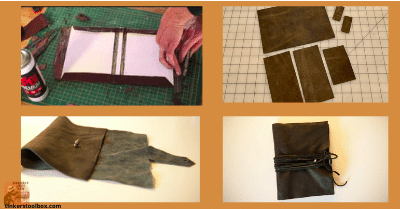
Step 1 – Measure the book and cardboards
Measure the book’s height, width and thickness.
For the spine cardboard, have it ⅛” longer than the book’s spine. Also, give an excess to the width that will match the thickness of the covers’ cardboard and the leather.
For the flaps, start the measurement ½” from the spine. Have an excess of ⅛” from the edge of the flaps as well.
Line the cardboard pieces as if they were an open book. Have ½” of space in between the pieces. Connect them with a couple of long masking tape.
Step 2 – Assemble the leather cover
Place the cardboards on top of the leather. Cut the leather so that there is an excess of ½” on all sides of the cardboard. Mark the centerline on the spine and the leather. This will be useful for when you line them up later.
If you plan to do some stamping on the cover for the title or your name, now is the time to do it. Wet the leather up to about ¾ of the thickness. Let it dry for five minutes. Do the stamping. If the leather is getting too dry, spray some water and let it sink in for five minutes. Once the design is complete, let the leather completely dry.
Glue the cardboard and leather together with PVA glue. Note that PVA dries quickly so stay sharp when using it. With a brush, spread PVA glue all over the cardboard surface that will stick to the leather. Press them together with a heavy object while drying.
Step 3 – Seal the edges of the leather
Cut a square on the corners of the leather so that when they are folded over the cardboard there will be no overlap on the corners. Fold the leather edges over the cardboard and glue with PVA. Press the edges with a heavy object while drying.
Step 4 – Cover the book with the leather and cardboard
If your leather is thick, consider using filler cardboard about the same thickness as the leather. This way there’s no sudden step between the cardboard and leather. Cut two cardboards the same size as the cover ones and glue them to the inside of the cover.
Smooth the actual cover of your book with sandpaper to prepare it for gluing. Glossy covers tend to not stick very well. Place parchment or wax paper between the covers and pages of the book to avoid stray glue on the pages. Use a heavy object as a weight while it dries. Use rubbing alcohol to clean up any stray glue.
You can now add it to your book collection!
Conclusion
There are a ton of other leather projects to try out there just waiting for you to pick them. If anything catches your eye in this list, give it a try. As you decide to go further into leatherworking, just be sure to have lots of fun as you make more crafts that are both useful and beautiful.