Candle making is a great activity to do. It teaches us the value of hard work and creativity and gives us the relaxation and peace of mind we most need as adults. Thus, it is only fair enough that we share this incredible experience with our young ones as a form of a hobby which may lead them to develop several skills and good attitudes. Today, let us learn candle making with our kids in the safest and most enjoyable way.
Kids ages four to six would enjoy doing rolled candles, while dipped candles are perfect for children aged seven to twelve. For the older ones, they may find creating molded and container candles fun. Remember that these age groups need adult supervision throughout the candle making process.
In this article, we will talk about how to introduce candle making to your kids. We will also discuss the different recommended candle types for several age groups and the tools, equipment, and materials needed for those candles. Lastly, you will find plenty of safety precautions in this article to make your child’s candle making experience safe and worry-free.
Candle Making: A Fun Hobby for Children

Candle making is a fun and enjoyable activity for both children and adults. However, it should not be introduced to children under the age of eight without supervision. It may be dangerous for children if they are not guided well, so teaching your kids the art of candle making requires a lot of guidance.
Adults have a great role when introducing candle making to our young ones. They should always be on the lookout for any hazard to kids as most candle making processes need adult supervision. For one, the handling of wax and the hot temperature should always be considered for the kids’ safety.
Benefits of Candle Making for Kids
Candles are versatile products fit for any occasion, such as birthdays and anniversaries. It is also a beautiful home decor that enhances the scent and overall interior of your home. Kids would love to participate in making this light source that is indeed reliable when there is a power interruption.
A big advantage of making your candle and having your kids participate in it is saving you money. Fancy candles are becoming more expensive these days. If you could get your child invested in a candle making hobby, you will have a little assistant to help you create homemade candles customized for gifting. Plus, materials and ingredients are easy to find, so you can save more money when you make them than when buying them.
Homemade candles are perfect, unique, and thoughtful gifts. What could be a greater gift than the one made by your own hands and are even made special with the carved name of the gift receiver? Indeed, homemade candles are a way to show effort for your loved ones and are a perfect bonding moment for you and your kid.
Candle making is a good hobby that can turn into a profit in the long run. Children will be able to appreciate the value of hard work at a young age. If they could create good candles for selling, they would receive money for their hard work, and the profit could be an additional allowance for them.
More than anything, candle making boosts your child’s creativity. It is a way to release stress and anxiety, especially for children dealing with some emotions. The focus and concentration needed in candle making serve as a meditation activity for kids. It takes them away from phone screens and provides them with a worthwhile activity at home. Lastly, candle making is fun, especially when the kids are not schooling (on vacation).
Candles to Make for a Specific Age Group
Here are some recommended candles to create for the children’s specific age group. Note that these activities, however suitable for the child’s capability, still need guidance from adults.
Rolled Candles for Four to Six Years Old

Children ages four to six would enjoy making rolled candles. You can buy pre-stamped beeswax sheets and wicks or a candle rolling kit available on Amazon. Making rolled candles will exercise your kids’ little hands by rolling the beeswax sheets to produce hand-rolled candles. Plus, the sheets come in different bright colors and take only a few minutes to finish, making them perfect for young ones with a short attention span.
Here are the easy steps in making rolled candles. First, place the beeswax sheet on top of a flat surface in front of your kid. Then, measure the wick’s length relative to the sheet’s length you are using. Add ½ to one inch to the length. Make the additional length of wick stick out of the sheet as you roll it. This is the wick you will burn later.
Lay the wick straight and flat at one end of the beeswax sheet. Then, fold the sheet over the wick, securing it tightly. The natural heat from the child’s hands will make it soft and easy to roll, but if not, use a hairdryer to warm the sheet a little. Beeswax sheets are pliable when warmed up.
Once the wick is secured tightly at one end of the sheet, you can continue rolling. Help your child roll the wax sheet going from one edge to the end of the other side. Always make sure that the wax sheets are rolled and tucked tight to the wick as loosely rolled candles burn bad.
After rolling, press the edge of the wax sheet to secure it. An adult can help with this part. An alternative is using a hairdryer to warm the edge, making it easily stick to the candle’s body.
Smoothen the bottom of the candle. Rub the candle’s bottom into your working table in a circular motion. The heat from the friction will partly melt the wax and form a smooth finish to our candle.
Dipped Candles for Seven to Twelve Years Old
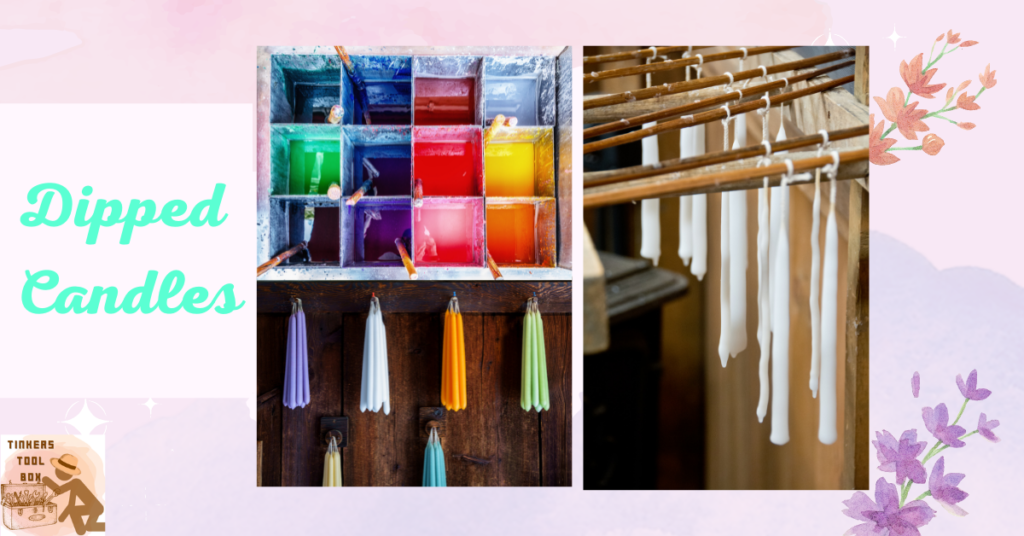
For seven to twelve-year-old kids, dipped taper candles would be a great idea as it keeps them moving, and these ages would require an active activity to satisfy their attention. The process starts as the kids are given a foot’s length of wicking. This will be bent into half where a finger is placed between the bent, so the two ends are dangling down. Use a wick with wire in the center to help kids keep the candles in straight form. The wick is then dipped into the melted wax over and over until you meet the desired volume of the candle.
Here are some tips for a fun dipped candles activity. Set up two containers of melted wax for children to dip their wick in. These containers will be placed at both ends of a rectangular table, long enough to create a fair distance between the two melted wax containers.
Have the kids line up with their wick, each passing through both ends of the table to dip their wick in the container. As they go around the table, they will have a fun time chatting and interacting with one another while making candles.
Since candle dipping is a more independent activity for kids, here are a few things you should look for to ensure safety during the process.
Keep wax at an even heat. Require kids to make a quick dip to the wax. The dipping of the candle for too long causes the already built wax on the wick to melt off. If this happens, they may need to start again, resulting in complaints or even loss of interest for kids.
Keep the wick straight at all times. The wick will automatically straighten with the wax’s weight on it. Some kids will have a hard time following instructions, and it is best to assure them that they are doing great on the activity to boost their confidence. Also, ask for adult supervision if a child happens to need one.
There are no shortcuts in this activity. Walking around the table to get from one container to the other is needed as this is the time the candle cools enough to accept another layer of wax. Do not trust the children to calculate their own time. They are all eager to finish and see the result, and instant is a word that does not apply with dipped candles.
The process takes a good 30 to 45 minutes. After this time, the weight of the candle would be enough to burn for some time. Furthermore, waiting teaches them a life lesson. Patience is a virtue, and they will get good results if they follow instructions well.
Here are some safety instructions to bear in mind to ensure a fun and tantrum-free dipped candle making activity. First, let the smaller kids be first on the line while guiding them well on what to do.
Tell the children to walk at a distance from the person in their front and back. Do not crowd them, especially if they are dipping the wick on the hot wax. The dipping needs concentration, and if they are out of focus, the candle may not come out well.
Avoid pushing and shoving with kids in line and keep a safe distance from one another. Stand still and concentrate when dipping your candle. Remember always to be careful not to touch the hot wax. Do not touch the stove either if you don’t want to burn your fingers.
Dip quickly but carefully. Do not swing or dangle your candle after dipping. Just let the wax drip onto the stove before leaving the spot. Lastly, respect the other children doing the activity and follow the instructions well to avoid mistakes and going over the whole process again.
Molded Candles for Ages Thirteen and Above

Children ages thirteen and above are the age group that can be truly creative. They can follow instructions and take on details seriously, so molded candles would be a great activity for them.
Let them be creative with color dyes, fragrances, and paints. They can also decorate their finished candles and can even be trusted with a craft knife so they can carve designs on the candle.
Molded candles are good for adding pressed herbs and flowers, so your candle contains the natural scents from the fragrances you used. It can also be layered with various colors using different dyes (for rainbow candles).
Molds can be of any interesting shape. It can be any container that is heat-proof, sturdy, and does not leak. You can purchase unique and special shapes in the market or let the children look for an alternative mold at home.
Silicone molds are commonly used for this project. These are one-piece molds with a slit at one side for easy candle removal after completely drying and cooling down. To start, measure enough wick size to cover the mold’s height leaving two inches of wick sticking out from the mold. This is the wick you will light up later.
Attach one end of the wick at the bottom of the mold and secure it with glue. Center the wick and anchor it at the top of the mold. You can use chopsticks or any object that holds it still when pouring the melted wax.
Secure the mold using rubber bands to close the slit opening. Place it every one to two inches throughout the mold’s height. The rubber bands keep the edges of the mold tightly closed to prevent any leaking.
Melt your wax using a double boiler. This step needs parent supervision in handling hot melted wax. Then, stir the wax as it melts. Take note of the correct temperature to pour the wax into the mold. You can find the pouring temperature in the wax’s packaging as well as the fragrance levels recommended for the type of wax used.
Place the mold on your working table. Then, use parchment paper to catch any spills or mess from pouring the melted wax. Pour the melted wax at the correct temperature filling it to the top of the mold. Remember to keep your wick straight at all times while pouring.
Let the mold cool down for 60 to 90 minutes, depending on the size. When the candle has completely cooled and hardened, remove the candle from the mold and test burn your output.
Container Candles for Kids
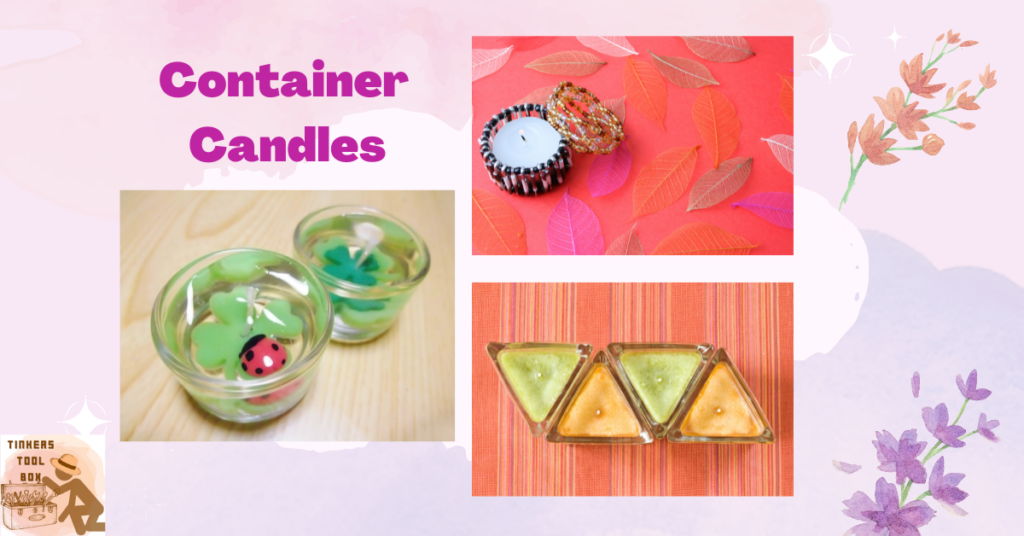
Here is a simple guide made for kids to create their first-ever container candle. Follow these steps with proper supervision to ensure a fun and memorable experience for your kid.
Gather the following materials: four cups of soy wax flakes, glass jars and tin containers, candle wicks, masking tape, scissors, pouring pot, scented oils (optional), thermometer, colored pens, stickers, and glue.
Heat the wax using a double boiler. Pour the wax into the pan and melt it at 185 degrees Fahrenheit. Stir the wax while melting and remove it from heat after all the wax has melted evenly.
Secure the wick at the top of the container using tape. Tape an x-shape across the container’s opening and stick the wick at its center. The tape will keep the wick straight and steady while pouring your melted wax on the container. Furthermore, make sure that the base of the wick touches the bottom of the container, so the wick won’t slip as the wax dries.
Add about ten drops of fragrance oils to your melted wax and stir and bind them well together.
Carefully pour the melted wax into the container using a pouring pot with a spout to avoid further spillage. Don’t pour wax over the wick and the tape. Instead, pour it on the space between the tapes up to one inch from the brim of the container. The remaining space on your container will be used to add more wax and smooth the candle top.
Let the wax cool and harden, then trim the wick leaving ½ inch for you to light. Finally, decorate the container using your colored pencils and stickers. You can draw the designs that you want. You can also put your name or the name of someone you will give the candle to.
Safety Precautions to Take Note in Kiddie Candle Making
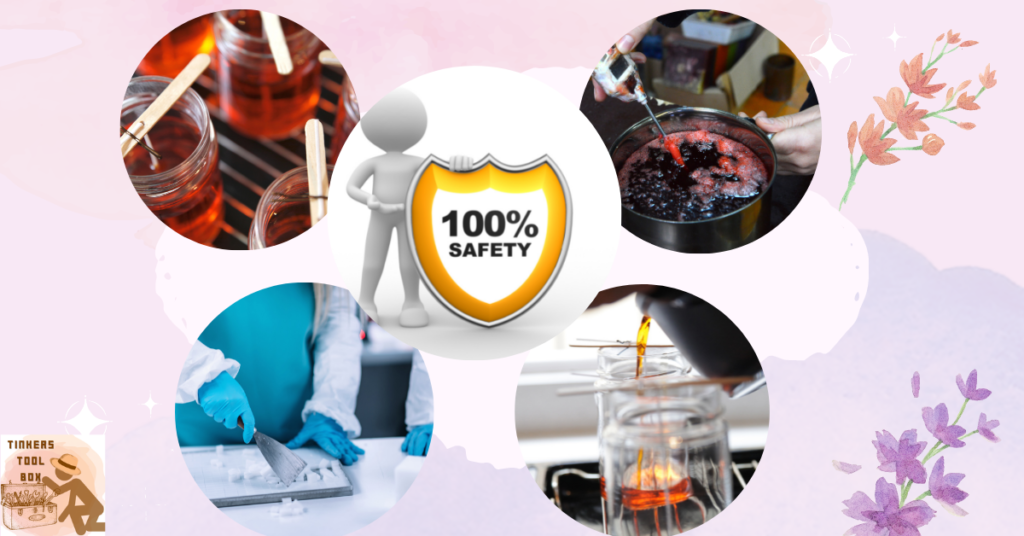
Follow these safety precautions when teaching kids to make candles to make their experience fun and safe.
Be Mindful when Handling and Melting Candle Wax
Always use the wax that is made only for candle making. Better choose an all-natural wax, like soy wax or beeswax, which is 100% safe for children to use. These waxes have no added harmful chemicals that may cause serious health problems.
Hot wax is a danger to both kids and adults when not handled properly. When melting and pouring hot wax, make sure an adult is supervising it, or better yet, don’t let the children do it themselves. Furthermore, keep the children away at a safe distance to avoid splashes getting in contact with them.
Keep wax away from naked flames. These flames will melt your wax easily and cause a mess in your work area.
Use a potholder when handling a pouring or melting pot. Check the temperature using a thermometer to prevent wax from overheating and producing bad burning candles.
Prepare Your Ingredients Before Starting Your Project
Preparing your ingredients beforehand lessens the chance that you will leave your kid alone to look for missing ingredients or tools. Leaving the kid unattended with all the candle making tools and ingredients would not be advisable as kids tend to be always curious, leading to serious accidents.
Check the ingredients’ content. Ensure the wax, fragrance oils, and other additives do not have any content that may trigger an allergic reaction to your child. Moreover, all ingredients should be manufactured for candle making, and the use of any alternatives not made for candle making is not advisable.
Here are some common waxes used in candle making and their pros and cons regarding children’s use. Paraffin wax comes from petroleum, coal, or oil shale. When burned, it produces highly toxic benzene, which is commonly linked to causing asthma and lung cancer. Hence, paraffin wax is not a good choice for kids.
Soy wax is a 100% natural wax from vegetable soybeans and is highly safe for children’s use. Beeswax is another naturally occurring wax produced in bee’s hives. It is considered the least reactive type of wax, easiest and safest to use, and the healthiest candle wax to burn.
If you want to create stylish candles like beer and soda-shaped candles, you should go for gel wax. The wax can also be infused with sand, glitters, and other decorations and is also 100% safe for kids.
Use Safety and Protective Equipment for Kids
Safety is a top priority in candle making for kids. As they are new to this hobby, they may get too excited and curious to try things for the first time, not minding the possible consequences of their actions. To protect them, it is recommended to use protective equipment.
The protective equipment you need to prepare is safety glasses, heat-proof gloves, apron, and a hairnet so their hair won’t block their sight or be caught on the candle’s fire. Moreover,
have a ready-to-use fire extinguisher near your working area, just in case, you may need to use one.
Prepare an old cloth for cleaning up spillage as kids are expected to be messy when working on crafts.
Use candle making materials that are heat-proof and sturdy. These will be additional protection to your child aside from them using gloves. Containers, melting pots, mixing bowls, and boilers should have proper insulation.
Use a double boiler to melt the wax. It is the safest way to melt the wax. Also, use your potholders when pouring melted wax. Most importantly, start and end clean. Provide clean equipment and materials to lessen any accidents in the candle making process.
Keep Your Work Area Organized at All Times
An organized work area prevents accidents in the course of candle making. Equipment, tools, and ingredients need to be organized and found in one place to ensure less time in searching for the needed tools.
Prepare a cleaning cloth and minimize spillages if possible. Do not crowd the working space. If you are working with two or more kids, ensure that the working table is enough to accommodate this number. Each participant should have enough space to move around the table and reach for any needed tools.
The working table should be of suitable height for kids. Higher tables cause kids to reach up, which may lead to accidents and mess when they knock on containers and liquids.
Create Simple Yet Fun Designs
For starters, choose any design which is easy to make and not too complicated to finish. You can use simple-shaped molds that feature bright colors and wonderful scents. Hand-rolled candles are an easy and fun activity for kids which uses thin sheets of pre-stamped beeswax that are hand-rolled around a wick. Plus, they also come in different colors and designs!
Introduce candle making for occasions. Kids would love to do projects which will be gifted for any occasion. It makes them more excited and determined to learn candle making, giving them a more fulfilling experience.
Have the kids create candles like Christmas candles, Easter egg candles, Halloween candles, and more.
Fire Safety Tips for Kids
Here are some fire safety tips for kids and adults to bear in mind. Make a safe type of candle for beginners. The safest candle to make for kids is container candles. In this activity, the flame and hot melted wax are contained inside, which lessens the risk of contact with kids when burning the candle.
Tapers are not recommended for young ages as they easily tip and lose balance. Furthermore, decorative candles are great; just make sure that the decoration will not ignite a larger flame.
Teach kids how to light a candle properly. Strike the match away and not towards your body.
Scratching the match on the pad towards your body may result in hair, clothing, or any accessories catching on fire.
It will be safer to use a long-necked lighter specifically made for lighting candles as it keeps your hand and fingers away from the flame when lighting it. Dispose the used match properly. You can dip it in water to ensure that the flame is completely out and will not catch fire when placed in the trash can.
Don’t leave a burning candle unattended. Keep the flame out when you leave your house or if candles are not needed for use to avoid burning your house down.
Conclusion
Candle making for kids should not be stressful and worrisome for adults. With these safety tips and candle making activities, you can ensure that safety would be the priority as well as the enjoyment of the kids. Bringing out children’s creativity at a young age is a step forward to truly realizing their full potential and discovering amazing skills through candle making. So prepare your tools now and start your kid’s candle making hobby today.