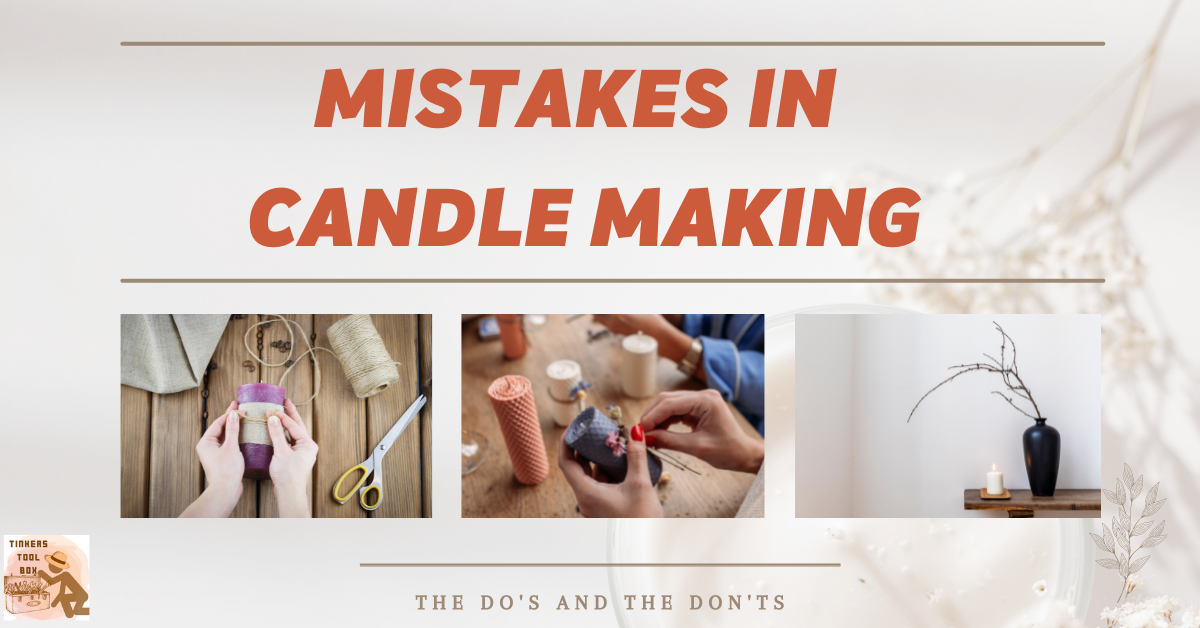
Candle-making is fun and easy until you encounter mistakes that could ruin your beautiful piece of art. These mistakes may be things that we unconsciously do, especially if we are just starting our candle-making journey because, as we know, candle-making takes a lot of trial and error. The good thing is that these common mistakes and problems are avoidable or fixable, and I can surely help you with that.
Avoid mistakes in candle making by always using the right size of wick for your candle. Choose the correct combination of fragrances and wax as some scents are not meant for some type of wax. Lastly, the temperature is important in achieving the perfect burning of candles, so measure them accurately.
This article talks about all the mistakes you need to avoid in candle-making, starting from the proper use of the ingredients to the dos and don’ts in every candle-making process. I also included the possible reasons for these mistakes and the steps to properly resolve them if you cannot avoid them or are unaware that you are making them.
Candle Making Mistakes Involving the Candle Wick
Wicks are one of the important parts of a candle that are often overlooked and lead to mistakes in your candle making. They may seem like a small part of the candle, but they are the foundation that holds the whole candle together. These are the common mistakes we might be unconsciously making concerning candle wicks.
Carbon Buildup at the End of the Wick (Mushrooming)

Mushroom wick or a black cap at the end of the wick occurs when wax does not burn fast enough as the wick. This happens when the flame can’t burn all the wax. Hence the wick will absorb the wax and create a buildup of carbon particles on its end.
There are numerous possible causes in this scenario. First, the candle wick may be too large for its container, providing more wax to the flame than it can handle. The bigger wick creates a flame too large and too tall which produces excessive heat and can also cause fragrance oils to break down and release a poor hot throw. Another undesired effect of mushrooming wick is the production of soot and smoke.
You may also be using the wrong wick type for the candle resulting in candles not burning properly and the wick mushrooming. Here are some recommended wicks that are not prone to mushrooming. Coreless wicks provide controlled curling on the wick and reduce possible mushrooming. You may also choose flat braided cotton wicks, which are considered self-trimming and help reduce mushrooming.
Untrimmed wicks will also get you a mushroom cap on your candle wick. Furthermore, burning candles for more than four hours at once causes mushrooming as carbon starts to gather up the wick.
Soy wax is known to be more prone to mushrooming and incorporating heavy floral scents in your candle. These scents can cause mushrooming due to their chemical composition. The scent or dye may gather at the wick, causing the flame not to burn completely and resulting in carbon buildup.
Mushroom wicks seem like a lot to handle, but here are easy ways to deal with them. If you have used a larger wick for the candle, the obvious fix is to use a smaller one. Zinc wicks are known for wick mushrooming, so you can prevent this by keeping the wick trimmed at ¼ to ½ inches before burning.
Good wick curls while burning. A general rule of thumb is that the melting time should be the same as the diameter of the candle. If your candle is three inches wide, it will take three hours to melt the whole candle. Now, if the candle burns faster than that, your wick may be too big for the candle’s size.
Burn candles for two to three hours only before blowing or trimming the wick. The first burning time of the candle is important to know if it will burn evenly, so you shouldn’t interrupt its first burning time.
With fragrances causing the wick to mushroom, putting excessive or small amounts can both cause mushrooming. You can experiment with different amounts of fragrances to perfect the right amount of scent for your candle.
Unstable and Large Flames
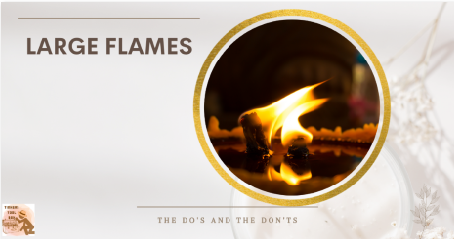
Candle wicks are often not given attention in candle making, resulting from multiple problems when not given proper attention. Unstable and large flames could cause flickering lights to candles and produce a flame too high, resulting in uneven burning.
The number one cause of this problem is the use of a low-quality wick. Wicks, which are excessively long for the candle’s size and are considerably large for the container, is also one reason that causes long, large, and unstable flames that may result in a lot of smoke.
Always use the correct wick size for your candle. It should not be too long or too short and is relevant to the container’s size (diameter). Another method that could help is trimming the wicks properly. Trim them from ⅛ to ¼ inches long after two to three hours of burning.
Candle Wick Doesn’t Stay Lit

Keeping your candle lit is a 100% must. However, some candles tend to go out easily and are even harder to maintain.
This problem may be caused by any of these three reasons. First, the candle wick may be too long. Remember that the longer the wick, the longer the wax needs to travel to be melted and produce a flame.
In this instance, the wax could not reach the wick and ignite due to its long travel time, causing the candle’s light to go off. Take note that a candle stays lit by drawing the wax through the wick and not by burning the wick, so if the wax could not travel fast enough, the flame would surely go off.
Excessive additives on the candle, like fragrance oils and color dyes, make it hard to maintain its flame. When you add excessive amounts of these additives, the wick may drown in them and not light up properly.
Another possible reason is the wick being too short for the size of the candle. You may have trimmed the wick shorter than recommended. In effect to this, there would not be enough space between the wick and the surface of the wax to work its way.
Notice that in all problems concerning candle wicks, I always mention using the right size. This is to prevent any further problems that would stem from simply not following the recommended size for your candle.
Use the right size of wick for the container. Maintain it to about ¼ inch or 6 millimeters above the wax’s surface. If the wick is too short, you can melt the wax around the wick to make it longer and drain the excess melted wax around the wick to give it more space to burn.
Less is more when it comes to candle additives. Don’t put excessive amounts, only the allowable quantity recommended for each wax type. You can find the recommended amount of the additive fit for each wax type on its packaging.
Common Mistakes in Using the Candle Wax
When making candles, we might think that the whole process was going smoothly until we see cracks and spots on the candle wax, which is not pleasing to the eyes. Here are some common mistakes you might make, which cost your candles not to look and work as you expected.
Wet Spots on the Candle

Shrinkage and bubbles occurring as the wax cools result in the wax pulling away from the container creating wet spots or gaps on the candle. It does not do anything to the candle’s burning ability, but it makes them appear undesirable or the least appealing. Wet spots are commonly seen in candles made of paraffin wax.
The possible cause for this is the uncontrollable humidity in your working area. Pouring too quickly without following the correct pour temperature would also be the reason. Cooling candles placed closely holds heat unevenly and can also cause the candles to have wet spots.
Here are some quick fixes. Clean the container thoroughly using soap and water and dry it completely to avoid moisture mixing with the wax. Preheat the container before pouring the wax. This helps slow down the wax’s cooling time and removes any air bubbles on the wax.
Pour the wax slowly on the container at 70-72 degrees Fahrenheit room temperature. You can release the bubbles formed when pouring by tapping the container gently after the wax is poured.
Place the cooling candles apart, four inches away from each other. You may also use a wire rack for cooling the candles. This method is better than leaving them on the countertop, allowing the possibility of each candle’s temperature to influence one another.
Candle Wax Not Burning Evenly

A common problem faced by candle makers is when the wax melts unevenly while the candle is lit. When this happens, the wax pools to one side of the candle resulting in an irregularly shaped candle.
The consistent draft of air blowing the candle’s flame to one side (air conditioner or fans) could be the culprit. The side exposed to more flame melts faster than the other. The other side is disturbed by air currents causing it to melt more slowly.
Wick may not be placed at the center of the container. As the wick holds the whole candle together, wax always melts wherever the wick is placed. Placing the wick partly on one side and not in the middle will give you an uneven burning candle.
Another possible cause is having wicks too small for the candle, or the melting point of the wax may be too high for the flame to keep up to.
When the candle wick is not centered, the effective fix is to use a centering tool to balance the wick. It can be a pair of chopsticks or a centering device placed at the top of the container while the wax cools, maintaining a straight wick.
You may opt to use wax with a lower melting point. The first burn always determines if a candle burns evenly. Remember that the burning hours should be equal to the candle’s diameter. Let the candle burn within those hours to melt evenly on all edges before extinguishing the flame and burning it a second time.
Make use of a larger wick. Remember to always use the right wick size relevant to the container’s diameter. Furthermore, keep candles away from any source of drafts like open windows, fans, or ACs.
Lastly, do not burn candles for more than four hours. Doing so may overheat the candle and cause the wick to not stay in place if the middle of the candle becomes too soft.
Tunneling Effect Causing Wax Left Over on the Sides of Container

The tunneling effect is one of the biggest problems in candle making. This happens when the candle burns from the center, creating a vertical tunnel towards the bottom and leaving unmelted wax around the sides of the container. Tunneling is a common problem in pillar candles, making the wick drown in the tunnel when not fixed.
Candle tunneling may be caused by using a wick too short for the candle. Because of this, the wick can also burn the wax near its surrounding (middle), leaving the sides of the candle unmelted.
Another possible cause of tunneling is the candle’s short burn time. The first burning time is important as it evens out the candle’s surface. When this is not met the first time you burn your candle, it will burn unevenly throughout, creating a tunnel in the candle’s center.
Ingredient pairing is essential in candle making because not all fragrances and wick sizes can be paired. In candle tunneling, the wick size may not suit the container and ingredient combinations of wax, fragrances, and color dyes. Larger wicks are needed for darker and highly-fragranced candles.
Here are things you can do. Burn your candles for two to three hours the first time you lit them. This results in uniform burning throughout the height of the candle. Also, change your wick size, one or two sizes bigger than your current wick.
Fix the tunneling by filling the gap with wax. Scrape out the wax from the sides of the candle and even it out at the tunneled surface using the lowest heat from a heat gun.
White Frosting in Soy Wax

Polymorphism or the production of white frosting is a common problem in using soy wax. These tiny crystals formed at the top and sides of the candle naturally occur in natural or vegetable waxes. These white frostings do not affect the candle’s burning ability but rather an aesthetic issue that is more noticeable in colored candles.
Pouring melted wax in the container without following the correct pour temperature can be a cause of this. Pouring with too high or too low wax temperature combined with excessive stirring or blending of wax may cause the candle to produce white frostings. Furthermore, the wax’s quick cooling may also contribute to this problem.
Follow these simple instructions and say bye to these white frostings. The first is to stir the wax slowly. Then, preheat the container using a warm oven with a maximum temperature of 100 degrees Fahrenheit. This will prevent the wax from cooling quickly.
Pour wax at a lower temperature as it reduces crystal formation. Also, cool wax at room temperature to naturally form the candle. It is recommended to make non-colored candles out of soy wax as it makes the frosting less noticeable.
Lastly, use the soy wax flakes within a year from their manufacture date. Frosting occurs relative to the wax’s age, so it is better to use it earlier after purchase and consume candles within six months after they are produced.
Problems Concerning Color Dyes, Scents, and Other Additives
Color dyes and fragrances and what brings style and personality to candles. These additives are essential not only for decoration but also for making them effective for home deodorizing and promoting a refreshing and relaxing environment. However, if not used properly, they may impair your candles and may not serve their purpose.
Oils Seeping Out and Pooling at the Top of Candle (Sweating)

Sweating is characterized by a thin layer of oil sitting on top of the candle. It can be from the wax’s natural oils or the fragrance oils used in the candle. Soy wax is sensitive to severe temperature changes causing its natural oils to separate from the wax and be left at the candle’s surface.
Fragrance oils may also cause sweating when they are not mixed at the right temperature, stirred sufficiently, and not suited to the wax type. Putting more oils produces excessive smoke and soot as the wick drowns in the fragrance oils.
Different waxes cannot hold the same amount of wax. As in the case of soy wax, it can’t hold more than eight to ten percent fragrance oil, so it is essential to follow the written recommendations on the wax’s packaging.
Only use the fragrance oils suitable for the wax and use oils of lighter viscosity. These oils bind perfectly to the wax molecules. Heavier oils may be used in lower amounts to ensure a great blend.
Little to No Scent Throw

Candles may produce less hot and cold throws than expected. Hot throw is the fragrance released by the candle when burning and cold throw is the candle’s aroma when not lit. Little to no scent throw happens when the candle doesn’t smell anything near the fragrance used or smells very little.
The scent throw is important in a scented candle because it is one trait that attracts customers or people towards the candle. It should smell good to favor people’s sense of smell.
A problem concerning scent throw happens when the fragrance oil is applied in a smaller amount than recommended, of poor quality, or added at an incorrect temperature. The recommended temperature to mix your fragrance oils is 185 Fahrenheit. Ingredients bind well at this temperature and adding fragrance at lower temperature results in poor cold and hot throw.
Here are things that you can do as remedies. Add more fragrance, considering the minimum and maximum percentage recommended. Furthermore, use premium quality fragrances. Test different fragrances in different waxes (paraffin wax gives a great scent throw) and only use the oils designated for candle making.
Provide enough time for candle curing. The minimum curing time is 24 hours (recommended up to two weeks) before test burning. It is also notable that using the right wick size for each container solves most of these problems.
Use a wax with a balanced melting point. The wax should not be too hard or tight to mask the cold throw and not too soft that fragrance will easily escape.
Take note that the ratio of fragrance oil to wax depends on several factors. First is the type of wax used. Some wax is hard, while others are soft. Most waxes can only hold up to 12% fragrance oils, and adding 10% is recommended for optimal scent throw.
For example, your candle weighs 100 grams in total, 90 grams of it should be wax, and ten grams should be fragrance oils. For a subtle scent throw, you can add a six percent fragrance. Notice that we measure the fragrance oils in weight and not in volume. Some fragrances are thicker than others, and calculating by volume would give an inaccurate percentage. Using the same unit of measurement provides a more reliable calculation.
Fragrance oil’s flashpoint, the temperature where the oil (fluid) starts to give off enough vapor (scent), is also important. Lastly, the amount of fragrance oil varies depending on how strong you want your candle to smell.
Fragrance Oil Pooling at the Bottom of Container

Fragrance oils pooling at the bottom of the container is a common issue in creating scented candles. This happens when fragrance oils do not blend well with the wax, causing it to settle down at the bottom.
You may have been putting excessive fragrance oils or using the inappropriate wax not suitable for the oil. Heating the wax at an incorrect temperature also contributes to this scenario.
Avoid this mistake by using a porous wax heated at its optimum temperature. Plus, stir the oil with the wax for two continuous minutes to blend well with each other. This is to make sure that the fragrance is evenly distributed at the full height of the candle.
Candle Color Easily Fades Out

Candle colors would easily fade out if they were too exposed to sunlight. It can also be because you used a candle wax or dye of low quality, which may not mix well together and fade over time.
Fix this issue by storing candles in a darker area, away from direct sunlight. Also, keep them shielded from interior lighting. Use a UV inhibitor, an additive that aids in preventing the quick fading of colored candles. It prolongs the candle’s color and protects white candles from turning yellowish.
Always use premium quality dyes and wax. Only use dyes and wax specific for candle making to get the optimum results.
Color Dye Spots on the Candle

Color dye spots on the candle happen when dye blocks or chips are not fully dissolved in the wax. To prevent this, allow the dye blocks to melt and mix evenly with the wax. The color dyes can be added to the wax while it’s melting. Thoroughly stir the mixture for even distribution of color.
Most specks of color remain at the bottom of the melting pot, so stop pouring your wax when you spot some. Discard the remaining wax with the dye spots on it. You can also use liquid dyes as they are easier to mix with the melted wax.
Candle Burning and Appearance Issues
Here are other issues you might encounter towards the end of your candle making process. These mistakes are hard to spot and may not be seen early on as they are mostly noticed after the candle was made and when the test burning is done. You need to take note of these mistakes to avoid wasting ingredients and time on candles. Moreover, you can also follow these easy fixes to still use the candles without making them go to waste.
Rough Surfaces on the Candle Tops

Uneven, rough surfaces of wax and small air bubbles cause small holes and cracks on the candle resulting in rough candle tops. Some possible causes of this is over-stirring of wax, moisture (water) getting into the wax, and the wax being poured at a cooler temperature, hence the candle cooling too fast.
Here is what you can do in these instances. Do not over-stir while melting the wax as it creates air bubbles to the wax. Stirring should not be more than two minutes. Furthermore, you can increase the wax’s pour temperature by five degrees. You can do this by preheating the container at 90 to 100 degrees Fahrenheit before pouring.
Avoid moisture from coming into the wax. Using a double boiler would be one reason for water to mix into the wax, so you may opt to use a tall melting pot or pitcher. Then, let the wax cool at room temperature.
You’ll love to have a heat gun with you when making candles. It can be used to smoothen the uneven and rough candle tops. Set it at the lowest temperature allowed, then melt the candle tops to create a smooth finish.
Candle Won’t Get Out of the Mold
Candles getting stuck in the mold and forcing them out is an easy way to ruin your candles. This is indeed a big problem when this happens to a whole set of candles you made simultaneously.
I got you covered here. Remember these simple hacks to avoid this problem. First, never fill up the container or mold to overflow. Also, do not pour the melted wax when it is too hot that it may stick strongly to the container. The wax used should be the correct type, not too hard or too soft for the mold.
You can also use the refrigerator technique. Place the mold in the refrigerator and wait for a couple of hours. Remove them from the fridge and tap the mold’s bottom very lightly to take out the candle. The cold makes the candle shrink a bit, leaving a bit of space for the candle to detach from the container.
Candle Produces Excessive Smoke and Soot

Smoke and soot are not very attractive traits of stylish candles. The heavy use of additives like dyes and fragrances and using too large wicks may contribute to its production. The draft also causes candles to burn slightly quicker producing soot and smoke.
Well, the solution is pretty obvious. Reducing the amount of additives and placing the candles away from draft areas are effective ways to solve these problems.
Hard to Remove Wax from Glass Containers
Leftover wax sticking to the glass containers after the candles are over is a lot to handle. There are three ways to deal with them. The first is by placing the container in the freezer. This is a common way to remove candle wax from glass containers. Leave them there for a couple of hours or overnight.
The wax will shrink, turn hard and come off automatically. Then, use a spoon or a knife to scrape out the remaining wax and finish by cleaning the container with mild soap and water.
Option two is placing the container in a microwave. Preheat the oven to 180 degrees. Then, put a parchment paper before lining your containers on the baking dish. Let the wax melt in the oven for 15 minutes. You can store the remaining melted wax in another container and save it for future use.
Cleaning the container using cotton dipped in vinegar would be effective in removing hard stuck wax on glass containers.
Conclusion
In my years of experience as a candle maker, I can say that all these mistakes make you learn more and master your craft. As you make your candles, you may encounter these problems which you can either avoid or fix. With this article, I hope you will be vigilant enough to avoid mistakes and make your effort not wasted by producing perfect burning candles.