One of the best decorations for your Halloween celebration is DIY Halloween candles. These bring out the spook and character of your decorations and make the atmosphere feel much spookier and scarier than ever. Making DIY candles for your Halloween decorations can be a great bonding time with your kids, and you can even make some more as presents for their moms and dads! If you want to give your Halloween celebration a personal touch, this is the right way to do it.
Here are some of the materials and tools you will be needing for your DIY Halloween candles:
- Wax flakes in any color you want
- Pre-tabbed candle wicks
- Wax dye in orange, black, or any color you want
- Votives or similar-looking glass containers
- Fragrance oils (optional)
- Electric stove
- Two glass measuring cups or heat-safe pouring pots
- Medium-sized saucepan or pot
- Wick stickers or glue gun
- Glass thermometer (optional)
- Wick bar (optional)
- Dixie cups (optional)
Step 1: Attaching the Wicks

The first thing you must do in your DIY Halloween candles is attach the wicks to the votives or the glass containers. If you do not have any votives available at home, you can use old drinking glasses or cups that you do not use anymore as substitutes. These work the same, so you do not need to buy new votives for this candle-making project.
Using wick stickers, adhere the wicks to the metal tabs on the bottoms of the wicks to prepare them for use in your candles. Alternatively, you might use a hot glue gun to apply a little dab of glue on the wick tab and let it dry. Then, carefully press the wick into the bottom of the glass container to secure it.
You must be careful when using a hot glue gun to attach the wicks to the votives because it might scald your skin. Also, choose a glass cup that has thick glass on it to not break or burst into shards when you put direct heat towards the bottom of the glass. This is for safety purposes to ensure that you will not be hurt throughout the process.
Put it over the top of your glass container using the wick bar and attach the wick to the bar. To prevent the wick from spilling out of the container, wrap it around a pencil and place it on top. Before lighting your candle, check to see sure the wick is in the middle of your glass and that it is standing straight up on its own.
Step 2: Measuring Your Wax
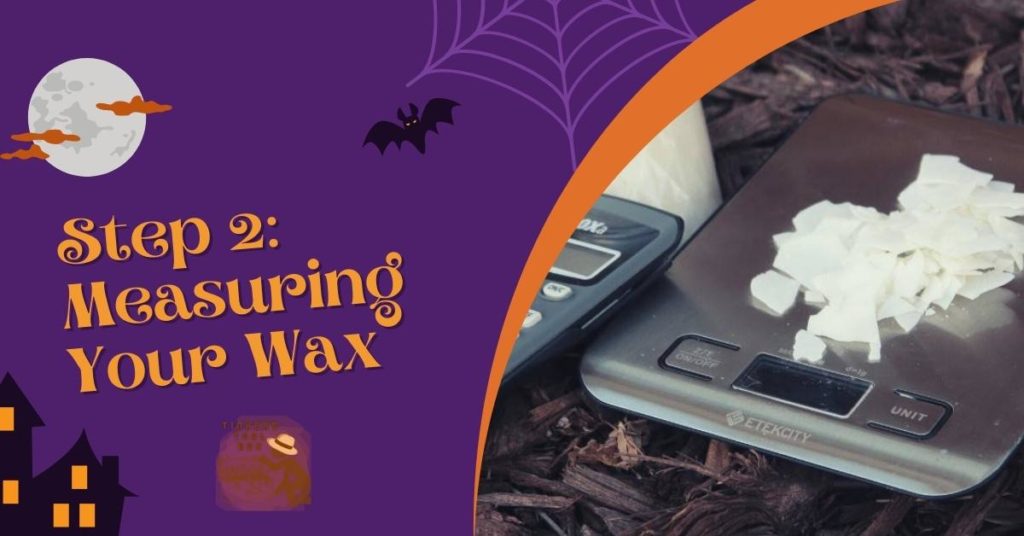
The next step you are going to do now is to measure the wax you will use for this DIY Halloween candle project. You must use the exact amount of wax as said in the project rules, with the proper measurements, so that you will not end up wasting some of it after this activity. Always measure it exactly to avoid spillage.
For beginners, you can use soy wax for this project because it is much easier for newbies than paraffin wax or any other wax available for candle making. This is also much more affordable compared to those mentioned, so if you ever mess up one batch, you will not be sad about the wasted wax because it is cheaper, anyway.
Measure out the amount of wax that will be required to fill all of your containers. Wax flakes will meltdown to around half their original size, so create an estimate that is twice as large as the number of wax flakes you will need to fill your containers to the brim. Twice as large is enough but do not be lightheaded and pour way more than what is intended.
Individuals creating layered candles for their DIY Halloween candle project and those creating dual-colored candles should measure half of their wax into each measuring cup so that they have one cup for each color they intend to use in their candles. This ensures that you will have a lot of wax that will be just enough for your colors.
Step 3: Melting the Wax

After measuring the amount of wax you need for your DIY Halloween candles, now is the right time to melt your wax. We will be utilizing a double boiler to melt your wax, which will take some time. This is mostly a safety measure to ensure that our wax does not become overheated.
To achieve this, just fill a medium-sized saucepan or pot halfway with water and heat over medium-high heat until the water comes to a boil. Fill one of the measuring cups halfway with wax, or the color you choose to be the foundation of your candle and set it aside. As the wax begins to melt, it is important to stir it occasionally.
You must stir it occasionally and not all the time, as you need to give the wax time to melt on its own. However, you should always keep an eye on the saucepan and protect yourself from accidental splashes of water that might happen while you are melting your wax on the saucepan.
As mentioned earlier, it is best to melt your wax in an electric stove compared to a gas or propane stove. However, it is still best if you have an electric warmer designed specially to melt candle wax because it has the right amount of heat for your candle wax in any of your candle-making projects.
Step 4: Adding Color to the Wax

Once your wax is completely melted using the double boiler method, you are now ready to add some color to your wax. Adding colors can be exciting because this is one of the many ways to make your candles more creative and appealing, which is perfect for the Halloween festivities.
Some of the common colors include black, yellow, and orange since they are usually associated with Halloween. Some people use red to resemble blood, and red candles usually bring in an aura of terror, especially when it melts and drips all over the coasters.
The wax should be heated to a temperature of 185 degrees Fahrenheit before you begin adding color. If you do not have a glass thermometer, you can just wait until the wax has completely melted before proceeding.
You may either use liquid dyes or wax color blocks to add color to your project. You may experiment with any of the two types of dyes, but I feel that liquid dyes are the most convenient to use for this. Stir in the necessary quantity of color to the heated wax until it is well incorporated.
When dyeing these candles, I recommend using double the quantity of dye recommended on the package because soy candles frequently come out more of a pastel hue when using the recommended amount of color. If you are okay with the hue coming out a bit more pastel-y, that is fine. Otherwise, add more drops until it reaches your desired hue.
If you want to use sustainable dyes such as natural ones, you can check if they will work out the way you wanted them on your DIY Halloween candles. You can check natural dyes online, or you can just make it by yourself to complete the DIY aura into it. Whatever type of coloring you choose, use it properly because it would be difficult to reverse the effects soon.
Step 5: Adding Fragrances and Scents on Your Candles
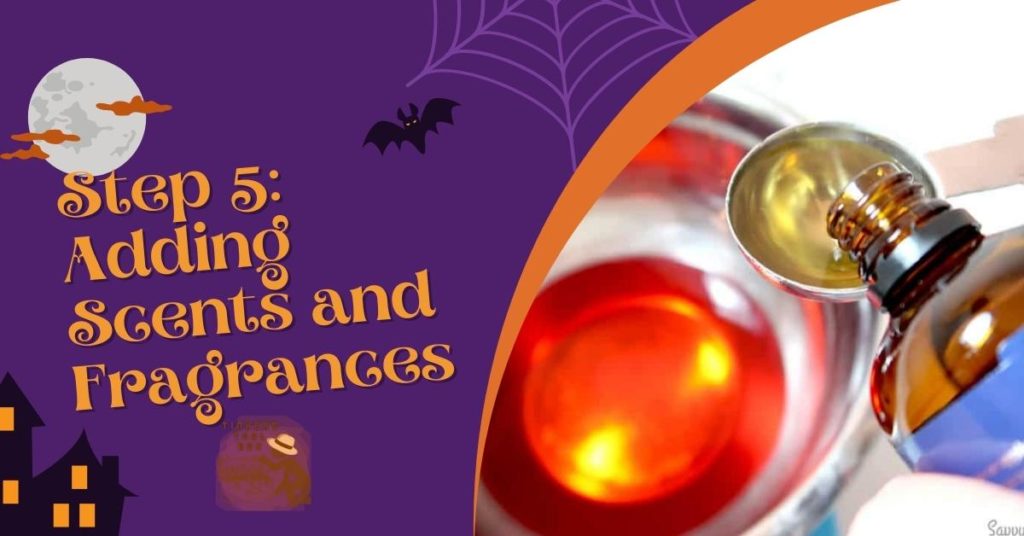
Aside from color, you can also add fragrances and scents to your DIY Halloween candles.
Scents and fragrances add that spooky atmosphere that tickles your olfactory nerves, or your noses, in layman’s terms. Thankfully, there are a lot of scents and fragrances that people usually associate with Halloween, so you are still on-brand.
Some of the scents you can use include caramel, vanilla, pumpkin spice, cinnamon, sandalwood, orange, deep plum, baked apple, and so on. These are the traditional scents associated with Halloween. Still, you can always put your personal touch in choosing the scents on your DIY Halloween candles.
Putting scents and fragrances on your DIY Halloween candles is very easy. First, remove the wax from the heat source and set it aside. You may now add your preferred amount of fragrance oil to the melted wax and swirl it in well to combine the flavors.
Depending on your own liking, you can increase or decrease the amount of fragrance oil used. Aromatherapy essential oils may also be utilized to scent your candle. In a separate bowl, whisk together the oils and wax.
Setting the scents depends on your preferences, so always follow your vibe whenever you put your scents on the candles you make. One thing you must remember, however, is that you must not think that scents and fragrances are required in this project. If you do not want to put fragrances on your candles, you can skip this step and proceed to the next one.
Step 6: Pouring the First Layer on the Candle (Optional)
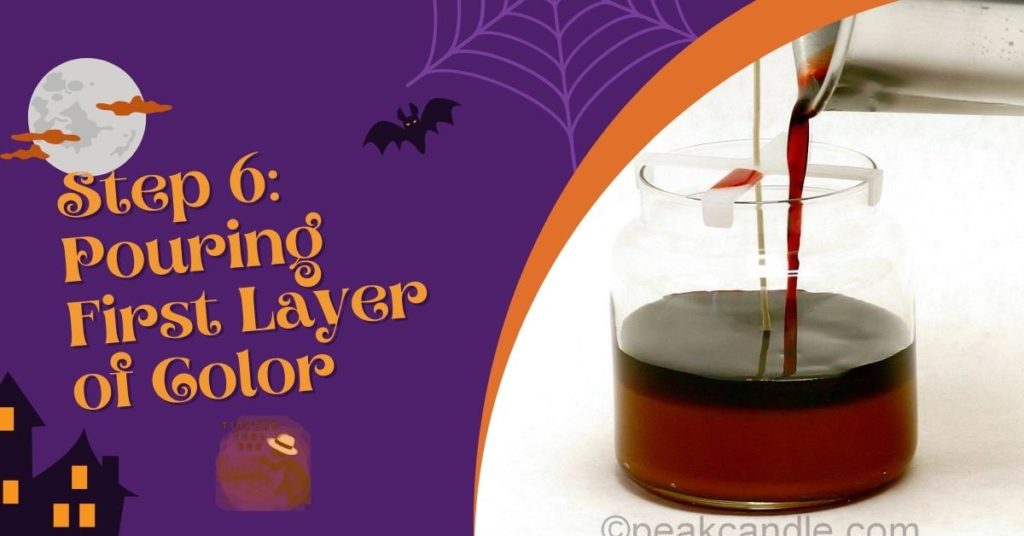
This step is for those who want to create layered designs on their candles. However, creating layers on your DIY Halloween candle can make your candles look more appealing in front of other people. If you do not want to layer on your DIY candles, you can skip this step and proceed to the next one.
Using your first measuring cup of melted wax, gently pour it into your glass container, being careful not to let any fall down the sides of the vessel. When I was pouring, I put some of the wax to the bottom of a dixie cup first because I discovered that it was simpler to pour this way. After all, you could fold the bottoms of the cups to fit your requirements.
I also removed the wick bar during the pouring process because they were standing rather straight on their own; I reattached them after the wax poured. Depending on how many layers you intend to add, you may vary the amount of liquid you pour into your initial layer accordingly.
Please keep in mind that each layer will need to harden before you can add the next; thus, the more layers you add, the longer it will take for the process to complete. Not all of the wax should be used up at once because it will be warmed later to be used for your other layers of the same color.
Again, you are not required to do layering on your DIY candles. Still, I am also putting this here so that those who want to do layered candles can follow the steps properly. You are free to skip this step if you wish.
As an added bonus, allowing the candles to sit in a room around the temperature of 71 degrees Fahrenheit will aid in adherence to the glass containers and prevent the wax from splitting.
Step 7: Pouring the Additional Layers
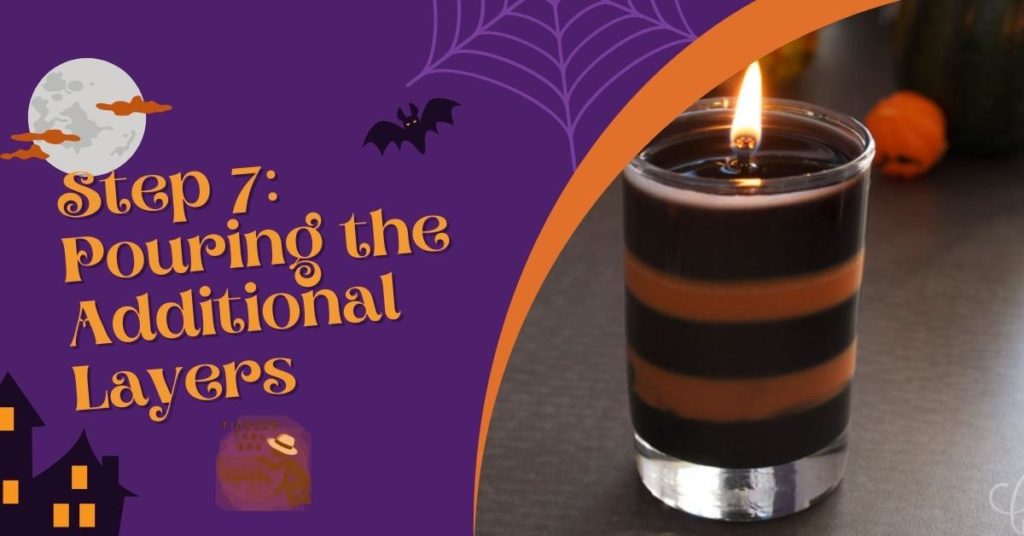
Allow for full cooling and solidification of the previous layer. This will take at least 30 minutes, but it is necessary to guarantee that the colors do not bleed together when you pour the next layer of heated wax into the mold.
In the meantime, you may prepare the next color to be poured by filling the second measuring cup halfway with wax and repeating the melting and coloring procedure, substituting the first color with the second one you’ve chosen until the desired hue is achieved.
If the melted wax in your glass container has been set, you may now add the melted wax of the second hue, taking care not to spill wax on the edges of the container as you pour it in. Allow for cooling of the layer. Continue in this manner until all subsequent levels have been completed.
Remember that you must pour accurately to prevent the candle wax from spilling out of the votive or the glass container. Be careful in pouring the wax to avoid your hands getting burnt or scalded on accident. Lastly, use oven mitts or something to protect your hands while pouring wax over to prevent your hands from getting burnt in the process.
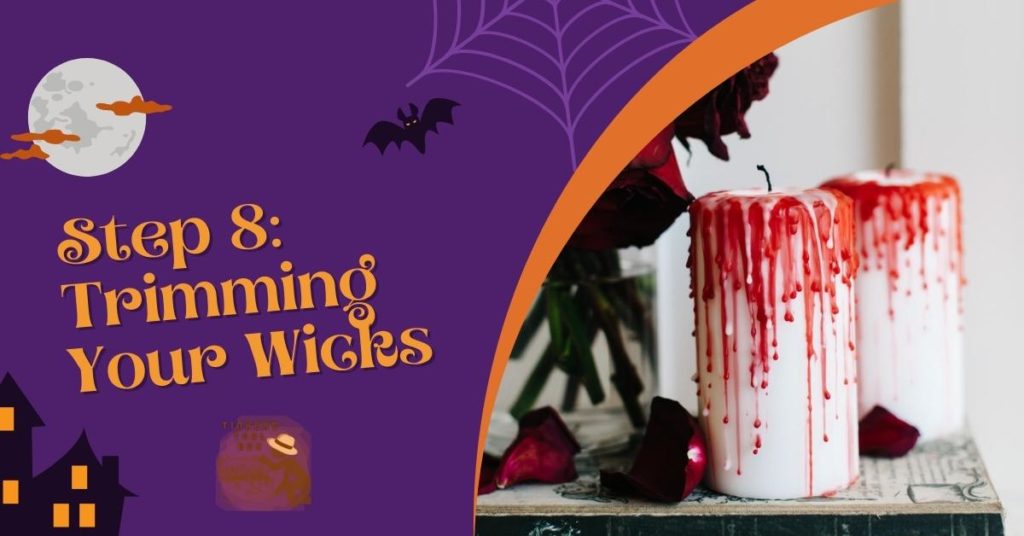
Step 8: Trimming Your Wicks
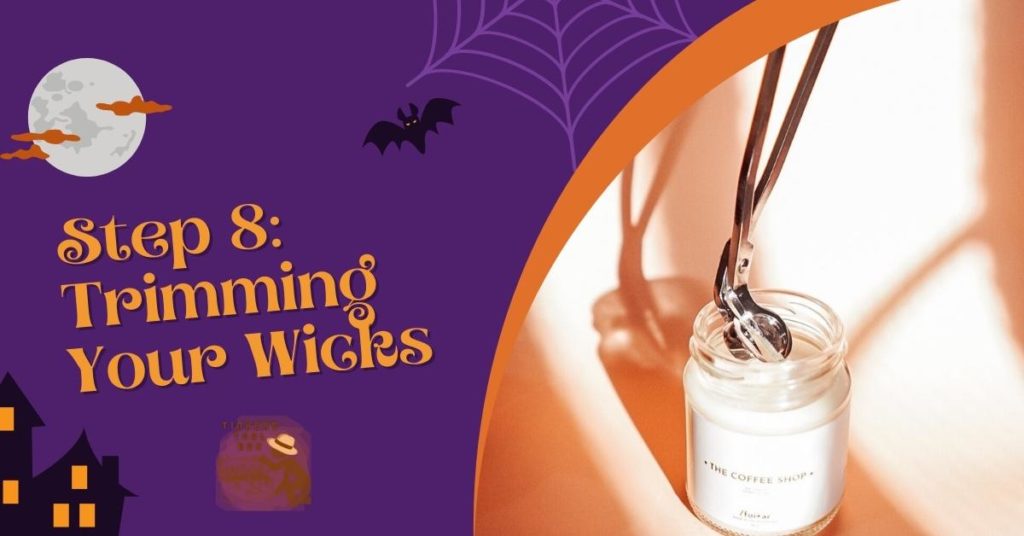
Once you have finished pouring the wax on the votives or containers, the next thing you should do is trim the excess wick. To finish your candles, once you have completed all of the layers that you desire, cut the wick with a pair of scissors so that there is around 1/4 inch of wick left above the wax.
Be careful not to trim too much because you will be left with no wick to put a flame on your candles, and it would be hard for your candle to shine its light brightly because of the shortness of the wick. It will also make the light a bit dimmer, which can ruin the Halloween aesthetic that you want to achieve with this candle-making project.
Step 9: Finishing Touches and Embellishments
You can also decorate the outside of your DIY Halloween candles with the help of ribbons and other sorts of embellishments, such as stickers, lace, or basically anything you want. You can put these candles on your coffee table as a centerpiece or on the sofa tables with the lamps for decorative purposes.
You can also make more of these candles and use molds to create Halloween candles that look like pumpkins, skulls, and so on. Halloween is the season to be festive and creative, and you should basically let out the inner spook in you. Give these candles to your friends and family or for parents who will be trick or treating with the kids as a little pick-me-up from making your Halloween fun and festive.
Create DIY Halloween Candles That Bring Out the Spook
At the end of this project, you already have a batch of spooktastic DIY Halloween candles that you can proudly display on different parts of your house. You can even hand some of these out to friends and family as gifts. The kids might be having all the candy, but you will have the longer-lasting goodies. You will also get to save more money because you will no longer buy ready-made candles from department stores or specialty shops anymore when you can already make Halloween candles that have your personal touch in them.