Old broken crayons lying in your house are a mess to look at. It is also a big waste to dispose of them, especially if they still serve their purpose, which is to color. The good thing is that crayons can color candles as much as they color your artworks, bright and exciting. These crayons would make a perfect wax for creating colored candles which you can make with your kids, following all the precautions for your safety.
- Step 1: Prep Time: Ready All the Needed Tools and Ingredients
- Step 2: Choose Wisely: Picking the Candle Wick for Your Candle
- Step 3: Unwrap: Remove the Old Crayons from Its Paper Cover
- Step 4: Make It Straight: Attach the Wick to the Candle Mold
- Step 5: Melt the Crayons Using a Double Boiler or a Microwave Oven
- Step 6: The Fragrances You Like: Add Scents to Your Crayon Candles (Optional)
- Step 7: Pouring Time: Pour the Melted Crayon into the Mold
- Step 8: The Cool Down: Let the Candle Cool and Harden
- Step 9: Keep It Short: Trim the Excess Wick
- Step 10: Finishing Up: Remove the Candle Out of the Mold
- Conclusion
Step 1: Prep Time: Ready All the Needed Tools and Ingredients

Prepare all these tools and ingredients before starting your project.
Use old crayons that are already broken or have spots of other colors on them and would have no use in your artwork. The broken and small crayon pieces will be useful as candle wax in our project.
Crayons are made of paraffin or a combination of paraffin, beeswax, and other waxes. Therefore, creating candles using crayons is highly possible as they use the same type of wax and have the same effect when used in candles.
The recommended crayons for this project are soy crayons, paraffin crayons, or those containing natural ingredients, which are good for your health.
Glass jars or any microwavable containers are where you place your melting crayons. You’ll also need heating equipment like a microwave oven or a double boiler for melting the crayons.
An optional essential oil would be great to add natural scents to your candles and mask off the crayon’s original smell.
A bamboo skewer would be used to stir the melting crayon wax and hold the wick in place while being attached to the mold or container. It will be placed horizontally at the container’s mouth together with the clothespin. These two stabilize and keep the wick upright while the wax cools and hardens.
Lastly, prepare candle molds or containers like a metal cookie cutter, a mini baking cup, or any shaped containers you have at home.
Step 2: Choose Wisely: Picking the Candle Wick for Your Candle
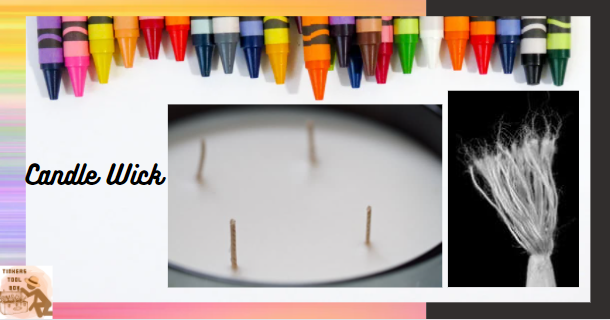
The size of the wick you will use for your project depends on the size of the candle, the additives in it, and the type of wick used.
When choosing your crayon candlewick, there are several things you must consider. The size matters as too small of a wick would leave a large amount of unburned wax on the candle. On the other hand, large wicks relative to the candle size produce excessive smoke, burn too fast, and cause wax overflow down the candle’s side.
Also, take note that smaller candles need a smaller wick diameter so that the candle burns evenly throughout its height.
Here are some candle wick recommendations you can use in your candle crayon. CD wicks work best with beeswax, gels, and paraffin. They are great for candles of solid color and no fragrance.
CDN wicks work best with paraffin wax and candles of solid color, free-standing pillar candles, and container candles. You may also want to try the 3-ply cotton wicks, which can be best paired with paraffin wax and candles like pillars and tapers.
Last on my recommendation list is the square braided wick, which is great for any wax type and works for any candle type.
Another thing to note is that the wick should cover the depth of the container and go over the rim of the glass, with enough length to burn.
Step 3: Unwrap: Remove the Old Crayons from Its Paper Cover
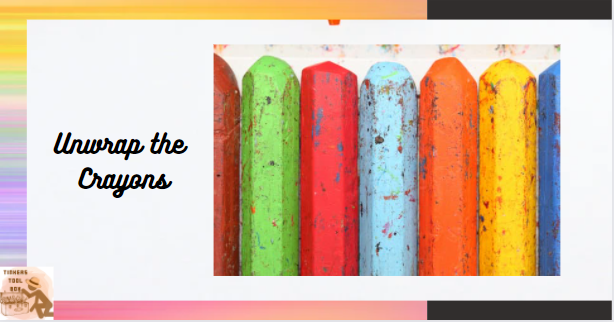
The next step is to unwrap the old crayons from their paper wrap (if there is still any sticking on the crayons), and there are three ways you could go about it.
You can peel off the paper wrapping on the crayons by hand if you are patient enough. However, this may take a long time as crayons wrappings are hard to remove and are stuck strongly on the crayons, especially if it has been around for a long time.
One good method to get rid of the crayon wrappings is using a utility knife. Score along the sides of the crayon using the utility knife and peel off the paper sticking throughout the crayon.
The last method is using water and a few pieces of ice. Prepare a bowl and add some water to it. Then, put some ice cubes in the bowl and wait for the water to get completely cold. The next step is to put your crayons in a bowl of cold water. Let it soak for five minutes.
After being soaked in cold water, you can peel off the wrapper using any of these two methods. First is snapping the crayon in half and peeling the wrapper where the crayons are snapped.
For hard-to-remove wrappers even after being soaked in water, lay them on the table and use a knife to scrape off the remaining stubborn crayon wrappers gently.
Step 4: Make It Straight: Attach the Wick to the Candle Mold
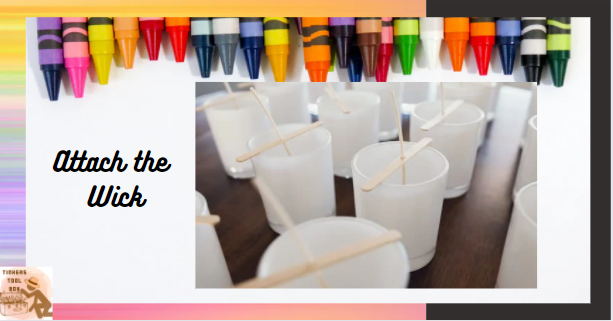
Attaching the wick in your candle container is done in two ways.
You can attach the wick before pouring the melted wax into the mold. Dip the bottom of the wick in the melted wax and place it in the bottom center of the container. Make sure the wick goes over the height of the container and covers the whole candle.
The melted wax would serve as an adhesive and help fix the wick into the container. Wait for a couple of minutes until the wick is attached well to the container. Then, place bamboo skewers at the top of the container and wrap the other end of the wick there. This holds the wick straight and in place, ready for the pouring process.
If you want to attach the wick after the melted wax has been poured into the mold, follow these simple steps. Make a small hole in the middle of your candle by poking it with a toothpick.
Make sure the hole goes all the way to the bottom of the container to ensure that the wick covers the full height of the candle. This prevents uneven burning of candles due to improperly placed wicks.
Insert the wick on the hole, then press the wax lightly to close it around the wick without damaging the shape of the candle.
Step 5: Melt the Crayons Using a Double Boiler or a Microwave Oven

Put the crayons in their melting containers, having one container each color. You can also mix two colors of your choice. Just place them in the same container and melt them together (like yellow and blue to make green).
The estimated crayons per container are 10-15, but it still depends on the size of the old crayons you’re melting and the size of your melting container.
Follow these simple steps if you are using a double boiler. Place the containers in the double boiler and over medium heat. Stir the melting crayons using bamboo skewers, having one skewer per color, so they don’t mix up.
Remove the containers from heat when all the colors have melted. Remember to avoid getting water in the melted wax as it may produce white spots on your candle.
When using a microwave oven, place the microwave-safe containers in the oven, one at a time. Set the crayons to melt for two minutes, stirring them after every 30 seconds. Have separate containers for each crayon color or melt two colors in one container to create another color shade.
For faster melting, grate or chop the crayons into smaller pieces. Crayons begin to soften at 105 degrees Fahrenheit, with the melting point between 120-147 degrees Fahrenheit.
Step 6: The Fragrances You Like: Add Scents to Your Crayon Candles (Optional)

An optional step in crayon candle making is adding scents and fragrances. You can use one scent for the whole candle or a different scent per layer of color in your candle. The amount of fragrance used depends on the size of the candle. Add one to two drops for small candles and three to five drops for bigger candles.
Note that using perfume as a fragrance to crayon candles is not advisable. Perfumes are highly flammable, so you won’t be doing your candles any good if you use them. The only fragrances you can incorporate are those suitable for candles like fragrance oils and essential oils made from natural ingredients.
Here are some fragrance ideas to pair with your layered crayon candles. Baked cookie fragrances are perfect for gold, mahogany, and maple tones. You may also try blueberry fragrances for blue, purple, and pink colors and candy cane fragrances for red and white.
Floral essences are great for pink, yellow, green, peach, orange, lavender, and apricot colors, while herbal essences work well with any shade of green.
Depending on your preference, you can also mix and match essences and fragrances. The amount you’ll incorporate may also vary depending on the scent strength you want for your candles.
Step 7: Pouring Time: Pour the Melted Crayon into the Mold
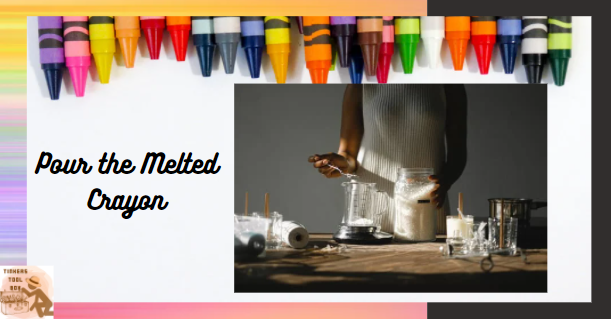
It’s now time for pouring. Remove the pot of wax from heat once all its contents are completely melted. Then, pour it carefully into your chosen mold or container. Pour in jars for container candles like votives and tealights and mold for pillars and free-standing candles.
Use a pouring pot if you have one. This pot has a spout designed for dripless pouring of the melted wax. It also prevents any accident by having contact with the hot wax. Pour the wax until near the brim of the container, leaving space for finishing the uneven top surface later.
If you are making layered crayon candles, let the previous layer of wax harden first before pouring the next layers. This way, the layers of melted wax would not mix and would have a visible division of colors.
Melted crayon wax solidifies fast (20-30 minutes wait time), so you don’t have to wait too long. To know if it is the right time to pour the next layer, poke a toothpick on the poured layer. If the toothpick comes off with color stains, the wax is still not hard enough to accept another layer. If the toothpick comes off without a stain, that is the right time to pour on the next layer.
Use contrasting colors for each layer to make your layered candle look nice and stand out because of its dynamic color elements. Follow the same when pouring another layer of crayon wax.
Ensure that the wick is stable while pouring the hot wax. Do not pour directly on top of the wick. Rather, pour on the sides of the container, avoiding the wick as much as possible. Furthermore, keep the wick straight at the center by securing it with a bamboo skewer and a clothespin.
Lay the bamboo skewers horizontally on top of the container. Then, place the wick in between the two skewers and use the clothespin pin to hold the wick upright, preventing it from dislocating as the weight of the pouring wax falls on it.
Step 8: The Cool Down: Let the Candle Cool and Harden
After pouring the wax on your desired container, let it sit, cool, and harden. An overnight rest would be enough to make your candle ready to burn a day after it is made.
Step 9: Keep It Short: Trim the Excess Wick
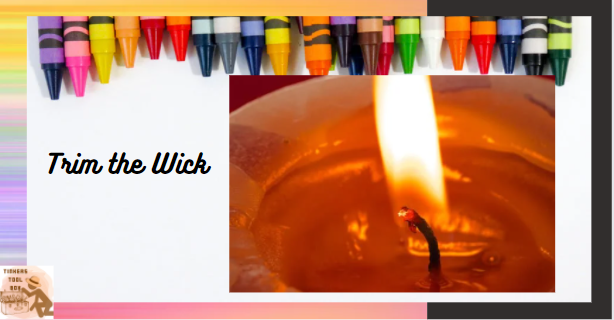
Trim any excess wick if there is any on the hardened candle. The wick should sit ¼ inch above the wax, and the excess should be trimmed off before lighting the candle. Do not skip this step, as long candle wicks relative to the candle’s size may produce smoke and soot.
The wick should always be the correct size, so the candle burns evenly throughout its body.
Step 10: Finishing Up: Remove the Candle Out of the Mold
The last step is to remove the crayon candle from its mold. Just tap the container lightly on your table to release your candle’s grip from the mold.
If you are having a hard time removing the candle, place it in the fridge for a couple of minutes. The temperature change, from warm to cool, would make the candle shrink a bit, so it is easier to remove from the container.
Do not do these steps for container candles. These steps only apply for candles that use molds, as container candles are meant to be used with the candle inside them.
Conclusion
After this project, we can say that crayons are also great ingredients for candle making. Aside from the fact that they already have their bright colors, you can make them using old materials found at home, saving you a lot of money. Now, gather all your old crayons, old jars for your containers, and some tools in the kitchen, and start creating your crayon candles today!