I have been working with beeswax for a long time now, and I must admit, they are the best for natural candles. As much as I want to use 100% natural beeswax, there are some in the market which is not pure, meaning it has been mixed with either paraffin or other types of candle wax. So, I’ve ventured on a journey to find out how to render my beeswax with all the simple materials and tools I can find at home.
- Step 1: Get Ready: Prepare the Needed Tools and Materials
- Step 2: Wrap Up: Place Your Honey Comb in a Piece of Cloth
- Step 3: Heat It Up: Boil Water in an Old Pot
- Step 4: Honey Comb Dive: Place Your Honey Comb into the Water
- Step 5: Cool Down: Remove the Cloth from the Water
- Step 6: The Appearance of the Beeswax Disk: Remove the Beeswax Disk from the Water
- Step 7: Remelt the Wax: Remove Remaining Impurities
- Step 8: On to the Container: Pour the Melted Wax into Your Mold
- Step 9: The Cool Down: Allow the Beeswax to Completely Cool in the Mold
- Step 10: Clean Up Time!
- Conclusion
Step 1: Get Ready: Prepare the Needed Tools and Materials

Wax cappings and honeycomb. This is where you will extract the beeswax. It’s what remains after you have extracted the honey from the comb. Other wax sources include old combs and scrapings from the beehive.
Old cardboard or old newspapers. These will be laid out on your working table to protect your area from spills of hot wax.
A piece of cloth (preferably cheesecloth) will serve as a filter of debris from the melted honeycomb. We’ll also need rubber bands to hold the cheesecloth in a bundle as it is dipped into the hot water.
Large and old metal pot. This is used to melt and separate beeswax from the honeycomb. It should be old enough not to be used again for other purposes rather than the rendering process. Rendering leaves too much dirt on the pot. These sticky residues would stick to the pot and are hard to remove.
Old metal tongs are needed to aid in the melting process and removal of the hot, hardened wax out of the pot.
Distilled or filtered water will be used to ensure that no other impurities will mix into the beeswax.
Beeswax mold or ice cube trays. This is where you will pour the hot wax to let it cool and harden before using them on your candles.
A large container is needed for storing the small beeswax pieces. It can be a glass jar or a plastic container.
Mineral oil would help remove sticky wax on your pot and tools used.
Note: You should designate pots and utensils for rendering beeswax. The dirt produced from rendering beeswax is hard to remove, and you’ll not be able to use the pots and utensils for other purposes anymore after they are tainted with dirt. So, it’s better to provide a separate set of materials for beeswax rendering.
Step 2: Wrap Up: Place Your Honey Comb in a Piece of Cloth
Rendering beeswax is a simple but time-consuming process that would take a day or more on average to fully extract all the wax from the comb.
The first step in rendering is to protect your work area. Beeswax is sticky and very hard to remove from surfaces. Layout some used cardboard or newspaper on your working table to protect it from spills and drips of beeswax.
The next step is to wrap the honeycomb and wax cappings in the cheesecloth. Layout the cloth on your working table and place the wax cappings or honeycomb in the center of the cloth. Then, draw the edges to the center to create a bundle and secure it using a rubber band. Make sure you tie it tightly, so the debris from the honeycomb won’t escape the filter.
Some directly submerge the wax and honeycomb into a pot of hot water. This method also works, but wrapping in a cheesecloth would filter out small bits of dirt and debris more effectively.
Step 3: Heat It Up: Boil Water in an Old Pot

Prepare the hot water to melt and separate the wax from the honeycomb. Fill the metal pot with one-half full of water, then warm it over medium heat. Then, place the pot on the stove, maintaining medium to low heat.
Beeswax is highly flammable, so you should only set the heat to low and not to boiling temperatures to avoid burning the wax. Remember not to leave the melting wax unattended to make sure it melts evenly with the right amount of heat.
Step 4: Honey Comb Dive: Place Your Honey Comb into the Water
When the water has already warmed up, it’s time to place the bundle of honeycomb into the pot of hot water. The heat of the warm water will make the wax melt off and separate from the honeycomb.
The liquid honey and wax will seep through the cloth holes as the bundle is submerged into the water. The honey sinks at the bottom of the pot, while beeswax will float to the top because it is less dense than water.
There is a reason why we use hot water as a medium to melt the wax. You can just directly melt the wax in a stove, but its low melting point would not be enough to melt all the wax and separate it from the dirt and debris.
The hot water would increase the heat for melting but not raise it to damaging temperatures. This is fair enough as beeswax is sensitive to high temperatures, and excessive heat may discolor the wax and ignite when exposed to a naked flame.
Let the wax seep through the cheesecloth holes. Wait until almost all wax and honey have escaped through the filter. You can stir the contents of the pot to help the wax melt even more.
Take note not to cover the pot. Covering it may be unnecessary, and removing the stains from the pot lid would also be another hard task.
Remember that beeswax is highly flammable, so you shouldn’t dare try to raise the heat from the stove, just enough to keep the water warm but not boiling and the wax to melt and not burn.
Beeswax would start to melt at 144-147 degrees Fahrenheit (62-64 degrees Celsius) and has a flashpoint of 400 degrees Fahrenheit (204.4 degrees Celsius). The wax would discolor at around 185 degrees Fahrenheit (85 degrees Celsius).
There are also several ways you can melt your beeswax aside from the immersion method that we are doing. We also have the bain-marie method. To do this, prepare a large pan of hot water and place a heat-proof dish on top of it. Then, melt the wax in the dish and use a cloth to filter the debris before pouring it into the mold.
A solar extractor is also used to render beeswax. It consists of an insulated metal box with a glazed panel where the sunlight enters to extract beeswax from the honeycomb.
Note: Do not leave your beeswax unattended. Beeswax is highly flammable and could cause fire when improperly supervised. Placing a fire extinguisher near your work area is always a smart move when dealing with flammables.
Step 5: Cool Down: Remove the Cloth from the Water
Remove the pot from the heat once all the wax has melted. Then, remove the cloth from the hot water using tongs. Squeeze out as much remaining wax and honey from the cheesecloth and let them mix with the pot’s contents. Remember not to touch the cloth by hand, as it still contains some hot wax that can burn your fingers.
In the cheesecloth, you’ll find debris originally stuck in the wax cappings and honeycomb and some slumgum, contents from dead larvae, pupal shirts, and old chalkbrood. You can now throw away the cheesecloth with all the debris as it will not be useful for the next rendering process.
Allow the contents of the pot to cool. You’ll need to wait for two to three hours for it to cool and harden. The wax starts to cool when it begins to turn yellow and solidify. It would form a hard layer on the top of the pot as it cools, and the dirty water will be left underneath the beeswax disk.
Step 6: The Appearance of the Beeswax Disk: Remove the Beeswax Disk from the Water
Wait until all the beeswax is solid and create a disk on top of the pot. It will begin to shrink from the sides of the pot, and you’ll also notice it change its color, becoming a bright yellow known for beeswax.
Push on the hardened wax lightly. This releases its grip from the sides of the pan. Then pull the wax layer out of the pot using your tongs. As you remove the wax, you’ll notice that the bottom part is still dirty.
The part where water meets the wax is unfiltered, and some impurities would still be sticking there. Just cut or scrape off the bottom layer of the beeswax disk to remove these impurities. Set aside the scraped beeswax as it can still be rendered again to produce more refined beeswax.
The remaining beeswax can now be used for a couple of applications like soap making and candle making. Or, you can render it again for other applications like lip balms and creams, which require more refined beeswax since they are applied directly to the skin.
Throw the dirty water in compost and not in your kitchen sink. The water contains bits of dirt and pollen and would clog your kitchen drains. It is better to throw them in your backyard, where the soil could directly absorb them.
Be careful of wax splatters when throwing the water from the pot. The hot wax retains heat longer compared to water, meaning your water may have cooled off, but the wax would still be hot and may burn badly on your skin.
Always be careful when handling the hot wax. The sticky beeswax may burn badly if it gets in contact with your skin. Feel free to use protective gloves while pouring the hot water and removing the wax from the pot.
Step 7: Remelt the Wax: Remove Remaining Impurities
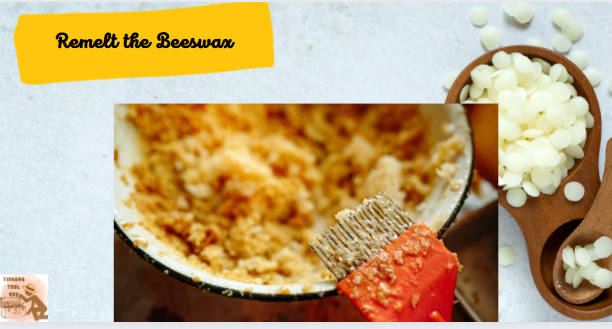
Repeat the process of melting the beeswax to ensure that all further impurities and small bits are removed from the wax. Repeating the rendering process produces pure and refined yellow beeswax.
Again, melt the wax using the metal pot over medium heat. Stir it while melting and wait until all the wax has melted. Then, remove it from the heat and use a strainer to filter out the small debris. You can also use a piece of cloth as a filter, a new one, not the ones you used earlier.
Step 8: On to the Container: Pour the Melted Wax into Your Mold

The next step is to pour your melted wax into the desired mold or container, where they will rest and harden. You can pour the wax in beeswax mold or silicone ice cube trays, just the right size to be easily melted for candles. These beeswax cubes are easier to store and measure for future candle projects.
Step 9: The Cool Down: Allow the Beeswax to Completely Cool in the Mold
Allow the wax to completely cool and harden in the mold. The cooled wax would shrink on the mold because of the temperature change, from being melted in hot water to being cool in the molds. Remember not to remove them from the molds too soon if you are too excited to use them in your candles.
When the beeswax starts to pull away a little from the mold, it means it has completely hardened, and it’s the perfect time to remove them from the mold.
Cut the beeswax into small chunks. The ice cube trays are the perfect size for beeswax. This way, they are easier to work with and would melt quicker than larger chunks which are prone to overheating. Store them into a large container, not in direct contact with heat, so they preserve their solid state.
Step 10: Clean Up Time!
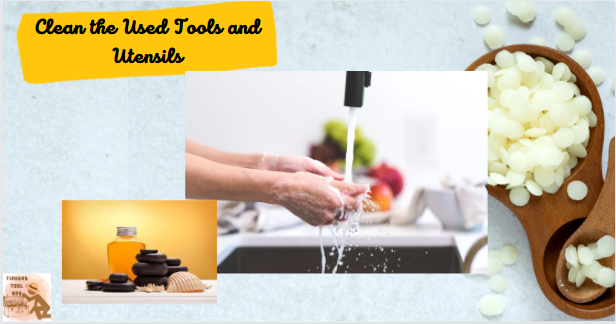
Clean your pot and all materials that have been in contact with the beeswax. This would be hard as beeswax would stick strongly to these tools. You can rinse them with dishwashing soap and tap water or use mineral oil to help remove the sticky wax.
Beeswax would stick long on surfaces and may clog your kitchen sinks. Do not pour the dirty water and remaining wax on your drain. You can dispose of them in composts or in the backyard, where the soil will absorb them.
Conclusion
Now that we have accomplished the task of rendering our beeswax directly from the honeycomb, we can be assured that the wax we’ll use in our candles is all-natural and would have all the beneficial contents of pure beeswax. You can now prepare all your candle making tools and ingredients and start making your beeswax candles that are perfect for any corner of your house and also for gifting.