The amount of work and time required for leather companies to tan animal hides and turn them into leather is definitely not to be underestimated. But this does not mean that we cannot do it on our own, in the comfort of our home. Certainly, we can tan leather with the right instructions to follow and the huge amount of resources we can utilize in our homes.
Tanning an animal hide into leather involves processes such as dehairing, fleshing, soaking the hide into the water and the tanning solution, and softening the hide. Home tanning can be done in two ways using two tanning solutions. The first one is bark tanning which uses tree barks as the tanning agent. The second option would be brain tanning, which uses an animal brain (preferably the brain from where the hide comes from) as its tanning agent. These tanning agents contain tannin, which makes the hide more durable and less susceptible to decomposition.
- Bark Tanning Leather
- Set Up a Large and Open Outdoor Area as Your Working Space
- Examine the Hide and Trim Off Unwanted Edges
- Soak the Hide in Water to Wash Off Dirt and Remaining Blood
- Flesh the Animal Hide to Remove Remaining Meat and Fat
- Salt the Hide to Prevent Bacterial Growth
- Buck the Hide Using a Wood Ash Solution
- Soak the Skin into the Tanning Solution
- Hang the Leather and Let it Air Dry
- Soften the Hide to Produce a Smooth and Soft Leather
- Brain Tanning Leather
- Getting the Hide Off the Animal
- Skin and Flesh the Hide to Remove Remaining Meat and Fats
- Soak the Hide in Water to Loosen the Hairs
- Grain the Hide to Strip Off the Outer Layer of the Hide
- Membraining the Animal Skin to Remove the Mucous Membrane
- Wring the Hide to Further Break Down the Mucous Membrane
- Braining: Applying the Brain Solution to the Hide
- Hand Softening the Hide to Produce a Supple Leather
- Smoking the Hide to Add Water Resistance to the Leather
- Conclusion
Here are the materials you would need for Bark Tanning:
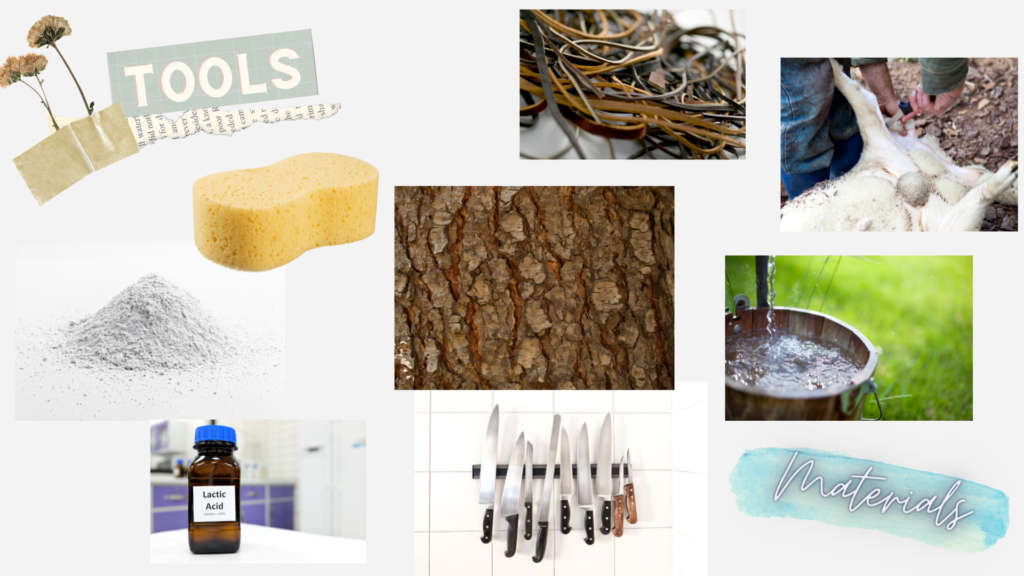
- Tools
- A fleshing knife is a long straight blade that aids in removing the flesh from your animal hide. It is used in dehairing and scudding (flushing out the skin interior). Furthermore, it can assist in soaking hides and removing excess moisture from the hide.
- The skinning knife has a curved blade used for cutting the hide after tanning. It is smaller than a skinning knife but cuts with the same sharpness.
- A dull edge knife is another tool used for removing hairs from the animal hide.
- Materials
- Animals hide. Choose and prepare the animal hide that you want to tan. Any animal hide will work with this tanning process, but a squirrel and deer hide are the most recommended because they are easy to work with, for starters.
- Shredded bark and two large wooden sticks. Shredded bark will be the main tanning compound for bark tanning. The tree bark has high tannins, a natural compound that helps protect leather, making it more durable and prevents it from breaking down. Bark tanning is also known as vegetable tanning. It is recommended to prepare at least half a bucket or more of any tree bark. Try to get the tree bark from a fallen tree instead of a living one.
- Cords, wool socks or sponge, and leather conditioner. Cords will be used to hang the tanned leather, while the wool socks or sponge are to apply leather conditioner all over the leather.
- Lots of water will be needed for cleaning and soaking your animal hide.
- Wood ash solution that is available in Amazon
- Hydrated lime
- Lactic acid or vinegar
Prepare the following material if you prefer to go for Brain Tanning:
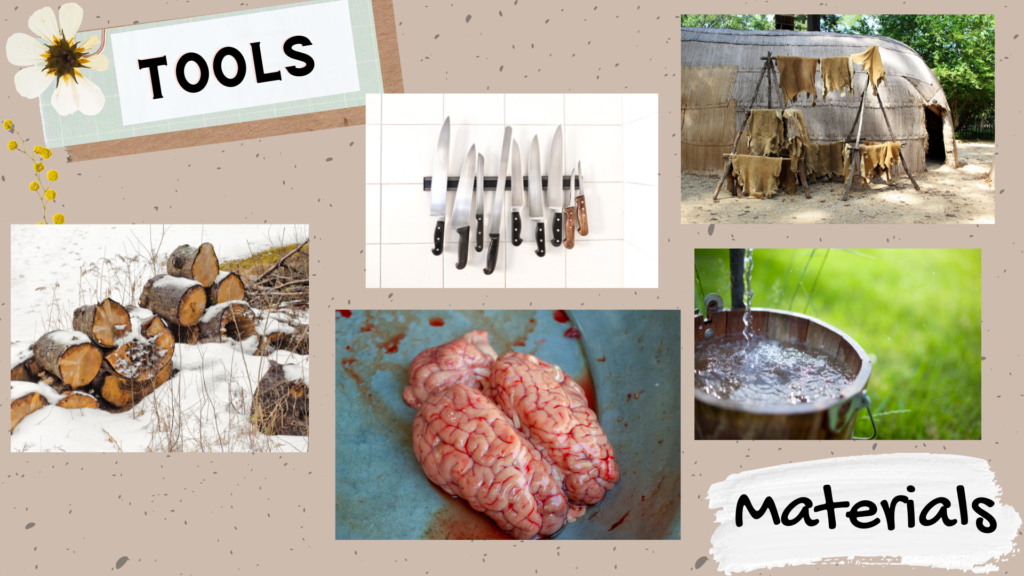
- Tools
- Fleshing knife
- Scraping tool
- Smooth object (like the back of a chair) for hand softening the hide
- Materials
- Many buckets of water
- Animal brain or canned brain to be used as the tanning agent
- Wood (preferably rotten hardwood) for smoking the hide
- Animal hide
Now get your hands on animal skin, and let us tan your hide the natural way by following these steps.
Bark Tanning Leather
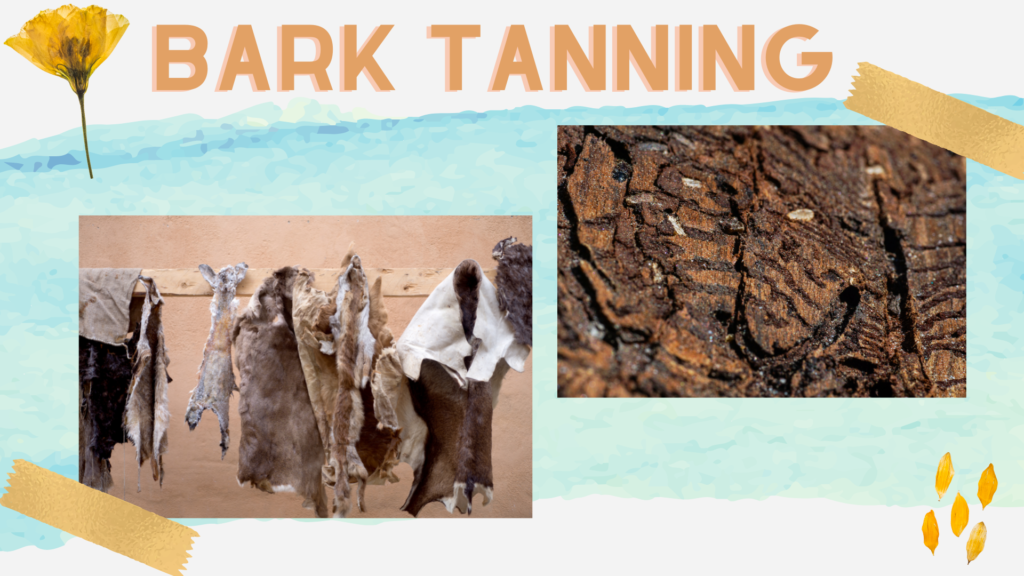
Bark tanning is an effective home tanning method that uses tree bark as the main tanning agent. The tree bark makes durable and water repellent leather which is used for many products.
Set Up a Large and Open Outdoor Area as Your Working Space
Home tanning leather can get messy, so finding a large open area, preferably outside the house, would be beneficial for you. The space would allow you to move with ease, especially if you are working with companions. You can set it up in your backyard or your garage. It is highly recommended that you choose a soiled area rather than cemented one so that the soil will automatically absorb excess liquid from tanning. Plus, the spilled liquid through the tanning process will be a good all-natural fertilizer for the soil.
Examine the Hide and Trim Off Unwanted Edges
The next step would be getting the hide off of the animal by using a sharp knife and examining it. Hides fresh from recently captured animals are recommended for use in tanning. You may store the hide in a freezer if you tan it days after removing it from the animal.
In skinning the animal, make sure not to damage the skin and avoid creating holes to harvest a good amount of quality skin for tanning. Evaluate the animal hide and trim off unwanted edges that may not be of good use for tanning. Examine the hide for any holes, lacerations, or knife marks and trim off excess and low-quality parts of the hide. Preparing a high-quality hide will give you the best-tanned leather.
Soak the Hide in Water to Wash Off Dirt and Remaining Blood
After examining the animal skin, soak the hide in water for two days, then rinse it off with clean water. Soaking with water helps wash away the dirt and remaining blood on the hide and makes it more pliable.
This step may be optional if you prefer to directly flesh the hide right after being removed from the animal body. Just avoid scraping the flesh while the hide is absolutely dry. This will be both hard for you and may cause damage to the leather.
Flesh the Animal Hide to Remove Remaining Meat and Fat
Strip off the remaining flesh on the hide using your fleshing knife. The meat and fat from the hide will contribute to its rotting and decay, so all of it must be removed immediately. Scrape off all the meat and fat that remains in the hide. Fresh meat and fat from a fresh kill may be a good ingredient for a soup. However, hides peeled from the animal several days ago will not be safe for human consumption.
To flesh a hide, place it on a flat level surface like a wooden working table. Make sure the hide is not folded in any way for easier fleshing. Next, hold the fleshing knife one hand at each side and glide the blade over the flesh. Scrape small areas at a time and make sure not to hit the skin with the knife. Continue scraping until no flesh remains and only the skin is left.
Always be cautious when using knives. You can ask someone for help as tanning at home may be physically tiring.
Salt the Hide to Prevent Bacterial Growth
Salting is an important step in tanning animal hides. It sets the hair and keeps the skin from decomposing. Applying salt also helps prevent bacterial growth from the remaining flesh on the hide.
Place the hide on a flat surface flesh side up. Then, apply a generous amount of non-iodized fine-grained salt onto the hide, making sure to cover every inch of the hide’s flesh side. Salting the hair side is not necessary for this process.
Roll up the hide after salting and position it inclined to let the fluids drain off the hide. Let the hide rest with the salt for at least 12 hours. After the 12-hour resting, unroll the hide, then shake off the remaining wet salt on it. Then, apply a new layer of salt on the hide, following the same procedures stated above.
Wait again for another 12 hours for the salt to drain the moisture from the hide. When the hide appears to still contain a lot of moisture, you can repeat the salting process a third time. However, if the hide seems to be drying, with no fluids dripping from it, you may just let it dry for the next 24 hours.
Buck the Hide Using a Wood Ash Solution
Bucking is the practice of soaking an animal hide in an alkaline solution (wood ash and water). The process makes the fibers of the hide swell, which helps loosen the hair and epidermis off the skin. It is then finished off by cleansing the hide with fresh water. Bucking also helps shift the hide’s pH level for easier tanning.
Mix 11 gallons of water and 2-3 cans of wood ash, then soak your hide in the mixture for 3 to 4 days. Next is to soak the skin into a hydrated lime mixture for at least six days. The mixture is composed of 3-5 liters of hydrated lime and 19 liters of water. This mixture helps loosen the hairs on the hide.
Remove the hairs using a blunt knife. Carefully guide the knife over the hide to remove the fur and scrape lightly to avoid damaging the skin. Soak the remaining skin in water for at least 4 hours.
Soak the skin in a mixture of lactic acid and water. Mix one ounce of lactic acid with 38 liters of water and leave the skin in the mixture for one day. This step will deactivate the lime on the skin. You can also use vinegar as an alternative for lactic acid.
Soak the Skin into the Tanning Solution
Prepare the tanning solution using tree bark and water. Mix the tree bark and water in a bucket with half and half proportion. Heat the mixture while stirring it using a large stick or wood. Wait until the solution is steaming before removing it from the heat.
Remove the boiled tree bark from the solution. You can use a strainer or a piece of cloth to remove the remaining small pieces of tree bark. Then, pour the mixture into a large container. The container should be big enough to let the skin soak in the mixture.
Let the skin soak in the tanning solution for several days. Stir the solution with the skin daily to let the solution sip through the skin and to the fibers. After 3-5 days of soaking, you can now scrape the dark brown layer of the hide. Just lay the skin flat on a table, then gently remove the remaining outer skin of the hide using a dull knife.
Return the skin to the tanning solution and soak the hide for at least a month. Soaking the hide in the tanning solution may also take more than a month. The longer the hide is soaked in the tanning solution, the more tannins get into the hide. The length of soaking makes the hide more durable as the mixture needs to sip into the skin fibers to prevent it from rotting. If the hide is soaked for less than a month, it will not rot, but it will also not be good quality leather which lacks durability.
Hang the Leather and Let it Air Dry
After soaking into the tanning solution, it’s time for drying. Create a rectangular frame made of wooden sticks or branches. Tie them together using a strong string. The frame should be big enough so the hide can stretch over the frame and dry.
Cut small holes around the hide edges, then place a thin string in each hole. Use these strings to hang the animal hide into the rectangular frame. Make sure that the leather is extended on all sides and no part is folded. Hanging the hide in a rectangular frame is a great way to ensure that the leather will dry evenly.
Soften the Hide to Produce a Smooth and Soft Leather
This step may be optional depending on where you will use the leather. If you want stiff leather for your project, you may skip this part.
The process of softening the hide is also known as breaking the skin. After the hide is tanned, it becomes stiff during drying because the natural moisture of the hide is drawn out during the tanning process. You may want to soften your hide and stretch and elongate its stiffened fibers so they can be used for different products which require soft leather. Heavier hides require more breaking, while deer, fox, and bobcats hides are usually easy to break or soften.
Softening is done by the use of breaking tools that you can simply make or find at home. Some of the breaking tools you can use are the back of a chair, side of a desk, a metal pole, banister, railings, or a large wooden stick. Simply glide the hide through these breaking tools and make sure to cover all parts of it. This process makes the leather smooth as it dries so it won’t come out hard and stiff.
Let the leather dry on its own. You can also apply a leather conditioner to the hide. Rub the leather conditioner generously on the hide using the sponge or a wool sock.
Brain Tanning Leather
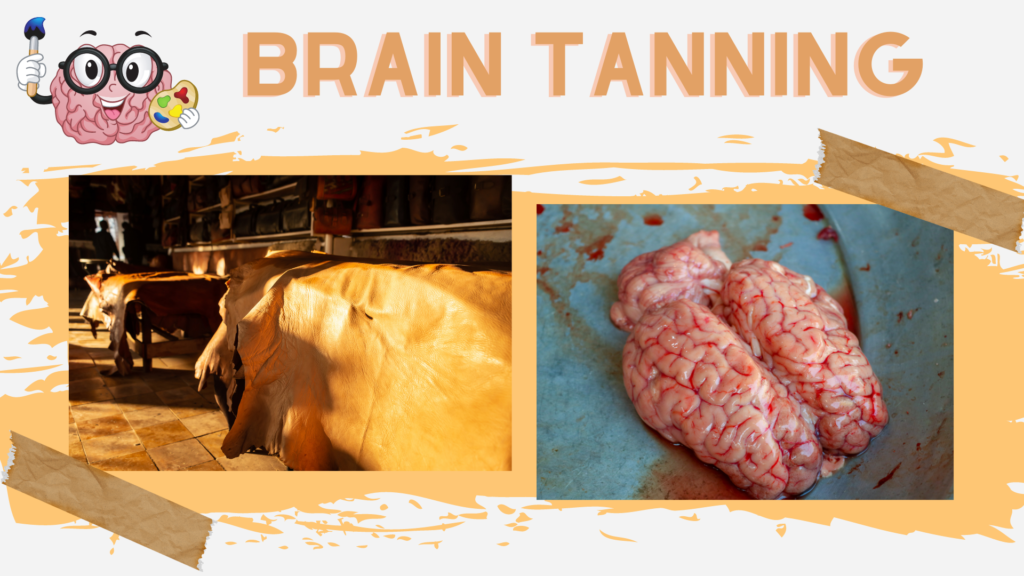
Brain tanning is an alternative to bark tanning leather, which uses brain solution as the main tanning agent to produce quality leather. This is an almost forgotten method and is rarely practiced but one effective traditional way of tanning leather. In this method, you can use the brain of the animal you skinned.
Getting the Hide Off the Animal
The first step in home tanning leather is getting the hide from the animal and preparing them. Skin the dead animal to get the hide using a sharp knife. Be careful not to damage the animal skin to harvest a good amount of hide. Examine the removed hide and trim the edges that will not be used, such as parts of the hide with holes, scratches, or wounds.
Skin and Flesh the Hide to Remove Remaining Meat and Fats
Use a fleshing knife to remove the remaining meat and fats attached to the animal skin. You can stretch the skin in a stretching or drying frame, then scrape the skin carefully to remove any remaining flesh on the hide. Do the scraping in the direction of left to right and top to bottom. Note that the skin can be damaged if this step is not done with proper care.
Soak the Hide in Water to Loosen the Hairs
The fleshed hide must be soaked in water for three days. The soaking allows the animal hair to slip and loosen on the skin. It also raises and softens the grain side of the hide.
Grain the Hide to Strip Off the Outer Layer of the Hide
Graining is one of the most intensive steps in brain tanning. Scrape the hide thoroughly to remove all the hair, the follicles, and a portion of the outer layer of the hide or the grain. You should make sure that the outer layer of the hide is stripped off well during this process. If not, these portions will dry and stiffen and hinder the brain from penetrating the leather fibers.
Membraining the Animal Skin to Remove the Mucous Membrane
This step removes the first layer of mucous membrane from the flesh side of the hide. Use a scraping tool and glide it on the flesh side of the hide to remove its outer layer. The membrane, if not removed, will prevent the brain mixture from penetrating the hide, and your leather will not get soft.
Wring the Hide to Further Break Down the Mucous Membrane
Wringing the hide further helps break down the mucous membrane to ensure that the tanning mixture can penetrate properly. This process is done by attaching the hide to an anchor point then twisting it around a large and stable stick. The process removes as much water as possible from the hide. Doing this successfully will create a hide with appropriate water content and maximum flexibility suited for leather.
Braining: Applying the Brain Solution to the Hide
The next step is to apply the tanning solution to the hide. Mash the brain into a gallon of hot water. The solution should look like soup after mashing. Then boil the solution for 2 -3 minutes. Let it cool to the touch before applying it to the hide. You may also use a blender (not the same one you use for your smoothies at home) in mashing the brain or use a canned brain available in the market.
Rub the brain solution to the hide. Spread it uniformly on the hide and let it sit for 6-8 hours. Another option if you do not want to use the brain mixture is tallow or egg yolk. But brain mixture as a tanning agent will give you the best result.
After the application of the tanning solution, soak the hide in water for a whole night.
Hand Softening the Hide to Produce a Supple Leather
Hand softening the hide is done to produce soft and supple leather. Work the hide across a firm, smooth object like the back of a chair. Glide the hide across the smooth surface to let the fibers loosen and the hide to become softer. You can also stretch it by hand while the hide is still damp with the solution. These steps help stretch the hide to let the solution penetrate the skin fibers. Properly softened hides will feel just as soft even if they get wet and dried.
Smoking the Hide to Add Water Resistance to the Leather
Smoking, the final step in traditional tanning, is done once the hide is dry. Tanned hides are laid over a smoky fire to let the tan set into the hide. Smoking helps the leather to be more water-resistant. It also prevents the hard drying of leather when they become wet and keeps the leather soft at all times. Furthermore, smoking adds a beautiful buckskin color to the hides.
It is highly recommended to use rotten hardwood to smoke the hides. Use them to create a very low heat fire, not a flame. Low heat fire and hide do not mix even if they come close to each other.
The length of time of smoking the hides will depend on your preference. If the hides are used to produce leather garments often worn (like shoes or boots), you need to smoke the hide longer.
Conclusion
Home tanning leather is indeed a challenging task but most rewarding when executed correctly. The finished product of both bark tanning and brain tanning is a supple and durable leather that you can use in any project that you would like to create. It may take some time and a lot of effort to do the traditional tanning method, but the outcome is perfectly worth it.