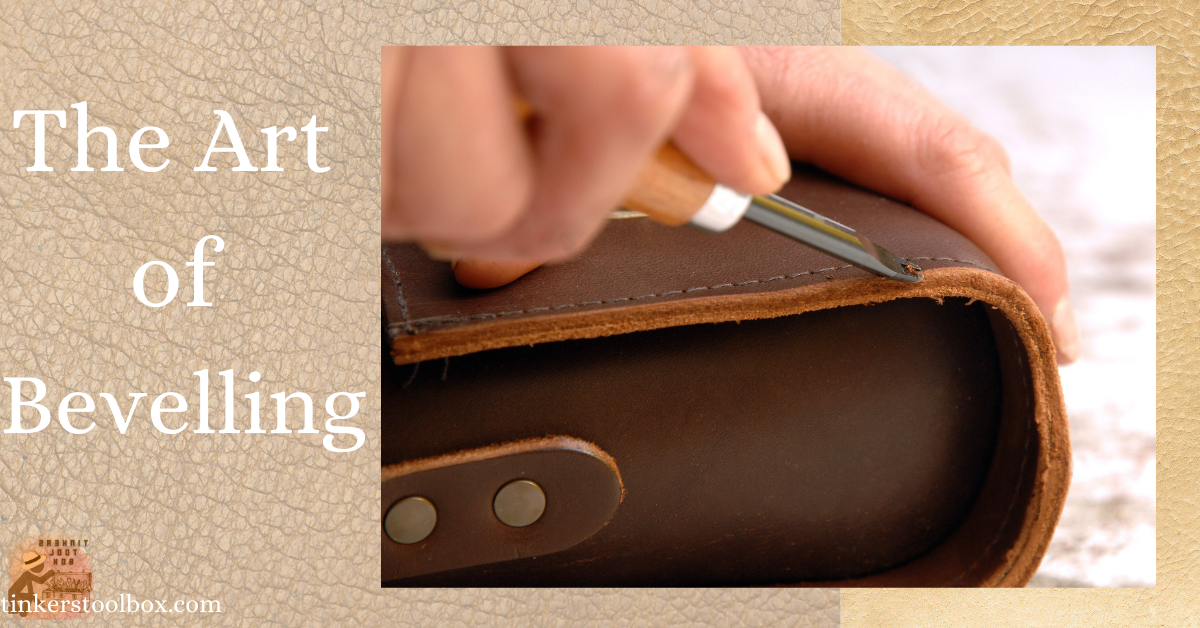
There are a few tricks to get a polished leather finish. One of these is edge burnishing. It is the finishing touch to your leather by polishing the leather’s rough edges using a burnisher. The friction created by the rubbing of the burnisher and leather edge compresses the fiber together. It is unnecessary to burnish all the edges, but doing so will definitely help you achieve that amazing look.
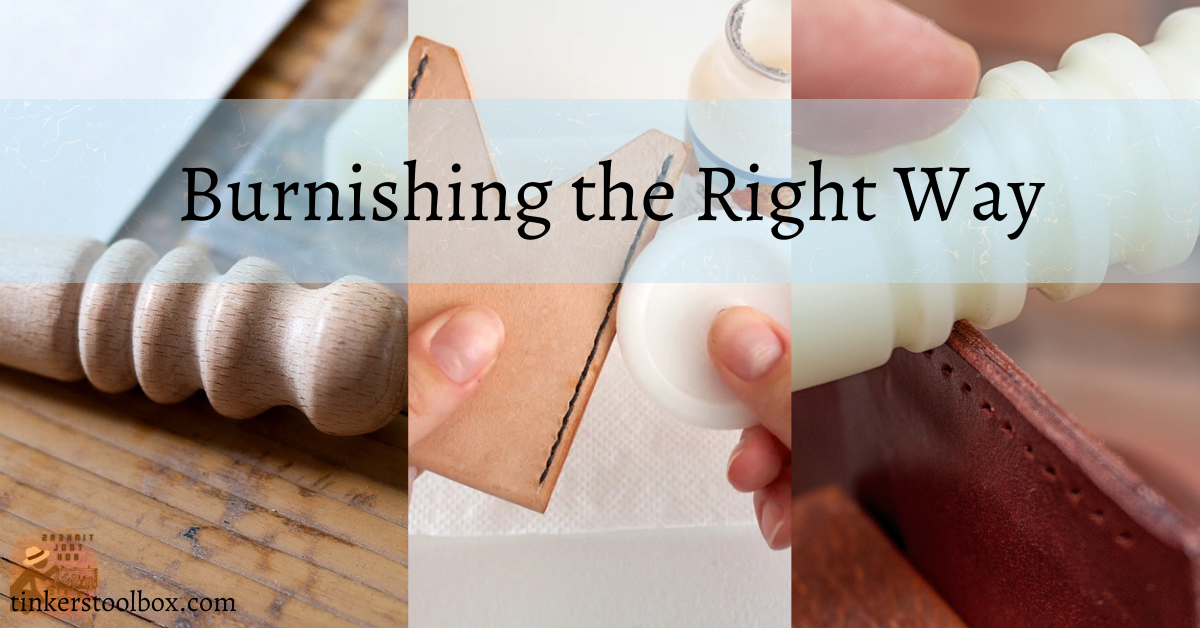
How to burnish leather edges? Rub beeswax or gum tragacanth in the periphery and apply enough pressure to a wood slicker rubbing back and forth. You can do manual burnish for small projects and use a drill-mounted burnisher for bigger ones. Burnish longer for best results.
If you are like me, who wants to get the best look of a leather project, burnishing should be on your list too. Burnishing involves sanding, beveling, and polishing. This process is optional, but you can do this to make your product exceptional and more professional-looking. It will also show your commitment to your craft by getting that clean-crisp looking edge.
Gather Up The Burnishing Essentials

Just like doing other projects, you also need materials and tools in burnishing leather edges. If you already have these tools, it’s time to take it out of the stash and prep it up for use. You can also acquire these materials from a physical or online store.
Materials You Need
- Slicker (Can be wood, plastic, or metal)
- Canvas
- Sharp blade or sandpaper
- Edge beveler
- Sharp blade
- Gum tragacanth
- Burnisher (Beeswax, leather edge painter, saddle soap)
- Sponge
- Leather hammer or mallet
Simple Ways To Flatten Your Way Out

If you already have the materials prepared, you are now ready to flatten your way out. Get ready for the initial step in burnishing to achieve the glossy edges you desire!
Putting The Pieces Together
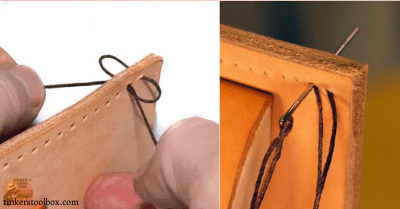
If working on a project that involves stacking multiple leather pieces, skive each leather piece to achieve the desired thickness once assembled. Glue the leather edges together. Ensure that there is no excess glue hanging off the leather sides.
If you stitched the leather, hammer it out to flatten and even out the stitches using a leather mallet. Cut the leather edges straight as you can using a leather knife and a steel ruler for a guide. For single piece leather like straps, make sure to flatten both edges out.
Target A Smooth End
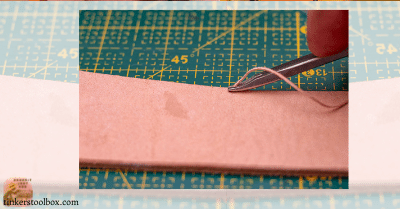
Once the leather edges are flattened, use an edge beveler to remove a thin sliver in the edges for a slight curvature or semi-rounded edges. These curved edges prevent the leather edges from flapping open later on.
You can choose the edge beveler size that you want to use depending on your preference (For beginners, you can use size no. 2). Bevel the leather’s front and backside and use a sharp blade to initially trim the leather fibers in the edges.
You can also use sandpaper, usually a 220 grit one but not ideal for harder and thicker leathers to take off the edges. Sand in one direction only when using 220 grit. Suppose using 400 grit sandpaper, sand in both directions. Remember to sand lightly and make sure not to scratch the face side.
Follow through by using a canvas. The friction created in the canvas’s rubbing will ensure that excess glue (if applied) is removed from the leather. This is the initial burnishing. It is essential to get two leather pieces glued together, leveled, and smoothened for easy dye application before final burnishing.
Trying Out Common Leather Burnishing Methods
If you are done with the edges’ initial polishing, the next step is to choose and apply a burnisher for sealing the edges. You have many burnisher options in the market. Just take the time to choose the right one for you.
Just Add Water or A Saddle Soap
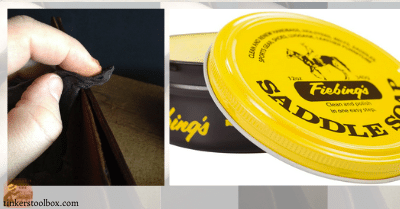
For initial burnishing, you can use water or saddle soap. Glide it over the leather edge by using your finger, a dabber, or a sponge. Water molds the leather. Just make sure not to leave any water stain if using veg-tanned leather. For other types of leather, you can dampen the edges and the face side too.
Saddle soap is used mainly to clean, soften and preserve the leather and produce a glassy finish. You can use it in combination with water or apply it directly.
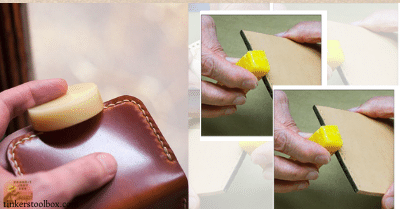
Use an edge slicker and rub along the border. The polished edges with water or saddle soap appear dark and a definite upgrade to your unburnished leather side.
Using A Gum Tragacanth
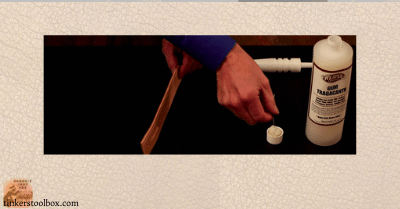
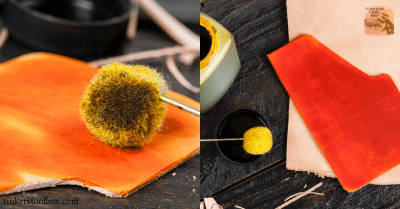
You can use gum tragacanth directly or right after burnishing with water. It is suitable for thin and smaller pieces of leather. Shake the gum trag before application.
Apply a thin layer of gum tragacanth with your finger, paintbrush, or a sponge. Work along the direction of the fibers. Let it sit and make sure it gets tacky (a little bit dry) before slickering. Burnish with a wood slicker by rubbing in one direction or back and forth.
A burnished leather edge using this method appears darker than a water finish. It is a bit lighter and smoother than wax burnishing. You can also add stain by using a sponge for additional contrast to the leather color. Remember to add a coloring before putting wax because the wax will repel your dye.
Wax The Edges
Use a wax (preferably an all-natural beeswax). You can also mix it with paraffin house wax, depending on your preference. Beeswax shows a little resistance during burnishing, so apply enough (not too much) pressure on rubbing the wood slicker once it is used. Applying the beeswax waterproofs the leather, completely sealing off the edges. It is also an inexpensive burnishing essential.
Make sure to create friction between the leather and slicker to melt the applied wax. This process draws the water out from the leather. The finished edge with a wax burnish is a lot smoother and a tad darker than using water and gum trag.
Burnish Hard For A Shiny And Crisp-Edges!
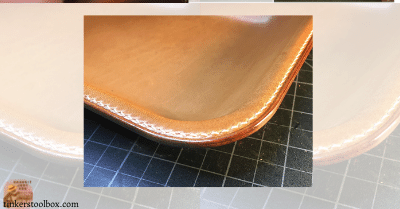
Putting in effort in burnishing the leather may be time-consuming, but it can contribute to your product’s fantastic look when done correctly. If you are willing to go the extra mile, burnish hard and aim for the best-smoothened edge.
Buff It Nicely
Before doing the final burnishing, make sure to apply all leather colorants or dye before the wax or gum tragacanth (after water burnish). Buff the leather by using a canvas so that the leather will absorb the stain efficiently. You can also use sheepskin for leather buff because it has a natural oil residue, which initially shines the leather.
Burnish the Right Way
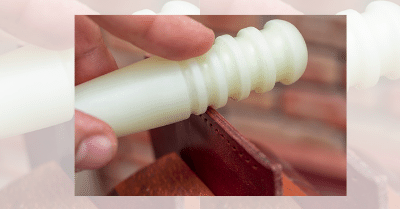
You can use canvas, slicker of choice (glass, metal, wood, brass material) for final burnish, but I will recommend a wooden edge slicker. A wood slicker is ideal to use because it creates friction well, leaving the leather naturally-looking. If you use metal slickers, make sure to use it with caution because it heats faster than a wood slicker. The decision is up to you.
Slightly dampen the edges using the preferred burnish (gum trag, water, beeswax) and start smoothing edges by moving up and down, compressing the fiber.
For long straps of leather, make sure to burnish first a foot or less before moving on to the next step to achieve a consistent finish, especially if you are doing a manual burnish. The friction created from slickering is what you aim for to get a nice burnish.
Reapply the beeswax from time to time and wipe back and forth until the edges smoothen out evenly. Continue to rub the wood slicker. Remember, the longer you burnish, the better it is going to look.
You can also use a drill mounted slicker for bigger projects, but manual slickering works well in small projects. It is also good because it’s cost-effective and hones your burnishing skill. On top of that, it’s fulfilling to complete a task using hand tools, but either will yield good results.
If you want to burnish faster and more comfortably, you can opt to use the drill mounted ones. These machine ones cost more and need regular maintenance to keep it working.
Conclusion
Burnishing takes a lot of practice, and knowing how to do it correctly will surely make you a champion of this skill. It is unnecessary for all leather works, but it will make you achieve an excellent finished product. Just be patient in burnishing, and it will surely pay off once you see that polished edge.