In leatherworking, one of the things that you should consider learning are the different leather stitching techniques. Since most of the projects can be made by hand, a leatherworker needs to know the different methods in leather stitching. Here I will teach you ten leather stitching techniques and when to use them.
What are the ten leather stitching techniques? The ten leather stitching techniques are single needle stitch, “Z” stitch, cross stitch, saddle stitching, baseball stitch, butt stitch, box stitch, whipping stitch, double stitching, and backstitching.
Trust me when I say that you can master leather stitching even if you don’t have previous experience in sewing. And with the help of this article, you will quickly learn the ten different techniques in leather stitching to start your crafts. Oh! And not just that, I will also tell you tips to have a clean and beautiful stitch so keep reading!
- The Easiest Stitching Technique
- Secure Projects With “Z” Stitching
- Repair Torn Leather Using Butt Stitch
- It’s DiMaggio! (The Baseball Stitch)
- Proper Way Of Box Stitching Leathers
- Cross Stitching On Leathers
- Whip Stitch 101
- Let’s Saddle Stitch
- Learn How To Double-Stitch
- Last But Not The Least, The Backstitch! (The Backstitch Boys)
The Easiest Stitching Technique

The most beginner-friendly method is single needle stitching. It is similar to how we sew fabric, and learning this technique can help you speed up sewing. You should apply this technique when securing the edges or sides of your project.
Steps And Materials To Do Single Needle Stitching
First, you have to get a scrap of leather and cut two equal pieces based on the size that you want. After cutting, punch vertically on one side of your leathers, then begin stitching by piercing the second hole and leaving a 2″ thread tail. Pierce on the first hole, then go back and move on to the second hole and then on the third. Remember to always use the pattern: one ahead, go back one and then forward two. When you reach the last spot, start opposite-stitching and fill in the holes’ spaces. Lastly, lock the thread by creating a knot or burning off the excess line.
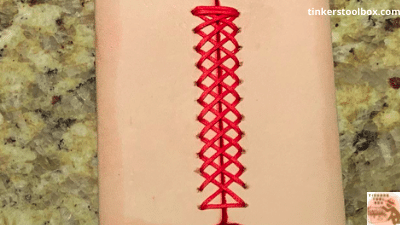
Secure Projects With “Z” Stitching
Z Stitch is a technique in stitching that adds a unique finish to the seams. If you add a metal or buttons and even rivets to your projects, the Z lines you’ll create will hide the metal parts on your crafts.
Steps And Materials To Do Z Stitch
First, get a nylon thread and cut two leather pieces about 4″ x 2″, after cutting off the leather, measure, and mark ½” on both parts of the leather’s edge and punch holes where the marks are. The leather must be right outside. Sew the first parallel holes multiple times until it is secured and then bring the needle to the top surface. After that, move on to the second hole. Remember that if your pointer or needle on the first hole is on the left side, sew the second hole on the right side and if your needle on the first hole is on the right side, sew the second hole on the left side. Pass onto the opposite part of the third hole and repeat the process until you reach the final spot. And that’s it! Lock it and look at your lovely Z stitch.
Repair Torn Leather Using Butt Stitch
This technique might be a bit confusing for beginners, but with lots of practice, you will surely know how to do butt stitching, and it will be perfect for stitching two pieces of leather close to each other.
Steps And Materials To Do Butt Stitch
Cut two rectangular pieces of leather. Once you are done cutting the leather-based on your desired size, measure, and mark ½” on one side of the leathers and then punch holes where the dots are. Sew the first parallel hole top side out, pass the needle through the opposite hole from the bottom, and then bring the arrow on the top surface of the right piece. Pass under and through the left portion. Take the needle on the side, and take it through the hole below, which is on the right part. Let the right arrow go down through the left piece and repeat the process until the last hole. Burn off excess thread to lock the stitch.
It’s DiMaggio! (The Baseball Stitch)
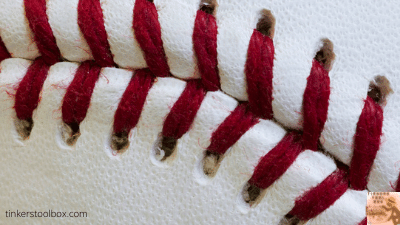
This stitch creates a “V” line on the entire seam, and this is best to use when making the two edges meet. It adds a unique finish because of its pattern, like what you can see on baseballs, and is best used when making a leather cover for steering wheels.
Steps And Materials To Do Baseball Stitch
Get a large piece of leather, cut a slit anywhere about 5″. Punch holes on the sides of the seam from the edge through the end of the slit. Take the needle on top and pierce the first hole on the left, then take the needle down the right second hole and skip the parallel hole on the left. Continue on the third hole on the left, then skip the third hole on the right. The whole process should be:Pierce first hole on the left, skip parallel holes on the right. Pierce the second hole on the left side and miss the parallel hole on the right side.
After doing the first batch of stitches, you will stitch all the skipped holes, but you will start on the first hole right side this time. Sitch all skipped holes down to the last hole, and that’s it! Lock the thread and be amazed by your first baseball stitch!
Proper Way Of Box Stitching Leathers
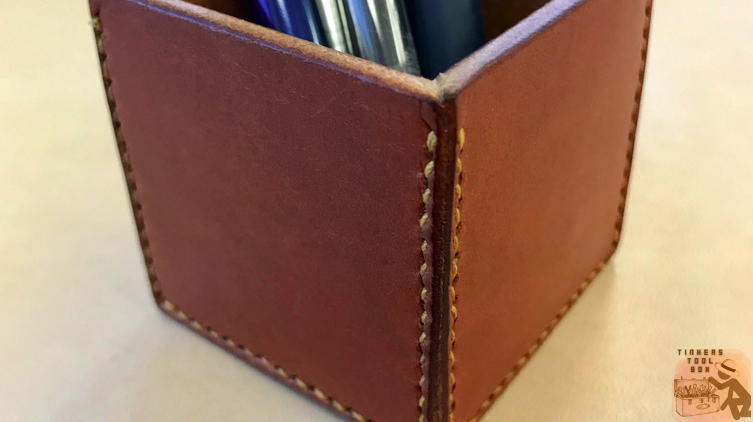
This technique might be a bit hard for you if you are new to leather stitching, for this can only be done when leather pieces are wrapped in a square-shaped material. But this technique helps secure two pieces of leather especially when you want to make a leather box for your tissues, pens, and other things you might want to store in it.
Steps And Materials To Do Box Stitching
First, cut two rectangular pieces of leather and punch holes on one side of each leather. Place the two pieces on the sides of the square-shaped material and make it look like a roof. Pierce on the first parallel holes, but don’t bring the needle on the top surface. Make sure that the thread is lined up only on the sides. Sew down to the last hole and do double stitching, then lock the thread underneath.
Cross Stitching On Leathers

Cross stitching is one of the most straightforward techniques in stitching that we all can master. Cross-Stitching adds a different style to the seams, and this can also hide the unwanted or uneven cuts on your project.
Steps And Materials To Do Cross Stitching
Cut two equal pieces of 3″. Label the left leather as Leather A, label the right leather as Leather B. Lay leather A on top of leather B and then punch a hole on one side. Put the leather on the stitching pony, then pierce needle A to the first hole on the left side. After that, pass needle B through the first hole on the right side and bring the needle to the top surface. Pierce needle A on the opposite first hole of the leather B and pierce needle B on the opposite first hole on Leather A. Make diagonal stitches by sticking Needle B on Leather B’s second hole, then stick Needle A on Leather A’s second hole. Bring the thread on the top surface again and repeat making diagonal stitches, then do the first step again and bring the needle underneath. Remember to always pierce on the opposite side, and lastly, lock the stitch beneath and viola! You’re done! So easy.
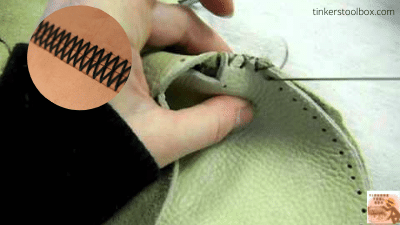
Whip Stitch 101

The whip stitching technique is often used in closing the open sides of the projects. It creates a neat seam in leather and is also considered a decorative stitch, but this needs a lot of practice, so good luck!
Steps And Materials To Do The Whip Stitch
Cut two pieces of leather (based on what size you want) and bind them together. Punch a hole on one side and begin lacing on the first holes between the two leather pieces.
Leave ¼” thread in between, then pierce onto the first holes again. Shoot and bring the needle over the leathers and pull the stitch-up to make it a bit tight. After doing that, bring the needle over the leather again and shoot on the next hole. Make a spiral stitch on the outside surface and repeat the process until the last hole. Make a loop on the previous stitch, run the needle back to a few stitches, and lock the stitch on the leatherback. Whipstitch, check!
Let’s Saddle Stitch
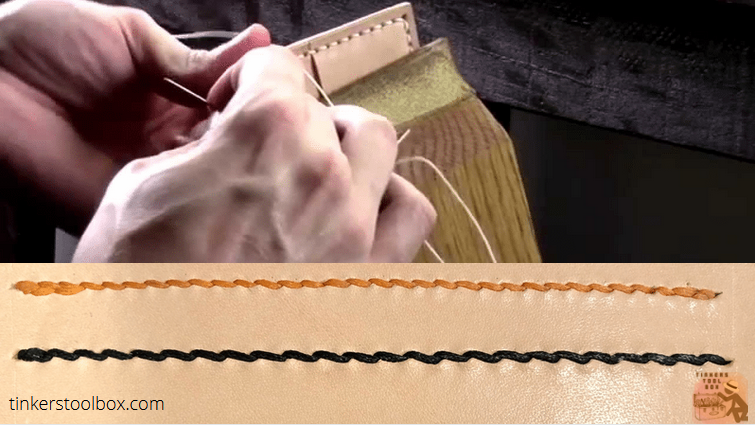
Saddle stitching creates a good lock at every stitching technique. Unlike a lock stitch that will unravel if your thread breaks, the saddle stitch will still hold your leathers together, and the good news is, this is great for beginners!
Steps And Materials To Do Saddle Stitching
Prick the needle through the first hole of the leather and lock the stitch. Cross the needle and pierce the left needle on the second hole. Pull the needle on the left, pierce the right needle on the same hole, and loop over the right needle. Pull the thread carefully and not so tight. After it, continue running the stitch until the last hole, and finally! Backstitch until you reach the first hole again, and that’s it! Don’t forget to lock the stitch at the end!
Learn How To Double-Stitch

Like the saddle stitch, double stitching can also be applied to almost all of the stitching techniques, but the difference is when you do double stitching, this provides a much stronger seam and keeps projects from fraying.
Steps And Materials To Do Double-Stitch
To start, get two equal pieces, and measure ½” from the edge of both pieces of leather. Punch holes on the line the place leathers on the stitching pony. Pierce one needle on the first parallel holes and pull it through. You must have an equal length of thread on both sides and label the needle on the left as Needle A and Needle B for the needle on the right side. Pierce Needle B on the second hole, just below the first hole on the right. After that, pierce Needle A on the second hole, just below the first hole on the left. Repeat the process until the last hole. Backstitch until the second to the final hole, then follow the steps again. Lock the thread, and that’s it!
Last But Not The Least, The Backstitch! (The Backstitch Boys)

You might notice that the backstitch was mentioned much with some of the stitching techniques. Backstitching leathers help lock in the thread and prevent the thread from unraveling.
Steps And Materials To Do Backstitch
Start by punching holes on one side of the leathers then after punching, place leathers on the stitching pony, and the next thing that you will do is to pierce the needle on the first hole. Pull it through and make sure that you have an equal length of thread on both sides. Pierce the left needle on the second hole and now your left needle is on the right side. Pierce back to the first hole and pull it through. Pierce the right needle on the right side of the second hole. Now that the right needle is on the left side, pierce on the third hole. The right needle is back on the right side so the next is to pierce onto the second hole of the right side. Pierce back on the third hole and then move on to the fourth hole. Repeat the first steps until you reach the last hole. Backstitch til the second to the last hole and lock the thread there. Cut excess thread or burn off to secure the project more!
Conclusion
Leather stitching is one of the skills that you must have to be able to create your first project and with the help of this article and your skills, I am sure you’re going to master the leather stitching techniques above. Now that you have the easiest and most helpful leather stitching go get your undone projects and apply the stitching techniques that you’ve learned today. Good luck!