Wet molding your leather can be something new for you, especially if you are just starting out in leatherworking. However, wet leather molding is an excellent skill that can help you make your leatherworking projects much more beautiful and well-crafted than ever before. Wet molding is very helpful in creating sheaths, holsters, and pockets that can house more things than we ever knew. The possibilities are endless with wet leather molding, and this article will open your eyes to the things you can do with wet leather molding.
Leather wet molding involves many steps, including wetting the leather properly, molding them into the desired shape, and taking them out to dry properly before trimming the edges and cleaning off the glue or cement residue from the process. It is useful in creating shapes for various purposes.
Let this article guide you on everything you should know about the entire leather wet molding process. This article will discuss the different tools and types of leather you should use in wet molding or wet forming leather for your leatherworking projects. Lastly, you will also learn how to do it and some tips and tricks that will surely up your ante in wet leather molding.
Leather Wet Molding: The Basics
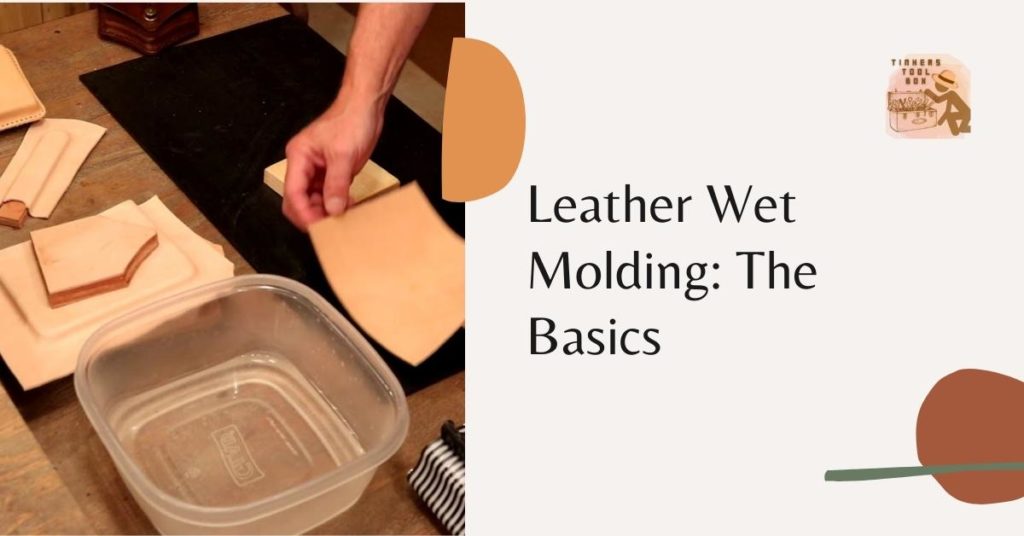
Leather wet molding is basically getting your leather adequately wet and forming it into any shape you wish to have. You should only wet your leather properly as too wet leather can cause the entire hide to deteriorate and therefore become unusable. You are using water and your hands in wet leather molding to ensure that everything fits perfectly inside. Leather wet molding is typically used in making holsters, pockets, and sheaths.
Leatherworkers often do this to ensure that the things placed inside or in between the holster, the sheath, or the pocket, will fit perfectly. Leather wet molding is also used in stamping or tooling designs onto the leather, either through embossing or carving the designs onto the wet leather, thanks to the wet molding process.
This is one of the more advanced skills that leatherworkers can learn and get to use in handy because it can really enhance the quality of the leatherworking project in terms of appearance and function. Learning how to do wet molding properly can help you prevent mistakes such as drenching the leather for too long or exposing it to too much water, avoiding deterioration and eventual ruin.
Leather wet molding is typically used in projects that require a 3D shape, which is complex enough but smooth and does not need any details left out. These include rings and necklaces, watches, bracelets, figurines, ornaments, sculptures, and other decorative pieces. Leather wet molding is also used for shoes and purses, and holsters, pockets, and sheaths.
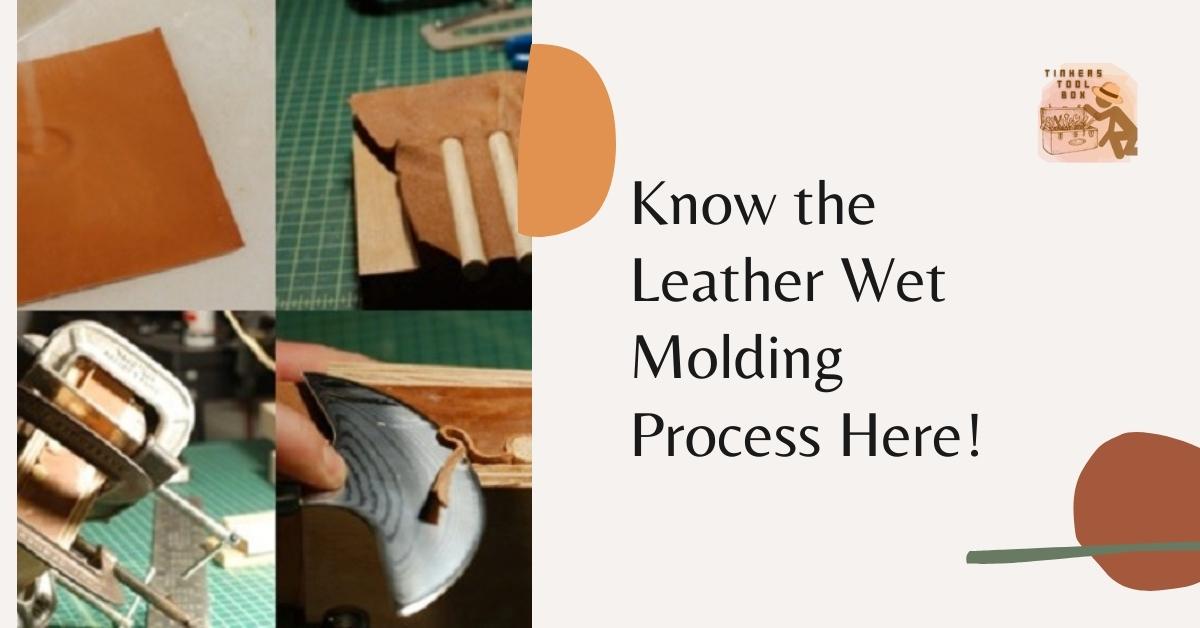
Leather Wet Molding Process Explained
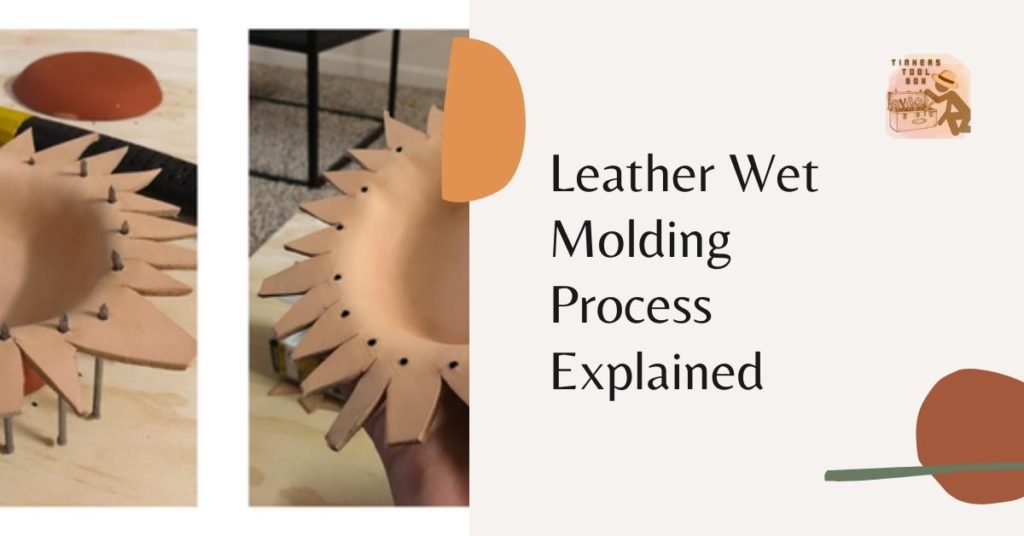
There are several steps used in wet leather molding. To start this process, you will want to make sure all materials used for this task have been carefully prepared and measured against the specific piece that will be transformed while also being placed on a flat surface before proceeding with the next step.
Each time a certain material is used throughout any step, it should be thoroughly cleaned if necessary and/or allowed to dry before moving onto another one, or else there may be an inevitable effect that results from dirty hands onto clean surfaces, which can take away from the aesthetic value that was created by following each step through one at a time.
The first step in wet molding leather is making a pattern for your finished product to look like. This can be done using wrapping paper, cloth, and so on. The important thing is that it needs to hold its shape when full of water and put under pressure so that it can be used to form an impression of the object around which the wet mold will be made.
Once you have your pattern, trace it onto your leather with a pencil or pen, as other writing utensils might not work because ink could possibly bleed through the porous material. Now that you have your pattern cut the leather out of it as close as possible.
Next, you need to soak the leather in water for about an hour or until it is completely saturated. This will make the leather very pliable and easy to work with. After soaking, lay a large plastic tarp down on a clean flat surface that can get wet. Lay your soaked piece of leather on top of the tarp and place another large sheet of plastic over the top of the entire piece.
Now take your pattern and use something heavy, like a cinder block, to hold it down onto the center area where you want your finished product to be placed so that its shape can be imprinted into the still-wet leather underneath it. This is where you will want to use something like a rolling pin or another cylindrical object to roll over the pattern, pressing it into the leather.
Make sure that your pattern did not shift and is still completely covering the area of wet leather that you had selected before using anything on top of it. If this happens, repeat the previous step until everything lines back up correctly and then continue with the next step.
Once your pattern has been rolled into place on top of the wet leather, take a piece of chalk and mark all around the edges of where your rolled-on pattern ends so that you know how much material needs to be removed from one side for it to fit onto its intended properly.
Next, you have to take a pair of large sharp shears and cut the excess material away from the edges of where you have marked. Suppose you are using a lot of layers or thick leather. In that case, you may need to use a razor blade, machete, or some other large knife to shave off the extra leather pieces because it will be too difficult to cut with shears. Be careful with using the shears or any cutting objects to avoid any accidents along the way.
Now take your still-wet piece of leather from underneath all your plastic tarp covering and lay it on top of another clean tarp or something similar. Take your rolling pin or cylindrical object again. Still, this time roll across one side at a time, making sure that they match up evenly at both ends, with one wet piece should be facing right-side up while the other is facing down.
This way, you can make sure that your material will be symmetrical. Once you have finished doing this, take a ruler and draw a straight line down the length of one side at a time to make it easier to cut off the excess once it dries. This will also avoid having any extra material sticking out from under one end while trying to get them both even. Since the leather was still moist when cutting it into shape, there should not be any razor burn marks or rough edges. You should be able to get through all layers without too much difficulty.
Now that everything has been cut and shaped and looks like it is in its final form, let your wet molding pieces sit dry overnight so that they can dry but not cure, as this will avoid the leather from shrinking in later steps.
The next day, take your molding pieces back out and let them dry overnight under a lamp. At this point, both sides should be completely dry. If you can pick up either one of your wet molding pieces, they should stick right back down again without bending or warping. This will ensure that your material assumes its final shape before any further steps are done on it.
Once you have ensured this, turn off all lights to have total darkness while working on the next step. Add some warm water to a bowl large enough to fit the molded item inside it with at least an inch or two extra room on each side for good measure. Then take a few drops of soap and mix it in with the water.
Now take your piece of leather that is dry and place it face down into the bowl, making sure that you do not spill any excess soapy water onto yourself or onto your workspace, as this will avoid ruining any future steps in the wet molding process.
Once the item has been placed inside the bowl full of warm, sudsy water, allow all excess water to drip out before placing it into another container or letting it rest on some paper towels. After this is taken care of, take your wet molding piece out from underneath all the plastic taping and set it face-up on top of a clean tarp. Again, make sure everything is lying flat.
Since both layers are now facing the same way, you will need to make a mark or a series of small dots along each edge about a quarter of an inch from the edge. This is so that when you roll on the other side onto your wet molding piece, you can easily tell where one ends and another begins. This makes it easier to line up both pieces with each other for gluing.
Next, take your rolling pin or cylindrical object and roll these two edges down simultaneously, making sure they are completely even with each other, then tracing around them with chalk or something similar. Make sure that everything lines up evenly before moving on to the next step.
Now that everything has been rolled into place, correctly remove all wax papers that were previously covering up your tarp to glue the two pieces together. Take your contact cement and brush it over one edge at a time, being sure to cover both sides evenly until they are completely covered. Also, you should not be able to see any of the white or color underneath.
Let this dry for about 1–2 minutes, then take some weight and place it on top of each end of your wet molding piece, which will be glued, making sure that everything is flat. You can use a bucket for this one. After about 20 or 30 minutes, make sure your material still lies flat before moving on to the next step by taking it off of the desk holding its shape up with one hand while feeling underneath if everything lies straight across. Now place things back where they were and move on to the next step.
Now that you have glued both layers together, take a clean rag and wipe down your wet molding piece, removing anything that might interfere with the drying process, including excess contact cement. At this point, you can choose to continue or stop, following one of these paths:
- Make sure everything stays in its final form by placing more weight on top of it while it dries
- Attach any straps, clasps, rivets, donuts, and so on
- Punch holes into either side for stitching later
Instructions for wet leather molding are usually similar to how they are tailored for other materials. Still, the details regarding finishing will vary depending on the type of material being used (e.g., what kind of glue should be used).
Always remember that there is no exact way to do this process and feel free to experiment with your own personal style based on any step or set of steps within the whole process or entirely different combinations of techniques altogether while still utilizing specific procedures listed by others to avoid having to reinvent everything yourself.
Tools You Need for Leather Wet Molding
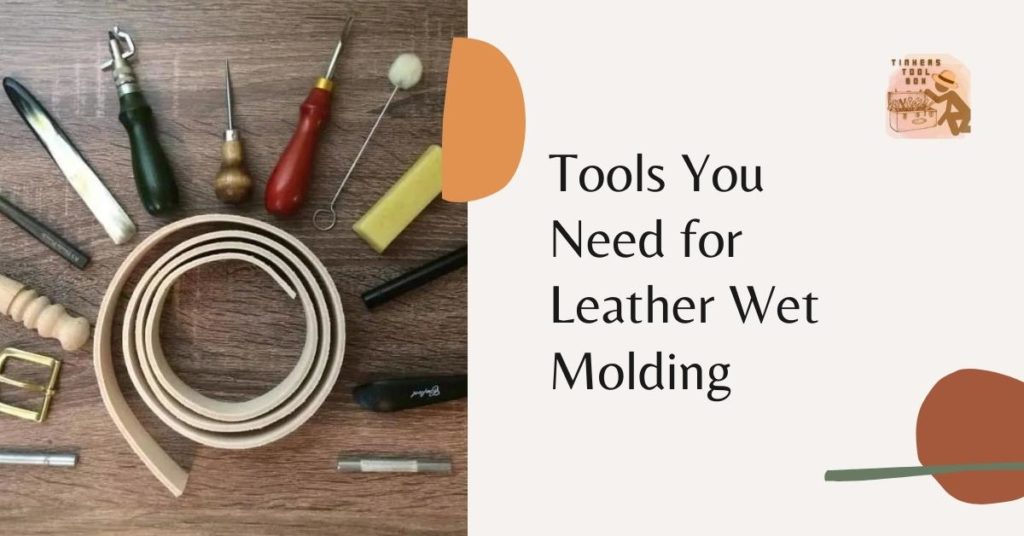
Before starting this sort of project, the main thing you’ll need is something to soak the leather in, so get started on that first. You can use a bucket, tub, or sink. Just make sure it is big enough to fit the entire piece of leather if it does not fit into your regular bathtub. The next thing you will need is a stir stick. You can use anything sturdy, like an old paintbrush handle.
You will also want to gather any tools unique to wet molding; this includes caulking, sponges, and something to smooth the leather once it has stretched. You may also want to keep two pairs of gloves on hand during the process, one for working with the soap solution and another for working with clean water. This project typically takes about an hour to complete; ensure you have enough time set aside beforehand.
Before putting your leather into its container, apply some sort of cleaning agent that will not irritate your skin if it gets onto your hands. Some options for this agent are saddle soap or Lexol cleaner. Next, make one part dish soap and 10 parts hot water to allow the leather to soak for about an hour. Work with a small section at a time, using your hand to smooth it flat as you go.
Once that piece has been smoothed out, put it into your press. There are special tools just for wet molding, and continue working with small sections until the whole piece has been molded. It is best to use a sponge to press down on the front evenly, followed by pressing from the back, so you do not flatten any raised areas or ridges in your design.
The next step is drying; once all your pieces have been molded, they should be left to dry inside their press for 24 hours. Some companies leave the pieces in the press another 24 hours after that to completely dry before removing them, but this is unnecessary if you follow some care instructions while molding.
After your leather has finished drying, it will be time to clean up. Remove any parts of the design that are glued together using an X-acto knife or razor blade. Then, remove any glue residue left on the piece with a solution of two parts vegetable oil and one part dish soap. Buff until all residue has been removed. You can also use saddle soap for this purpose, which will make your leather nice and supple for wearing purposes.
In summary, you need the following tools and materials:
- Vegetable-tanned leather for your leather wet molding method
- A big bucket, tub, or sink where you can wet your leather
- Stick for stirring purposes
- Caulking
- Sponges
- Pairs of gloves for the soaking process
- Saddle soap or Lexol cleaner
- Dish soap and hot water
- Wet molding press
- X-acto knife
- Contact cement
- Razor
- Leather glue
- Vegetable oil and dish soap to wash glue residue
- Clean plastic tarp to protect your workplace
- Rolling pin or any cylindrical object
Wet molding takes some practice to master, but it is fairly simple once you get started.
Other Things You Should Know in Leather Wet Molding
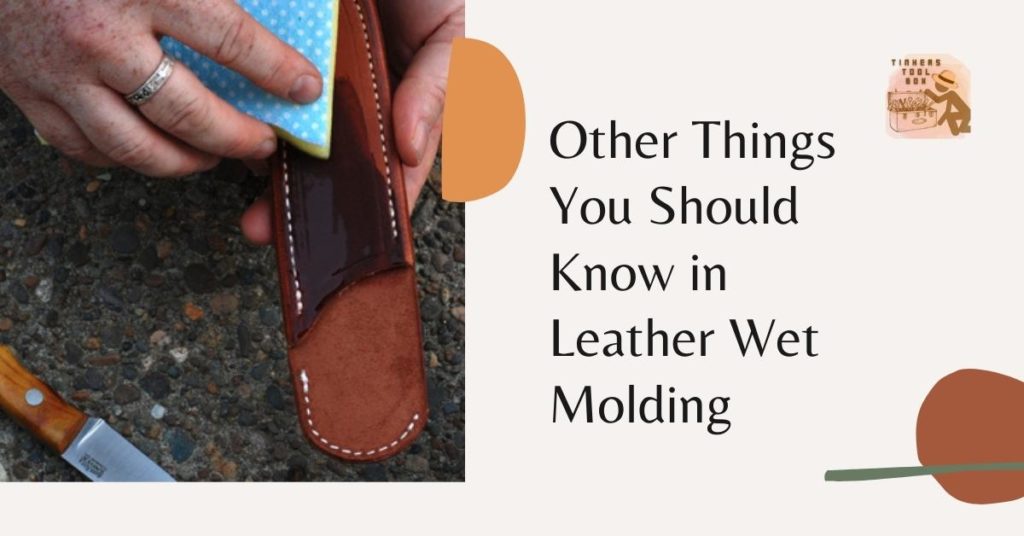
Now that you know the basic steps and the tools and materials, here are some things that you should know about wet leather molding.
When it comes to wet forming, there are two prevalent methods: by hand and with a 2-piece mold. The first approach, done by hand with a bone folder, is physically molding the leather around anything. Still, the second method, which is done using a 2-piece mold, pushes the leather down for you.
To be quite honest, both procedures need a significant amount of elbow grease. Hand forming is best suited for one-off objects, whereas 2-piece molds are ideal for goods produced in large quantities.
To make a web form, you can use any vegetable-tanned leather. Leathers with a firmer texture perform better since they keep their shape better. Still, I have also used medium temper leathers that held their shape without a hitch.
The thicker your leather is, the more difficult it will be to shape it around your item, mold or otherwise, but any thickness will work in this situation. Thin leathers are extremely simple, and the difficulty tends to increase as the weight of the leather increases.
Leather wet molding can help you make your leatherworking projects much more visually appealing than ever. Learning this can boost the level of craftsmanship you can offer to the table with your leatherworking projects utilizing this technique.
Make Your Leatherworking Projects More Beautiful
Leather wet molding can actually boost the aesthetic quality of your projects. You are already a skilled leatherworker, but introducing wet leather molding to your projects can give your items a new level of dimension, beauty, and craftsmanship that you can actually turn into something profitable, should you perfect the art of wet leather molding. It was not easy for me, but I made it, and I hope this article gives you everything you should know about this process that can elevate your crafts to a hilt.