I used to be a very big fan of burned art on wood; they are creative and give you that rustic feel. I thought of applying the same technique to leather, but it was not a good result. I ended up wasting money. So I did my assignment and found this helpful information about leather burning that would surely become handy when trying some unique techniques on your leather.
What is leather pyrography? Leather burning is used as a surface technique to imprint burned designs into leather. The process called leather pyrography uses a leather burning tool and tracing papers to transfer the designs like letters and drawings from paper into the leather by putting heat into it while following the design outline.
In this article, I will discuss the technique of burning leather called pyrography. I also included the tools and materials used in leather burning and some safety tips to deal with the hot burning tool. Lastly, I will talk about the detailed steps to create designs by burning them through the leather surface.
What is Leather Pyrography?
Leather burning is done as a creative technique of imprinting burned designs onto the leather. It uses specific tools to create lines, shapes, letters, and drawings of your choice and follows a careful procedure to produce art in leather.
Pyrography is a decorative technique in leather that consists of burning designs on the grain surface of the leather using scorching tools or a pyrography kit. Pyrography comes from the Greek words “Pur,” meaning fire, and “Graphos,” meaning to write, which translates to “writing with fire.” The modern application of pyrography is more inclined in designs and drawings rather than writing on leather.
Leather is a good material to burn designs on. For one, they are easier to burn than wood; the traditional material pyrography is mostly used. In addition, the leather’s soft and smooth surface, where the tip of the burning tool sinks well on its grain side. It allows you to imprint designs with ease, and you can also create amazing tones and shades like, for instance, highlighted and shadowed designs of cinematic views. The aesthetic and beautiful sepia appearance of leather would indeed make your design stand out.
The best leather to use in pyrography is vegetable-tanned leather. This leather is produced using natural materials like tree bark and is not induced by chemicals, unlike chrome-tanned leather. Plus, vegetable-tanned leather accepts burning beautifully on its surface.
Pyrography can also be done in wood, gourds, paper, and other materials that won’t damage when applied with heat from the burning tool.
Tools and Materials Used in Leather Pyrography
The tools and materials used in leather pyrography are not anything that you haven’t heard of. They are easy to find, or you probably have one of them lying in your storage.
Leather
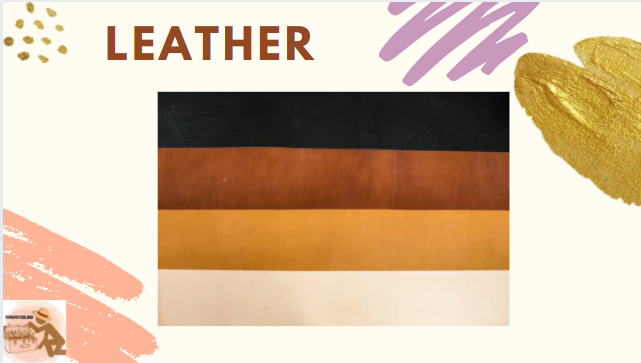
The most important material you need to have, of course, next to the burning tool, is leather. You can use a smaller size of leather, probably the scrap one, to practice on for starters. For experienced leatherworkers, any size of leather that fits your design will do.
Burning poses a serious threat to your health; that is why using the safest and most appropriate leather is a must. And there are numerous reasons why vegetable tanned leather is the one for the job.
Vegetable-tanned leather or simply veg-tanned leather is the most suitable for pyrography as they are tanned using natural elements like dried leaves and tree bark. This leather won’t release chemicals that may be harmful when burned as compared to chrome-tanned leather, which uses chemicals in its tanning process like chromium sulfate. That is why they are easily produced and take a shorter time of the tanning process.
Genuine leathers are non-flammable materials. Meaning they won’t catch fire and melt from the heat of the scorching tool. And unlike artificial leather, which is often produced with polyvinyl chloride, vegetable-tanned leathers are non-toxic. They won’t cause you serious health problems when you inhale the smoke from burning this leather.
Another great trait that makes veg-tanned leather the perfect choice for pyrography is its grain surface that takes imprints and burns beautifully, producing quality designs. You can create variations and depth in shades of color.
When choosing your material, go for the denser ones; in short, go for a veg-tanned leather. You’ll need not less than 3 ounces of l to burn designs on leather; lightweight leather won’t accept as much burning as the heavier ones.
Leather Burning Tool
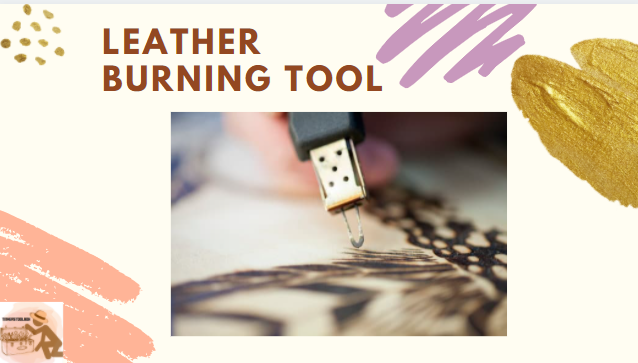
The most important tool in leather pyrography is the burning tool, sometimes referred to as the scorching tool. It is a handheld tool with a burning tip and is held like a pen. The produced heat of the burning tool is used to burn designs on leather, not burn the full leather but parts of it to create a layered design. It is electrically powered and comes with different brands and designs.
Before purchasing a burning tool, there are some things that you might want to consider. First is the heating capacity of your burning tool. There are two types of heating, the one temperature burning tool, and the variable temperature. One temperature burning tool has
a pre-set, high-heating temperature and often comes with interchangeable brass tips. The heating property of this tool is like a soldering iron, where you cannot adjust to your desired temperature. It is an inexpensive alternative for beginners who are just starting with leather pyrography.
The variable temperature burning tool can be used for working with more delicate details of imprints. This tool offers a lot of control regarding temperature. It applies to designs with varying heat requirements—the required temperature for burning ranges from 200 to 450 degrees Celsius, depending on the design depth.
Another thing to consider before purchasing is the burning tool’s tip. Burning tools can have fixed or interchangeable tips. Interchangeable tip burning tools are more convenient and can do many creative designs, while the fixed-tip only has one design you can use.
There are numerous tips to choose from, but these are the most commonly used in leather designs. The first one is the calligraphy tip, used for making letterings on your leather. We also have a writing tip that slides smoothly on a leather surface for you to write with ease. There are also burning tool tips suitable for drawings like the shading and the tight round tip. The shading tip is used to add darker tones and details to your design. This tip is what you need if you’re doing landscape drawings or painting-like creations. Talking about versatility, the tight round tip can be used for all kinds of details, curved lines, and shadings, all in one tip.
Carbon Paper or Tracing Paper
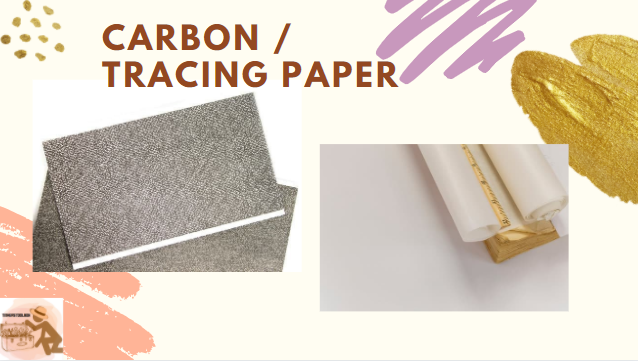
Carbon or tracing paper is what we will use to transfer your design from paper to leather. These materials are light and help avoid creating any unnecessary marks on the leather. The transferred design will then be the guide in the burning process.
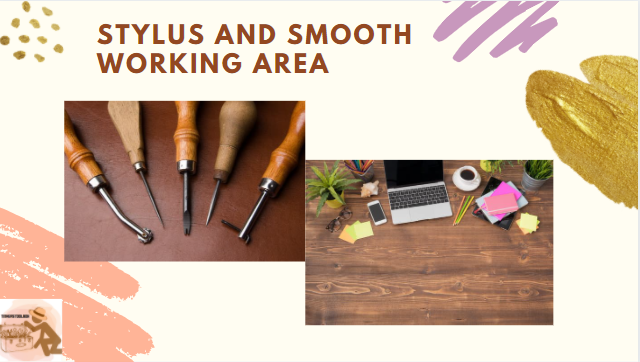
Stylus
We will also use a stylus, a blunt handheld tool used as a pen to lightly carve the designs to the leather with the guide from the carbon or tracing paper. Make sure not to cut the grain surface. Glide the stylus lightly enough that the markings are visible as a guide for burning.
Smooth Working Area
Choose a working area that is comfortable enough for you to work on. It can be in a wooden board or cutting mat, thick enough, and can accept minor burns from the burning tool. A comfortable working space lessens the risk of being burnt and provides more concentration needed in the burning process.
Safety Tips in Burning Leather
The burning process is dangerous both to your health and physical being; that is why safety precautions are always reinforced. Here are some tips on successfully achieving your desired work of art without burning a finger.
Always be careful when handling the burning tool, as it can get really hot when running for a long time. Hold the burning tool like you would a pen for proper control. This way, you won’t be touching its hot parts, and you can clearly draw and write on leather, just like doing so on paper.
When not in use, place the burning tool in its holder. The burning tool usually comes with a holder that prevents the burner from touching your working area while keeping it in an upright position. When changing tips, wait for the tip to cool before cleaning or changing it to prevent burning your fingers. You can also use pliers to change tips.
Work on a well-ventilated area. Use multiple fans so the air will keep circulating, and the smoke won’t stay in one place. Also, avoid inhaling the smoke from the burning leather; wear a mask if you feel the need to. And avoid working in an airconditioned room where air and smoke cannot escape.
Wear protective clothing such as goggles to protect the eyes, thick gloves for the hands, and a mask to avoid inhaling toxic chemicals. Stop when health issues arise, such as difficulty breathing, coughing, irritated eyes, developing rashes, burning throat, and lightheadedness.
Do not use leathers other than vegetable-tanned as artificial or chrome tanned leather may have toxic chemicals that cause serious health problems when inhaled.
Use a burning tool that is comfortable on your hands to avoid being burned on your fingers. A comfortable tool makes it easier for you to create and draw patterns on your leather.
How to Do Leather Pyrography
Here are the procedures for doing leather pyrography. Follow them religiously, and you’ll be ensured of a beautiful quality result.
Preparing the Leather
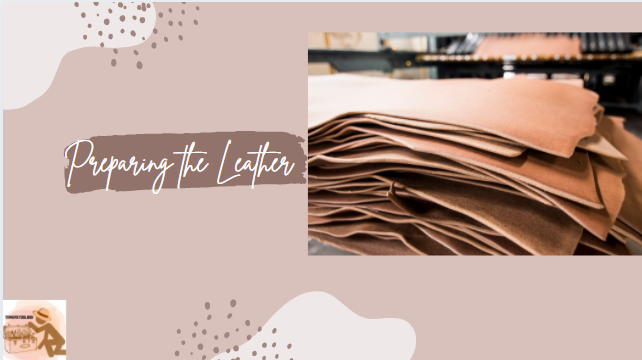
Pyrography is done on the skin side of the leather. In preparing the leather, you need to wet it with water to prepare the skin to accept burning. Place it in a smooth area, skin side up. Then, spray some water on the leather using a sprayer or a damp cloth. Let the leather absorb the water.
Smoothen the skin side of the leather using a wood burnisher. Glide it over the leather with enough pressure to all sides of the leather. You can also use any smooth-surfaced object like a wooden rolling pin or the bottom of the glass but avoid using objects that may scrape the leather skin. Smoothing the leather makes water absorb deeply into it, ensuring easy transfer of designs through the burning tool. You can add more water when the leather starts to dry. Continue the process until you have smoothed the leather in all directions, then let it dry. Dying may take a couple of hours or even overnight, so be patient with this process.
We also need to smoothen the flesh side of the leather. Repeat the process of smoothing out the leather, this time doing it on the flesh side. The purpose is to compress the leather material to become a firm surface ready to accept burned designs. After the whole process, let the leather dry completely before moving on to the next step.
Transferring of Design Pattern on Leather
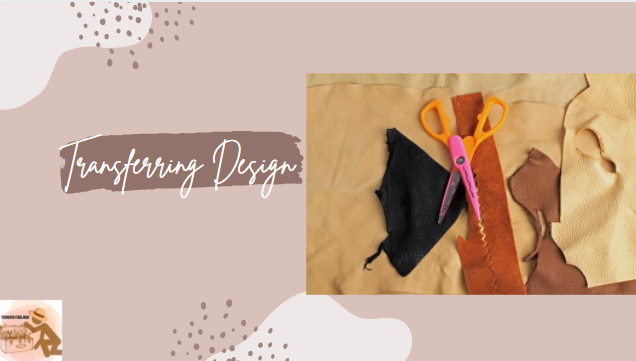
Using carbon or tracing paper, transfer the design to the leather. Use a stylus to carve the outline of your design. Remember not to press too hard because it may make the design embossed. We just need to have an outline for the burning tool to follow.
Do not use scotch tape to secure the pattern on the leather. It may leave a mark as the leather is sensitive to surface interaction after being smoothed and applied with water. Instead, you can use paper tape if you feel the need to. Paper tapes usually leave minimum marks on the leather that can be erased by applying a small amount of water and burnishing.
You can use a soft pencil eraser to remove unwanted lines or mistakes from the outline.
Burning Leather Begins Now
Before starting the pyrography process, it is highly recommended to test the burning tool using a small piece of leather. This is to get you accustomed to the feel of the pyrography tool on your hands and to see how the leather reacts with different temperatures of your burning tool. Also, this helps you get the perfect amount of heat you’ll need for your design.
Leather burns beautifully at low controlled heat, so you can start with a lower temperature then escalate it depending on the need for your design. When changing temperatures, try it first on a piece of scrap leather so your design won’t be ruined if you happen to apply excessive heat. Follow through the outline to create your burned imprints on the leather.
When burning the same spot multiple times, let the part cool down before re-applying heat so the leather won’t lose its firmness because of the high temperature. Furthermore, leather is prone to tearing when applied with excessive heat, so be careful when working around delicate and complex designs.
The exposure of the leather to the burning tool determines the outcome of your project. If you work with high heat, make small and slow strokes on leather and try not to rework them, it may rip the leather. For lighter tones, apply a minimal amount of heat and pressure just enough that the leather surface is not compromised.
After burning your way down the outline of the design, you can now turn off your burning tool and set the leather aside for it to rest. And that’s it! You now have your leather pyrography project fresh from the oven.
Conclusion
Leather pyrography is indeed a unique and stunning way to design your leather. It is an outlet to get creative and be personal with your leather projects, as you can incorporate any design and writings that you would like to have. It also shows the leatherworker’s personality that makes the projects more valuable. Now get your burning tool ready and make all your clever designs come to life.