Leather is a beautiful and sturdy material which is why it has been used for centuries to make everything from shoes to handbags. However, leather is not just about looks – it is also quite durable and can be sanded, dyed, and otherwise processed on various surfaces. The method most commonly used by leatherworkers is tooling.
In tooling leather, you will need to follow simple steps, and these are: preparing the tools and materials, casing leather, drawing the design and carving it afterward, and add beeswax for the finishing touch.
The tooling leather process requires complex tools and perfect leather. Though somewhat time-consuming and labor-intensive, leather tooling proves to be an effective way of creating leather goods that are both durable and appealing.
The Leather Tooling Process – What Is It?
Tooling Leather is perfect for shaping and embossing designs into the surface of the leather. It is available in various thicknesses, allowing the craftsman to choose the right one for each project.
For example, a belt will require thicker leather than a knife sheath. Several layers of tooling leather can be joined together to make thicker leather. It is advantageous when intricate motifs are cut into the leather that requires additional thickness.
It is used to create individualized and ornamental products, which are typically more expensive because of the higher quality of the leather and the effort involved. Tooling leather can be used to make shoes, purses, belts, saddles, cases for cameras and binoculars, holsters, knife sheaths, clutches, and wallets. Additionally, a flask holder has been included!
In general, the term tooling leather is used to describe any vegetable-tanned leather used for tooling. Vegetable leather becomes more pliable and easy to work with when it is tanned. After it has been dyed, the leather is frequently pale brown or white. But generally, the results will not be quite as excellent using any other type of leather other than vegetable-tanned leather.
Investing in high-quality tooling leather leads to much improved outcomes, with crisp, defined edges. Since the leather is vegetable-tanned, it will develop a patina over time and is appropriate for coloring when the product is finished. Additionally, leather is a long-lasting material that can endure decades.
The answer is yes if you have ever been captivated by the obscure ornamentation on a piece of leather and wondered if you could try it yourself. Let us now step through the process of tooling leather.
Step 1: Preparation for Tools and Materials Needed
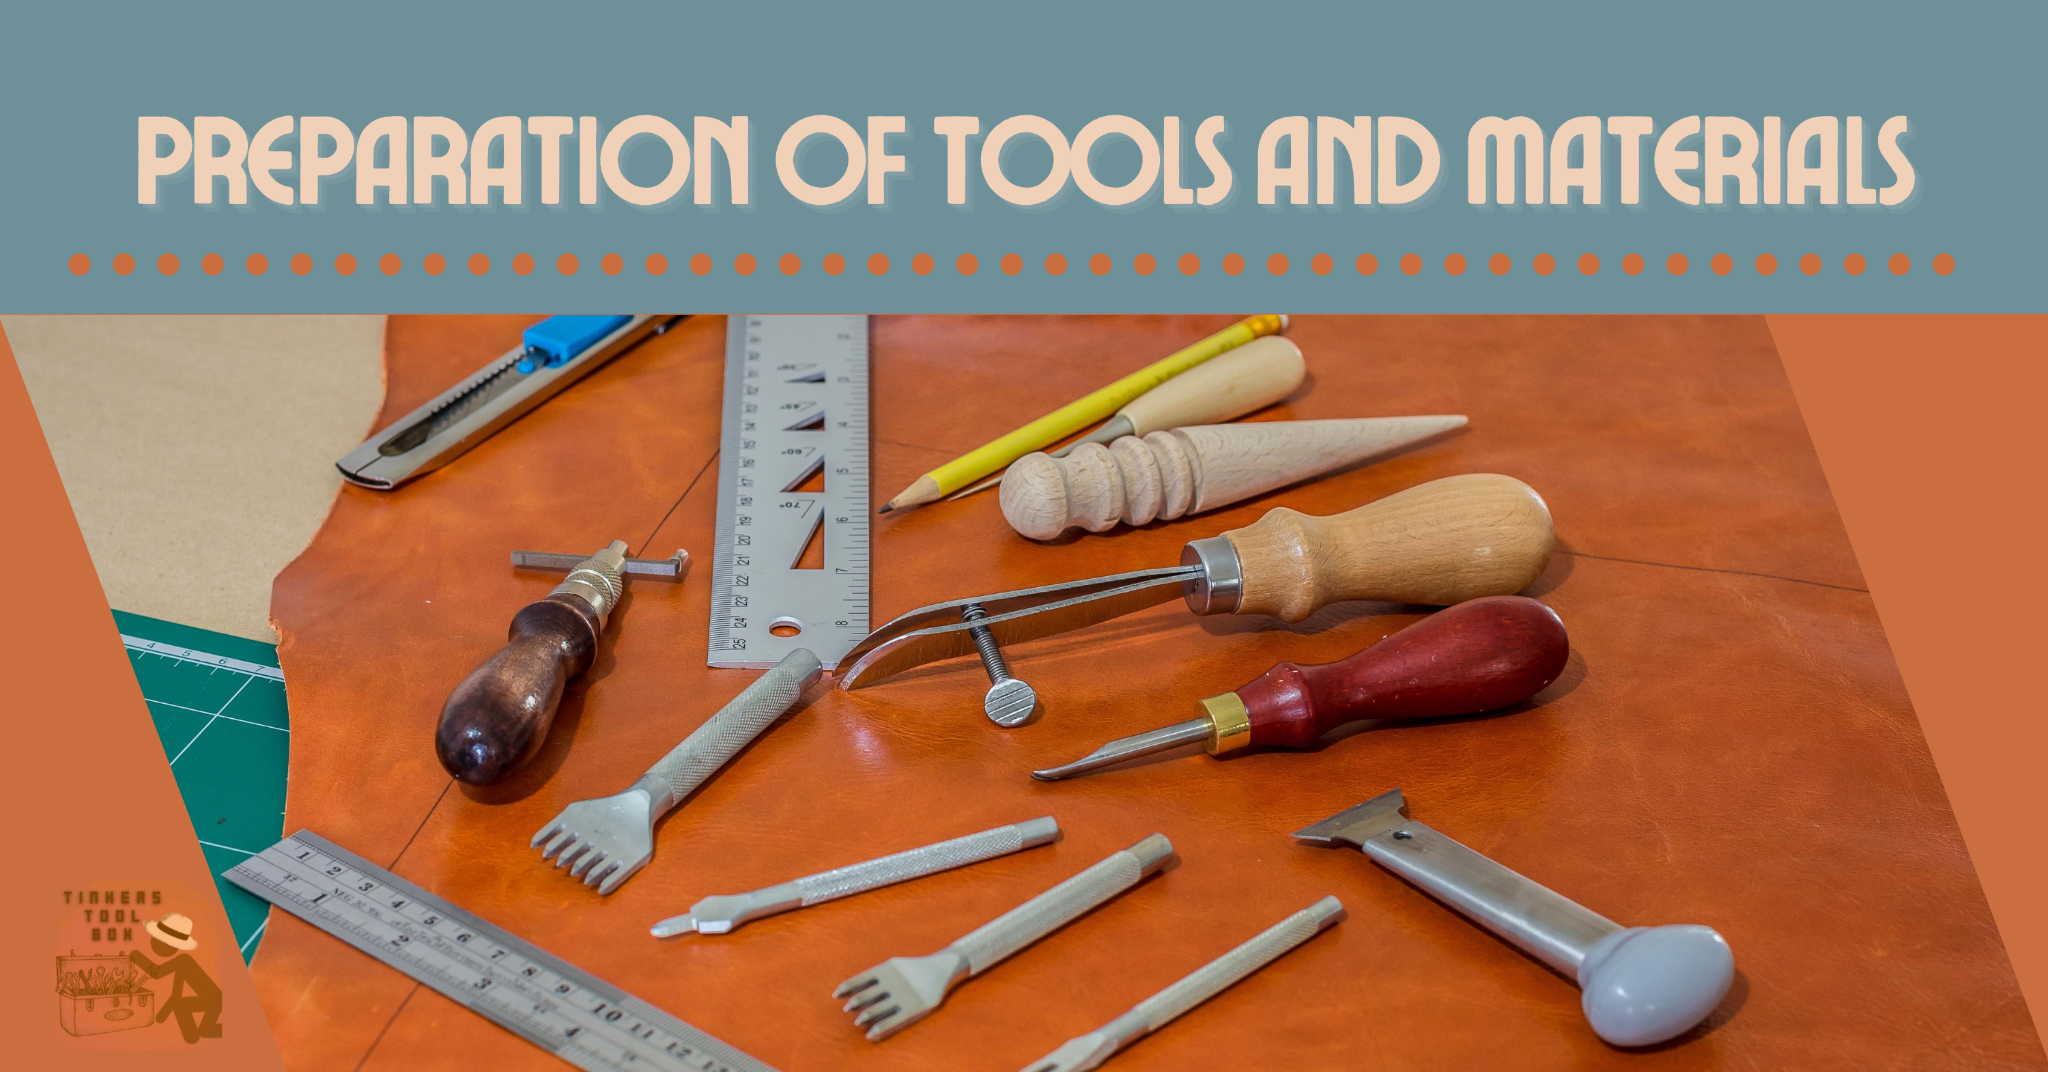
In tooling, strong, supple leather that absorbs water is used. Several colors and thicknesses are available, along with a variety of textures and finishes. It is tanned using natural tannins in a vegetable tanning process.
To make any decorative patterns or designs on leather, you will need to employ leather-tooled patterns. To make these patterns, you can download designs or make your own. Then, proceed to the gathering of tools that are needed in this project.
A swivel knife is needed to cut the lines out of the leather. The depth of the cut should be approximately half the thickness of the leather. Keep your cuts from overlapping, or you will end up with a nasty hole in your leather project.
The backdrop tool is the next item on the list. Backgrounders add dimension to your designs as well as generating backgrounds around them. The use of this tool is recommended if you wish to improve the aesthetics of your work.
A wide range of tooling materials is available for use in this project. Here are a few illustrations:
- Shaders for pears. These are used to shade areas, offer depth to a design, and add interest to a geometric shape or pattern.
- Veiner Stamp. It is frequently employed in the creation of veins in floral stems and leaves. It is employed for the creation of borders, scrolls, and geometric shapes. Different combinations of pressure and tilting can produce a variety of effects.
- Stamp with a camouflage pattern. A line or an edge is disguised by using a camouflage stamp. It is also employed in the creation of borders and geometric shapes.
Next are a leather mallet, a hammer, or a maul. These are all types of hitting tools commonly used in the leatherworking industry to strike leather. A metal tool, typically used in stamping, marking, or cutting the leather being worked on, is delivered to a specific spot with concentrated force. Choosing the right tool for your convenience can be difficult because many different forms, styles, and materials are available.
Do not forget that you must provide a beveler, a spoon-type, to smoothen the carvings you made in tooling leather. When it comes to creating leather goods, the leather beveler is a necessary tool. It contributes to the appearance of smooth and even angles, and it is quite simple to use.
Lastly, do not forget the water and sponge. In tooling leather, the casing process is the most crucial part. It serves as the foundation for having perfect tooled leather. Once all the tools and materials are prepared, proceed to the casing process.
Step 2: Casing The Leather

Stamps and tools are required to cut and imprint leather for tooling, but they should not be flexible or bouncy enough to cause the stamp impression to be wiped away. Before working with vegetable-tanned tooling leather, it is necessary to wet it with water.
The casing is used to describe the act of soaking the leather, which is required to stamp and shape the leather properly. As a result of the casing, the fibers become softer and more voluminous.
A damp sponge is rubbed on the flesh side of the tooling leather, followed by a dry sponge on the grain side of the leather. When applying the water, make sure to spread it out evenly. It is only when the leather is wet that it is possible to work with it.
Step 3: Drawing The Desired Design For Your Leather
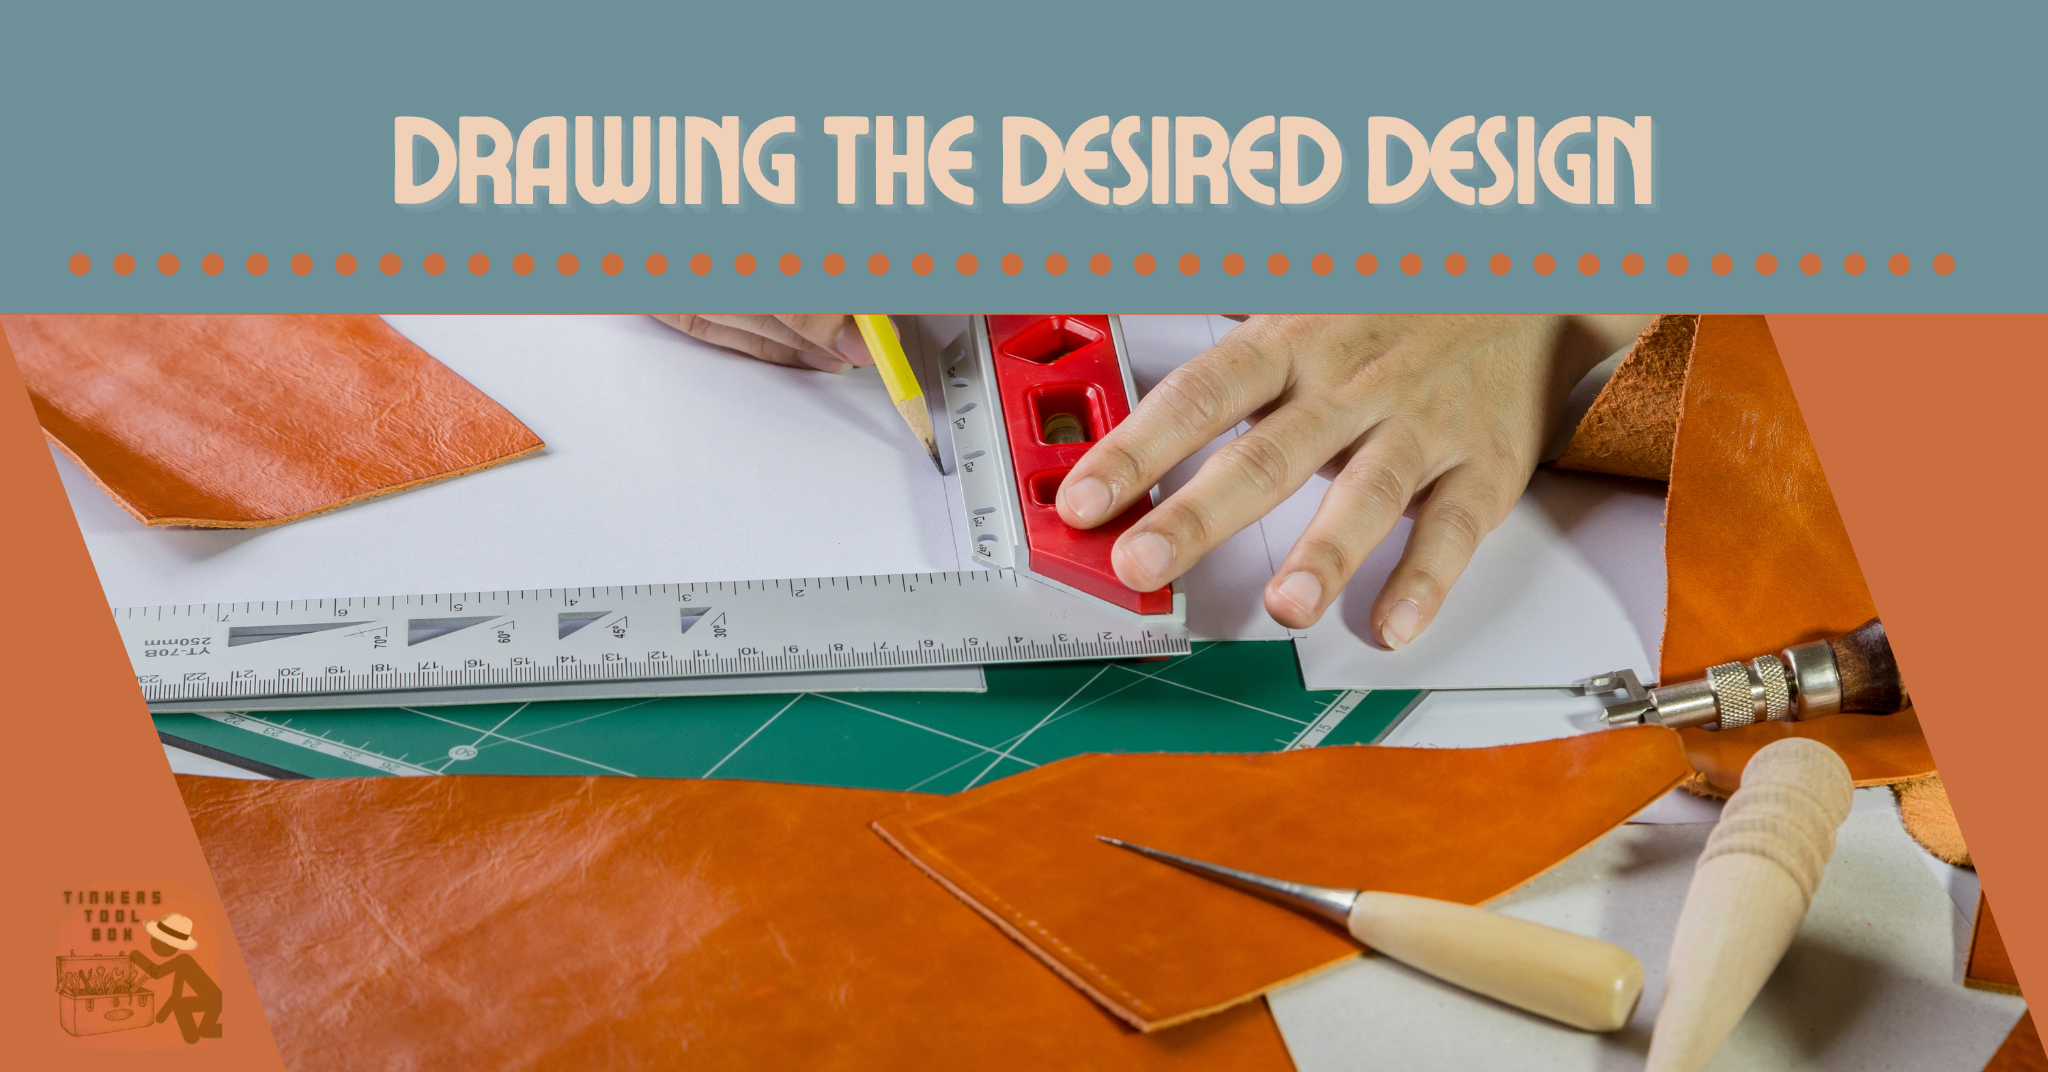
Drawing is the first step and also the most crucial to creating your desired design. Leather artists put their hearts into every drawing they create, a drawing that speaks to them somehow. The most important aspect of drawing is to understand the basic tools and materials used in leatherwork. Without a good knowledge of these basics, it will make creating your first leather design much more difficult.
Importance of drawing from a live model or reference picture is paramount in creating realistic designs that look exactly like what you envisioned them to be.
Designs should be kept simple because not everyone can draw as well as a professional artist, so produce what you can physically do on your own time, not wasting valuable resources.
For this step, use a pencil to create designs. Put curves and lines that fit well. Arabesque and anthemion are the common patterns that are used in leather tooling. However, a plaid pattern, Celtic knot, argyle pattern, and bird’s eye pattern is highly recommended.
Step 4: Tracing The Lines And Curves
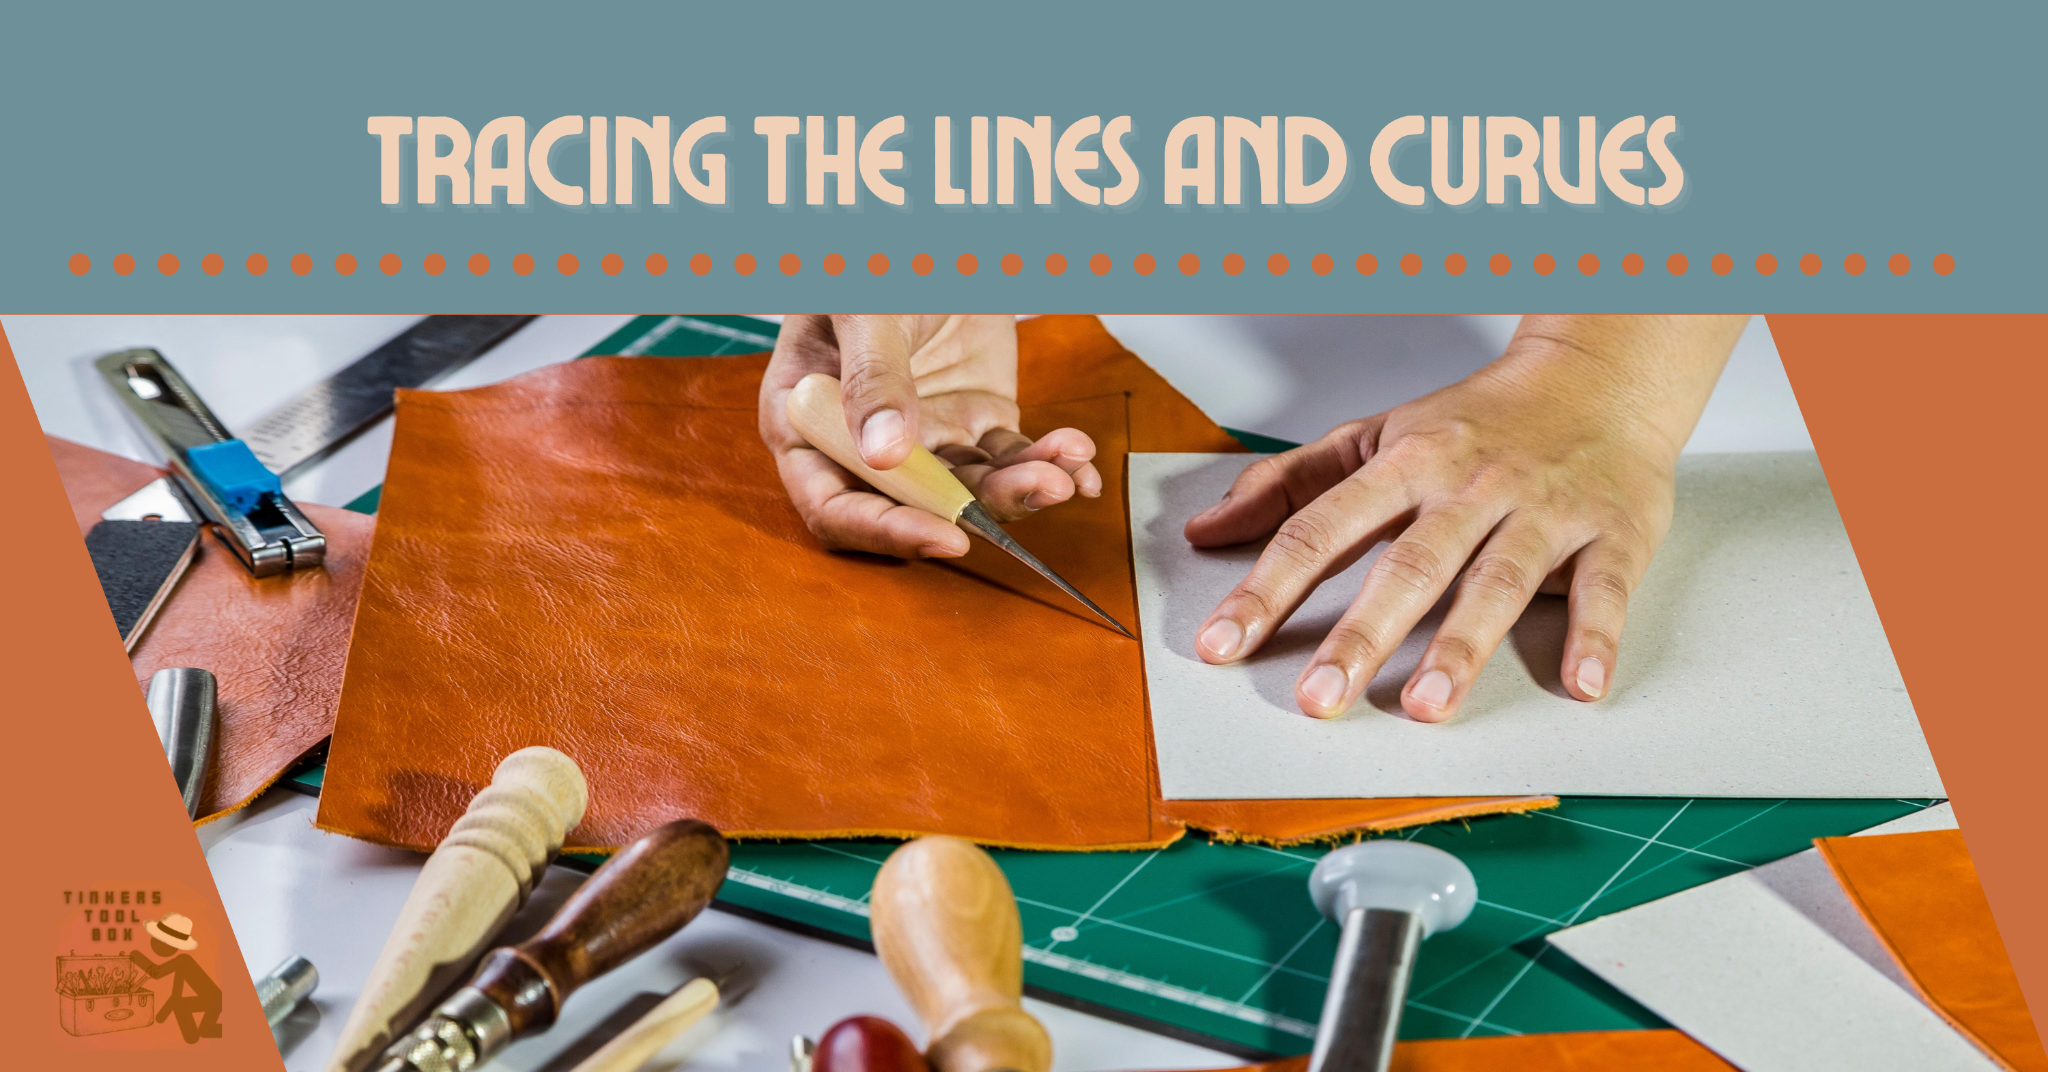
After drawing the desired style to the leather and marking the areas, it is finally time to trace the lines and curves made in the leather. In this step, a swivel knife is used. Gently trace the drawing in the leather. Make a bold line or edge by cutting the leather anywhere you want it to be prominent. You do not have to cut all the way through, but you should cut around half of the way.
Make sure that the blade of your swivel knife is sharp enough to sculpt the designs you made earlier. Thus, whenever you see small scratches or a tattered part that the knife has passed. Quickly check the blade because it might have worn down.
Double-check the leather after tracing the lines to make sure no nasty holes have been created inadvertently. If ever there are small accidental holes, try fixing them.
In most cases, a sub patch and leather filler will suffice to repair a hole in vinyl or leather upholstery. However, it is preferable to integrate a top-patch for cosmetic and feel purposes when the hole is greater than several inches in diameter. It is because the leather filler is stiffer when used to cover really large gaps.
Step 5: Beveling The Rough Edges Of The Design

Sure, it is necessary to smoothen the edges of the actual leather product, but in tooling leather, there will be edges created when tracing the design, and those also need smoothening.
An edge beveler is used for aiding the roughness of the edges. An edge beveler is most commonly used for thicker leathers, applicable to tooling leather. When edge bevelers are not used, the common problem is that the edges fold over on themselves, creating a terrible look.
Bevel the rough cutting of the design. By this step, the beveler that is used is a spoon type. You will need to run the beveler along the edges of the leather while it does the hard-to-reach work for you. If you are unsure that it all smoothens, use your bare hands to check for unwanted prickly edges.
Also, when beveling, it is not required to bevel the whole design. Bevel the areas that are needed to be smoothened. Do not waste your time beveling the whole thing, but check for the parts that require full-time flattening.
Step 6: Adding Extra Designs For Aesthetic Purposes
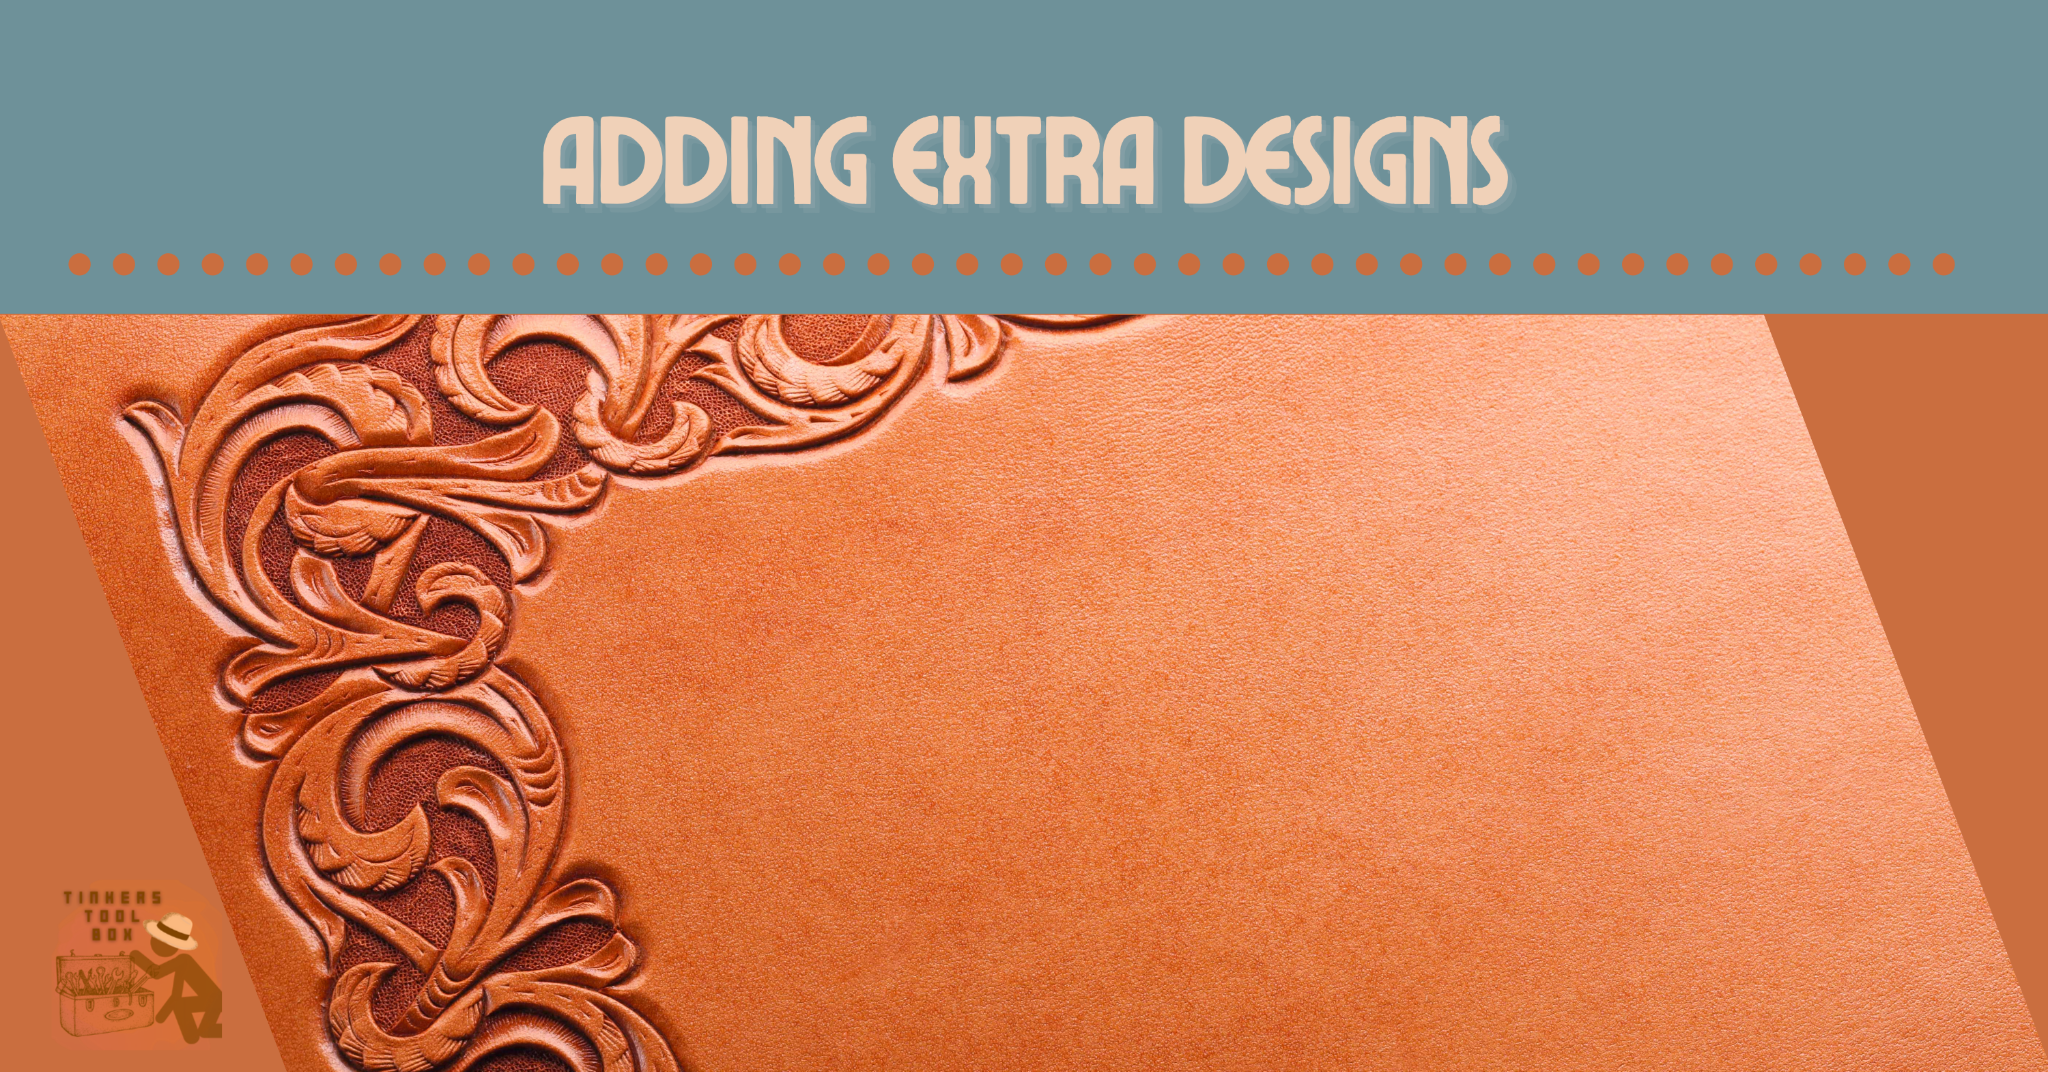
If you are a leather goods business owner or designer, you may have already known how to incorporate patches and appliques into your products for practical purposes. But in recent years, more leather workers have begun adding a design element for aesthetic purposes.
When tooling leather and adding more styles to the product, certain tools have a specific use. We will only need to provide a background tool or a backgrounder to mangle more aesthetics in this leather tooling process.
Grab your mallet or hammer in this step. Place the backgrounder into the part of your leather that you decided to be the background of the whole design. Then, by using the hammer or mallet, exert enough force to press it firmly into the leather and leave it with the backgrounder’s design.
Practice hammering in a scrap of leather. Ensure that the force you exert throughout the leather is the same, or you will end up with a bumpy background. Also, during the whole process, remoistening the hide would be necessary if tooling is not done.
Step 7: To Make It Last, Apply Beeswax
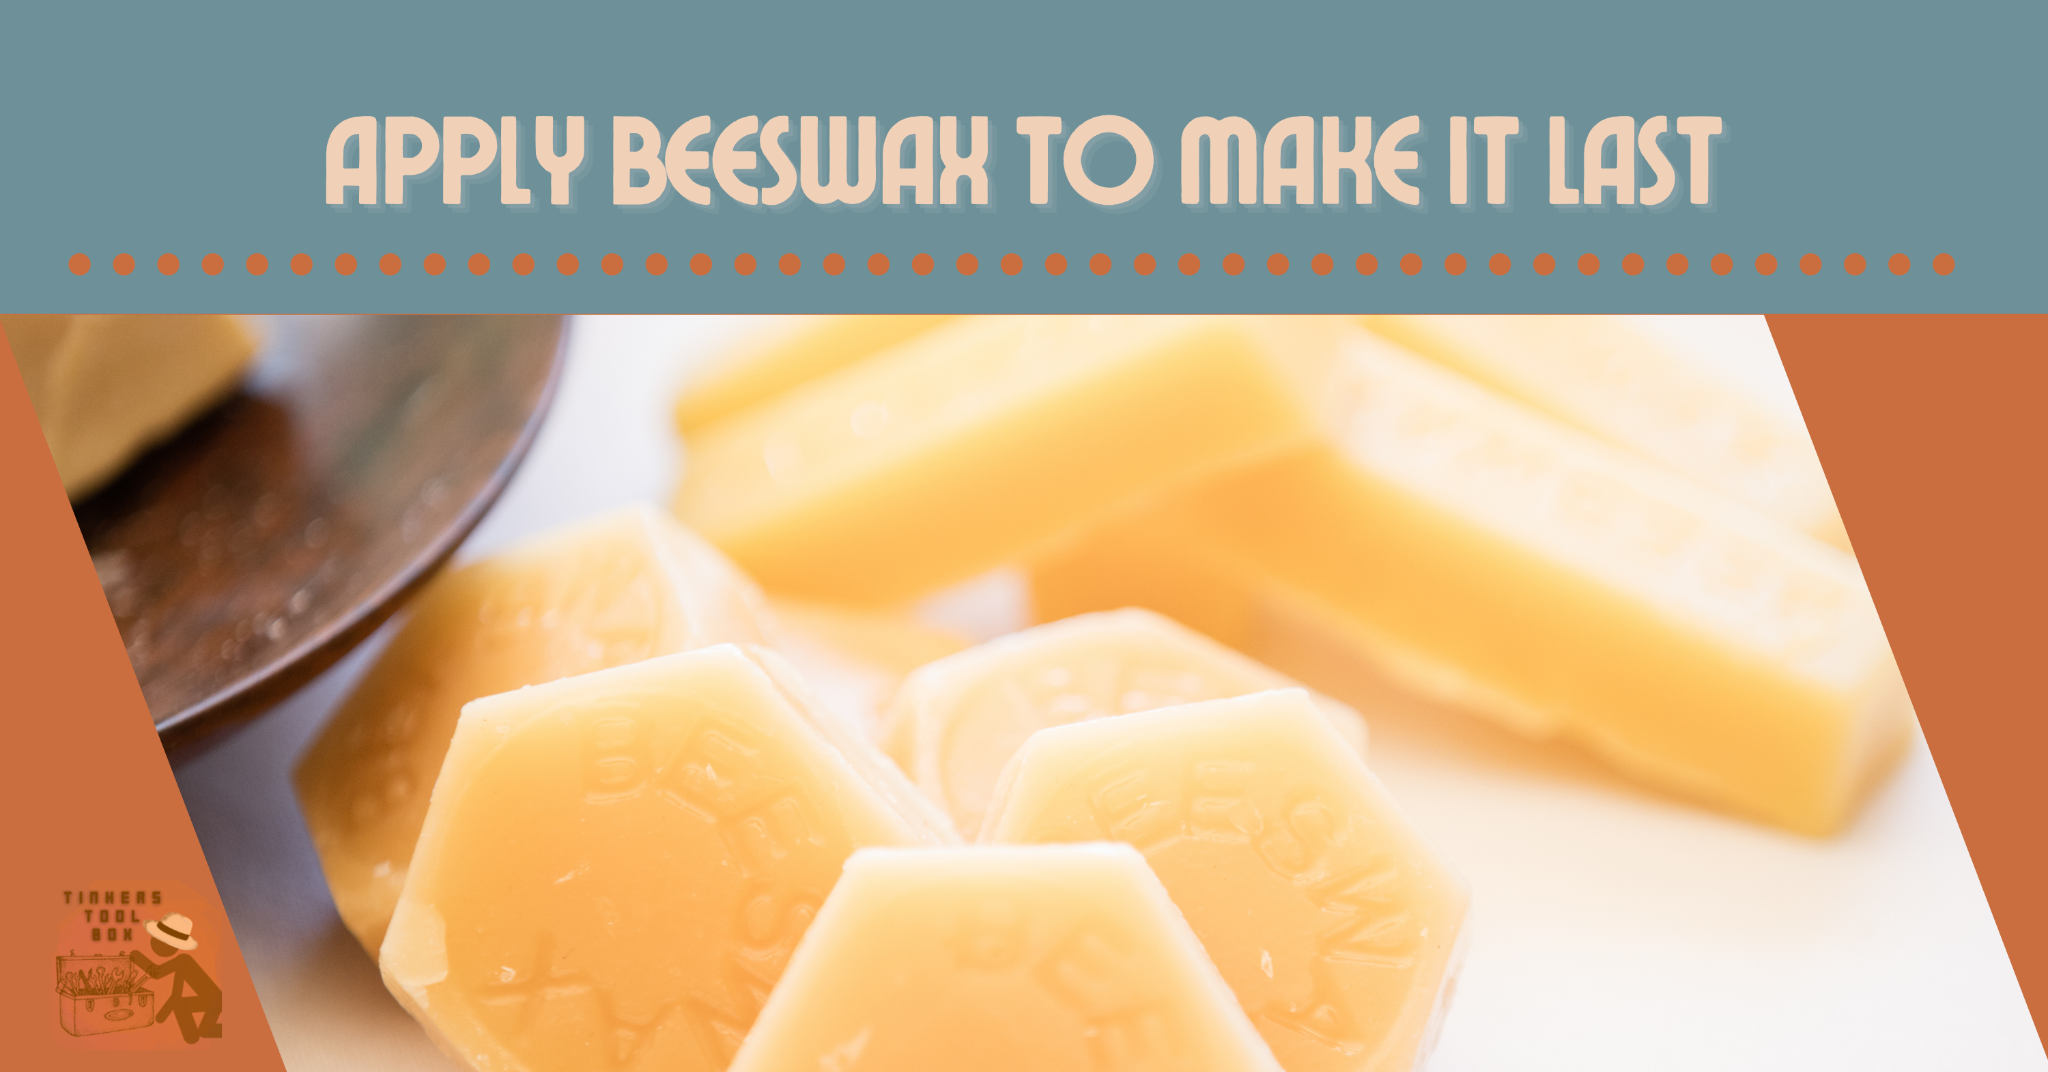
The final step of tooling leather is applying a coating to it. Apply beeswax to your tooled leather. A moist cloth is used to apply a small amount of beeswax to the outside surface. Use gentle strokes to lubricate and provide a smooth and lustrous output.
Then, do the process all around the design, from the base as well. If you want, you can also include the interior. The beeswax is not applied to the leather in large or generous amounts. Allow a small amount of beeswax to remain on the leather.
Beeswax is a byproduct of honeycombs. It is naturally antibacterial, and when applied to leather, it seals the pores preventing water from soaking out. This protector helps make leather water-resistant, more durable, and less susceptible to cracks and splits. Beeswax can also help cleanse the leather and keep it looking new for years without constantly cleaning it with detergent.
Tooling Leather: The Importance of Quality
Tooled leather is any form of item, regardless of its material. The process of working on leather is the same, no matter if the item is a belt, a saddle, or anything else.
Additionally, it could be any design or pattern. On tooling leather, you may create intricate stars, flowers, curves, fauna, and initials. However, even if you draw a line along the length of a leather belt, it is still a tooled leather belt. Nevertheless, the leather must have been cut, pressed, or manipulated in some way.
Tooling has been used to create and beautify leather garments for hundreds of years now. Through generations, leather workers have passed on their knowledge of leather trades. When creating a beautiful, long-lasting product that you can own and appreciate and that may even be taught from generation to generation, it is critical to choose high-quality tooling leather that is ideal for leatherworking.