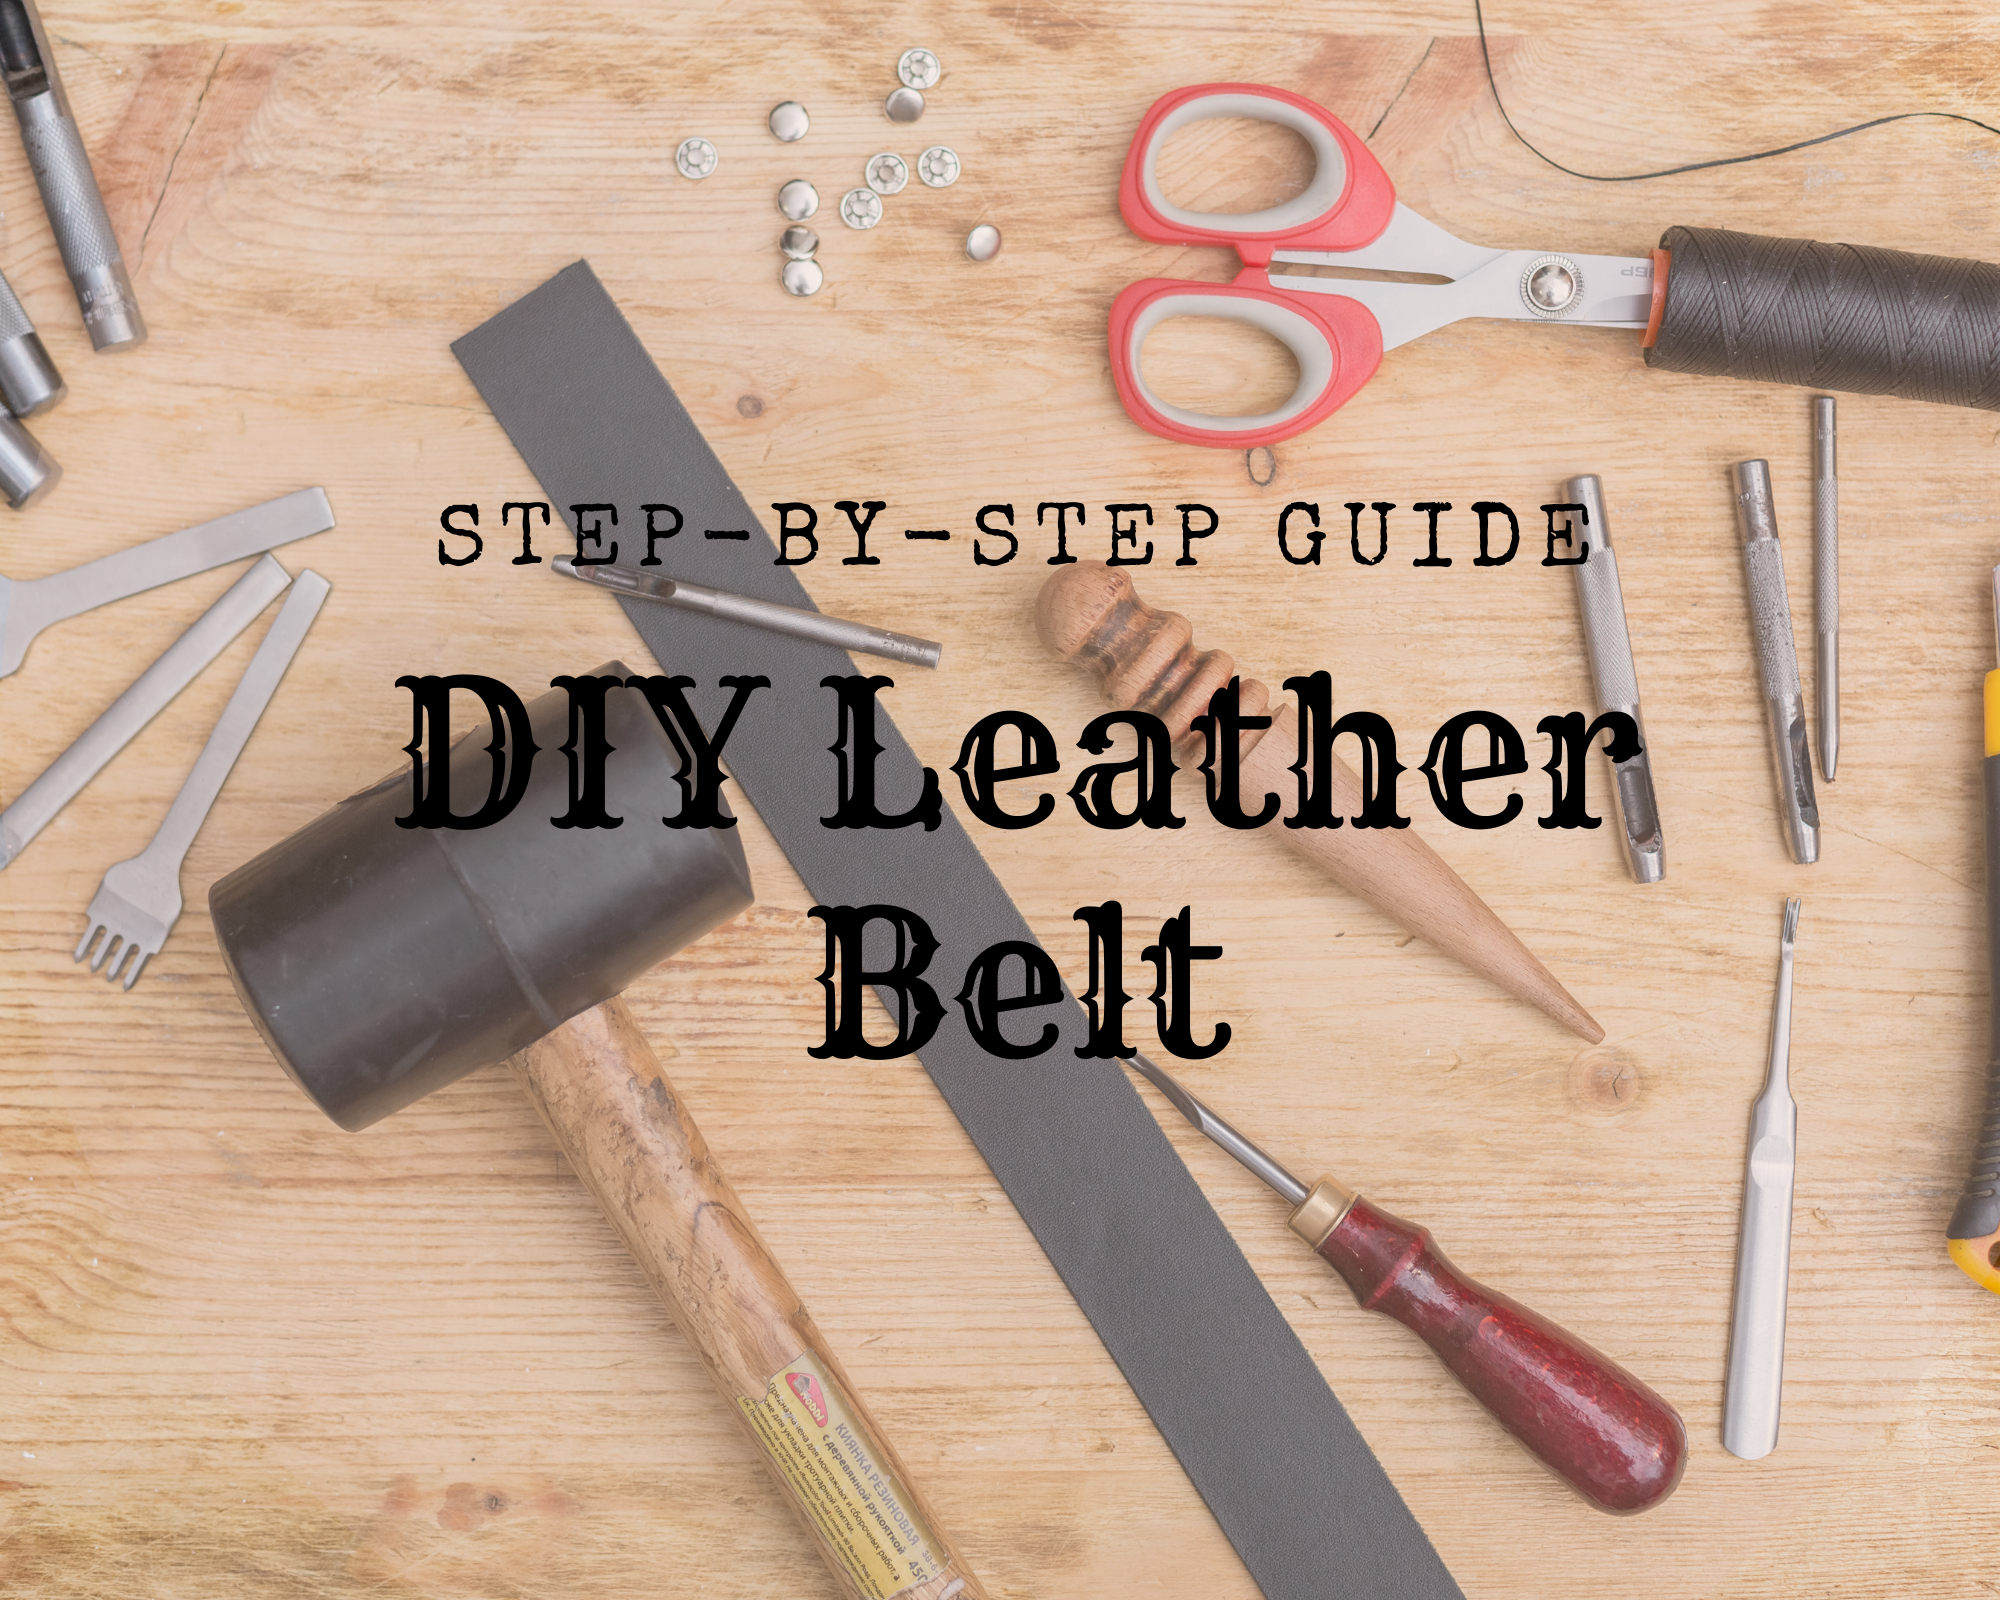
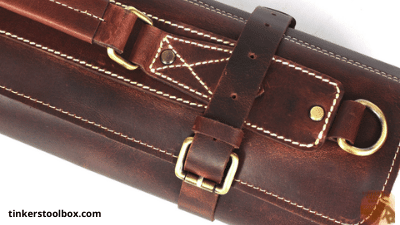
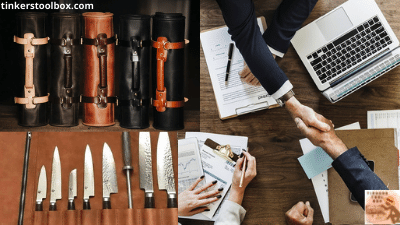
A knife is one of the handy tools people keep at home, for it serves numerous purposes. There are knives for cooking, household knives, utility knives, knives for leatherworking, knives for wood carving, knives used in carpentry, and many others. This is why you need a knife roll to store, organize, and arrange your different types of knives. Knife roll is simply a roll of any material like leather to keep the knives in place by rolling it and laying it down to open when you use it. Having a knife roll helps the blade be protected, which means keeping it sharp and in excellent condition.
How to make a knife roll? Lay out the knife and get the measurement, including the leather allowance. Prep the leather, buckles, and straps. Secure a pattern. Create the handle, strap, and closure straps, and finish up with aesthetic details.
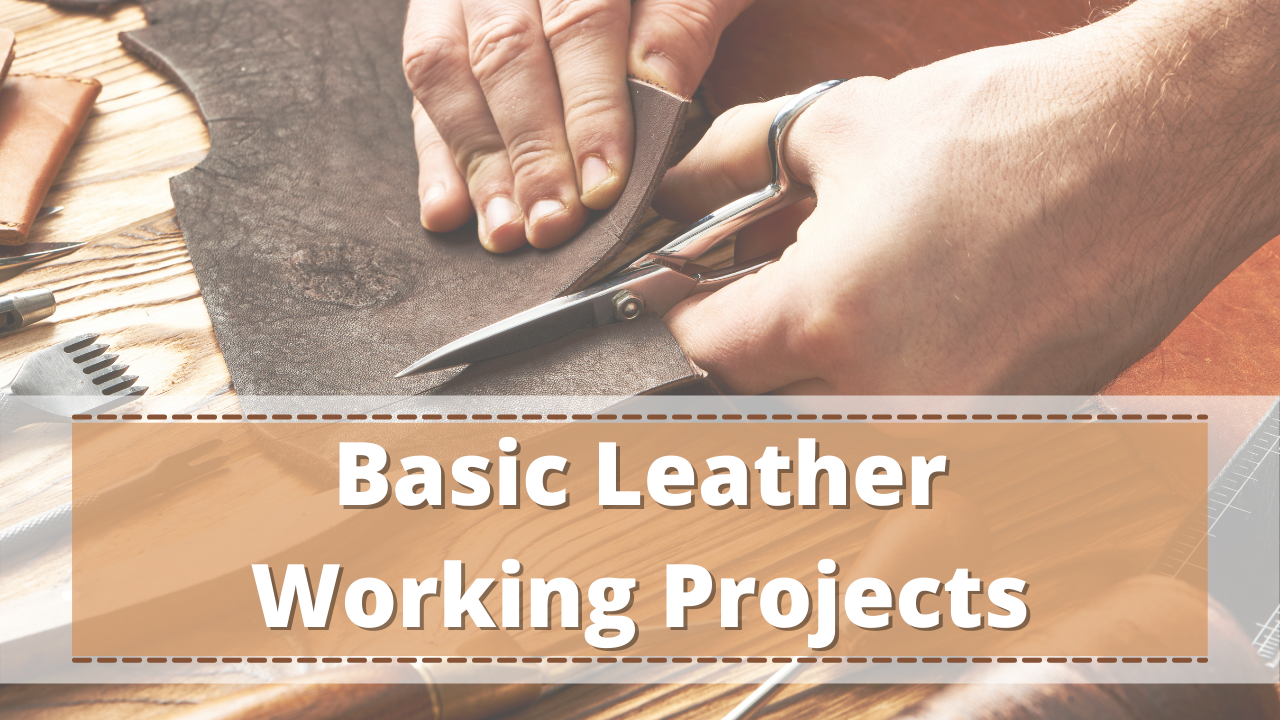
One of the best knife rolls is made in leather. Leather is known for its durability. Choosing this garment as a material for your knife roll is indeed a good idea. It provides the best quality not just for use but aesthetically because it is timeless, weather-resistant, and of course, stylish & classy. This is why many people prefer knife rolls made from leather. Be it any kind of knife for your hobby or job. This article will introduce the detailed procedure in creating leather knife rolls, providing better storage and protection for your loved blades.
Laying The Knives In Order and Getting Measurements
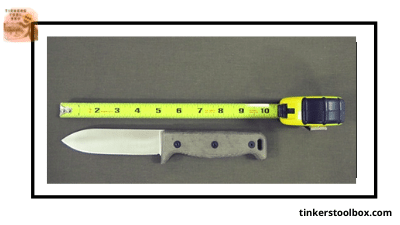
The first thing you need to do to create your leather knife roll is to arrange knives or any materials you will want to place in the roll. Doing this primary step is a must so that you can determine how much leather you need in making your knife roll, identify the essential tools to include, and the arrangement of the device according to your preference.
Tools and Materials For A Start
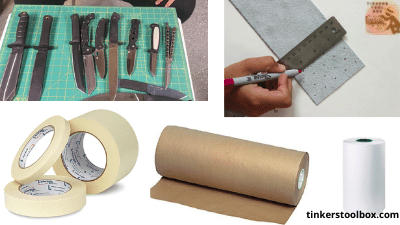
Gather all your knives and other essential materials you will place in your knife roll. Put in mind what other tools you may want to put in your roll in the coming days. Once decided, prepare a ruler and a marker. Then, get masking tape and a large sheet of paper to be your canvas for your measurements. A butcher block paper is recommended because it doesn’t easily rip or tear when in use. One roll of butcher block paper costs $10 to $30, which is widely available in different stores, including online shopping sites and physical stores. You can also use this for other projects.
How To Do It Like A Pro

Lay your butcher block paper or any large sheet of paper (just make sure it won’t tear easily). Arrange the knives and other essential tools into the butcher block paper or a large sheet of paper following your preference.
You can place the tools in the order of large to small or small to large. It is all up to you, but this is the simplest way to arrange their tools by size. Provide an extra space on both sides of each knife and tool to create a pocket. You can mark a broken line between each knife and essential tools to help you make a bag.
You may use scrap leather to determine how much space is consumed between each knife and other essential tools before proceeding to the final piece. After finalizing the knives’ arrangement, measure the width and length of leather on which the devices will be placed. This procedure helps you determine how much leather is required. In this stage, three to four times or more than the amount of space you measure is highly recommended to ensure a good fit and will give you a working allowance on your project.
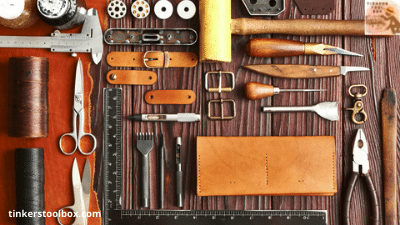
Getting The Suitable Materials: Leather, Buckles, and Straps
Of course, our piece of material is leather; make sure to get ready with that but if you don’t have one, consider looking at different online shopping sites for leather, then make a purchase. Also, include your budget the buckles and straps you will need to keep the knives in place.
The Right Materials and Where You Can Find Them
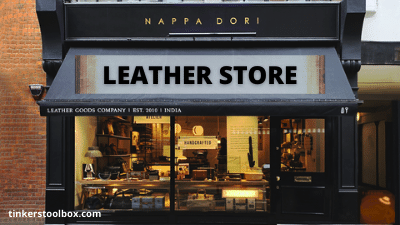
For starters, you can visit a physical leather store. It will be ideal to go to these stores, especially for novice leatherworkers, to have a feel or experience of looking for materials for your project. This way, you can also avoid the problems in online shopping when buying materials because you may still lack the skill to examine virtually.
You can also visit several online shopping stores that sell leather, buckles, and other materials required in making knife rolls if there is no specific store that only sells leather materials near you. You can also try the thrift shops to look for buckles and hooks where you can find inexpensive items for your leather knife roll from the thrift store purses and belts.
Making The Right Purchase
Suppose you are going to a physical store; it is best to take the paper layout with you, including the outline of the knives’ placement. In making an online purchase, be sure to chat with the seller you are ordering. Never forget to send a picture of your initial design of the leather knife roll so that they can assist you.
If you are a beginner in making leather knife rolls, consider talking to the store’s staff because they know exactly what you need, including the weight of the leather suitable for your project. If the leather you are going to purchase is not rectangular (which is likely to happen), take a look at its shape if you can still work your way on this (It might not be easy, but indeed, you can!).
Getting The Ideal Leatherworking Tools and Supplies
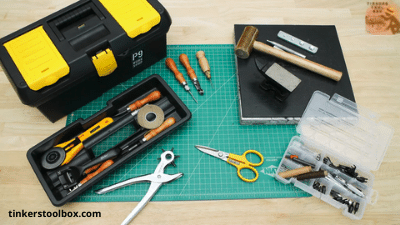
Let us say you have gathered the materials suitable for making a leather knife roll, be ready with your leatherworking tools and supplies. These leatherworking tools and supplies will be your buddy all along the process.
Basic Tools You Need
- Leather hand sewing needles
- Speedy stitcher
- Various punches like circular, oval, or rotary ones (if needed in your project)
- X-acto knife
- Razor blades
- Mallet
- Heavy rubber mat
Supplies You Should Have
- Rivets
- Chicago screws
- Buckles and hooks
- Wax linen for sewing
- Leather glue (barge brand is recommended)
Making a Copy and Creating a Mock-Up
Creating a copy in the paper or the butcher paper and a mockup will serve as a pattern in starting the actual process of making a leather knife roll. This will be your guide to a smooth process and, importantly, lesser mistakes since you have it pre-planned out.
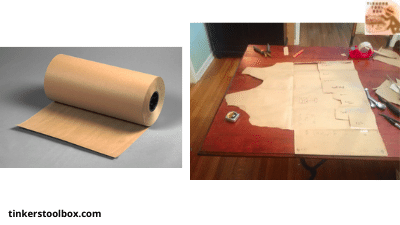
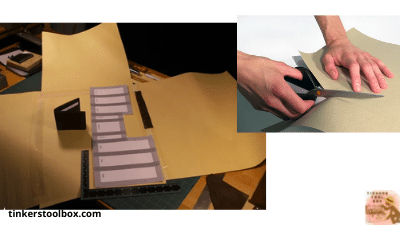
Copying The Leather Hide Shape Into the Paper: The Mould
Lay out a butcher paper that is larger than the leather hide (given that it is a cowhide type of leather you will be using for the knife roll project. Then place the leather cowhide over the butcher paper.
Using a marker, outline a copy in the butcher paper with the leather hide shape. Finally, cut out the butcher paper in the form of leather. One option is you may tape the leather hide onto the butcher paper so that it will be convenient in leather cutting. You can use masking tape, painter’s tape, etc.
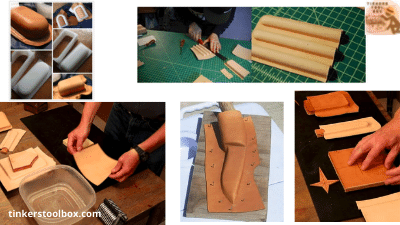
Creating a Mockup in a Paper with Butcher Paper
A mock-up is a full-sized model of your actual design. It helps you visualize what will be the outcome of your project. In this way, you can evaluate, demonstrate and teach how the project should be done or changed.
To do this, place the initial design layout on the large paper cutout of the leather cowhide. Position it appropriately so that the materials will have the best out of it, then mark with a pencil. Then measure a piece of butcher paper for the bottom part of your knife roll, covering the blade knives.
Measure another piece of butcher paper for the flap at the top of your leather knife roll again, and another part of butcher paper will be the flap on the end where the handle will be attached for your leather knife roll. Now cut out the measured four pieces of butcher paper.
With masking tape or painter’s tape, attach the four pieces of cut butcher paper. Your mockup is now ready, so place the knives, including the essential tools and roll them up.
Notice if there are handles that butt up against each other. If there is, adjust the spacing and pockets. Be sure to give extra space between the knife blades so that they will fit easily. Have some repositioning and adjustment of the knives when needed. Finally, secure your final design by taping it together with masking tape or painter’s tape.
Transferring and Cutting: The Four Major Section of the Knife Roll
Transferring the butcher paper mockup of the knife roll design into the piece of leather like a cowhide is easy. The process involves leather cutting of the four major sections of knife roll to start assembling your project. Make sure that the mock-up is already the real deal before doing this.
Mockup Transferring and Cutting The Easiest Way
Unfold first the butcher paper mockup, then place it onto the piece of leather like a cowhide. Then cut each part of the butcher paper mockup of the four sections of your knife roll. Now attach the cut pieces of leather and connect the bottom fold that covers the blade knife to the primary backing.
Also, connect the upper foldover piece of your leather material. Then attach the end piece of the leather in which the handles are located. Now that you have finished assembling it covering test the roll pockets by inserting the knives and other essential tools. Then roll up your leather knife roll filled with handy tools. Repeat this step for a few days more so that the leather will be stretched out, and the knives would perfectly fit & snuggle as well. This will also break in your knife roll.
Tips To Ponder To Lessen Mistakes In The Making
Leather gluing, sewing and riveting are undoubtedly part of the process in this project, so its covering ensures that the knives and other essential tools fit perfectly into each pocket of your leather knife roll. Considering that you did some fine-tuning of your work so that knives can snuggle on each pocket and pouch of the roll.
Suppose you want to save materials and get it done with the first try; you may add an extra fold of leather at the bottom of each knife pouch. Based on your preferences, you may sew the sections found between the pockets, or you may use rivets. Again, this all depends on you. Remember to always glue first with a barge leather glue when attaching any significant section of the knife roll to ensure it adheres firmly.
Creating the Handle, Strap, and Closure Straps
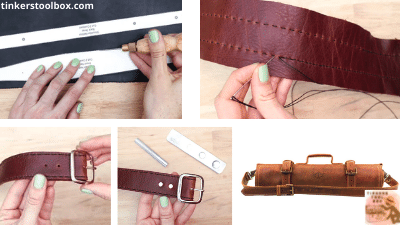
Creating the handle, strap, and closure straps only means you are almost done, and your leather knife roll project is close to finishing. Like other steps, you will need to polish here so that your knife roll will be the best once done.
What You Will Need
Two straps are needed to secure the roll when it is rolled up. At the same time, a short leather piece is required for the knife roll handle. You also need to prepare two longer leather pieces for your adjustable strap.
Also, prepare a one-inch wide piece of aluminum which is about 16 inches long used in the inner spine of your knife roll. You can get this supply from different online shopping stores, or you may check at any physical stores you prefer, or you can try at any thrift store for cheaper leather accessories.
The Details of The Knife Roll and Straps
Start by rolling the knives up, then place and position the two straps to secure the roll. Then attach the straps into the leather knife roll and make sure to provide buckles for closure. In mounting the knife roll strap, you can put a screw or sew it.
Use the aluminum bar as an inner backing in the leather knife roll strap when attaching the handle. Do this process to keep your leather knife roll rigid. Sew also the closure straps into the end flap of the knife roll though it is already riveted. Never forget to glue before sewing. The bond you make with the glue may be temporary wherein you just join these pieces before sewing or permanent being a part of the final piece. Anyhow, this will help you secure and control your material before sewing.
Say No More! Finish it Up and Polish
Now that you have come to the last part of leather knife roll making, you will need finishing touches on it. This process includes the additional details of your knife roll, like putting some designs, engraving initials, and enhancing and making minor adjustments to be more likely to be valuable and beautiful.
Things You Might Consider To Add In Your Roll
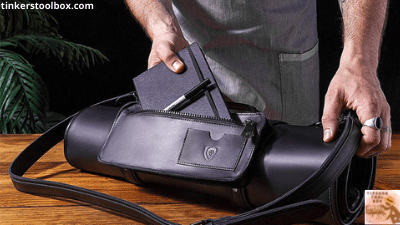
The process of finishing up doesn’t mean the leather knife roll project is not yet complete. However, finishing up refers to the additional tools you want to include in your roll. You might consider adding to your leather knife roll are the other essential tools that you want to be readily accessible.
Suppose you are a chef; every chef needs a meat thermometer to check if the food is ready. This is why consider adding a thermometer holder if you are making a leather knife roll for chefs. Since a leather knife roll is usually made for chefs, consider adding a removable gadget bag used to hold a wine opener, grater, measuring spoon, and other essential tools. This removable gadget bag must include a hook on its end so that the chef can hang it up close to him/ her every cooking time.
Of course, as a chef, you need a pair of pen and business card, which is why you need a portion of your leather knife roll to hold these things like a business card holder and pen holder in which you will need to use a magnet underneath.
Consider putting holer in your knife roll to hold menus and recipes. You may need to use a magnet, particularly if you place your holer under the business card holder pouch so that your sheets of notes, etc., are securely mounted.
The same idea will also apply to other professions that will require a knife roll. Make sure to customize it based on needs and then add the aesthetic factor.
Adding Aesthetic Details
Another thing you might add in the leather knife roll is the aesthetic details which include your initials. You can have laser engraved initials; you can have them carved or sculpted on your leather knife roll. You can also keep that simple look if you desire. These tooling techniques, such as a laser engraved initials service, are provided by different trophy shops at a fair price. You can also do it yourself if you have the materials and skills or do not have a budget to spare.
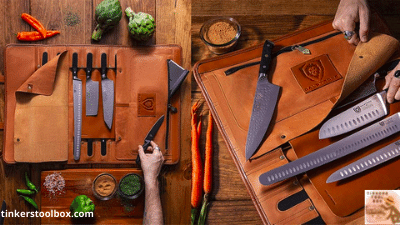
The Anatomy of A Leather Knife Roll: What More Do You Need To Know
Having the Interest in knowing how to make a knife roll, perhaps it is safe to say that you already have an idea of what it is, but here are some facts you might need to know to decide how you will create your knife roll.
Get To Know Your Project: Major Parts of The Knife Roll You Need To Include
It is essential that you know the project you are working on. It will benefit you because you know what specific parts you will make and adjust later on. In a knife roll, the area where you laid down the knives is referred to as the general knife section. You will also need a sheet of leather material that covers the blade knife. Another sheet of leather material responsible for folding down over the knives’ handle. Lastly, a sheet of leather material on the end of the knife roll where the carrying strap and handle are mounted.
The Perfect Reason To Get A Knife Roll
Knives have blades to preserve and protect if you want to get and maintain the best cuts you can get. There are single knife protectors or sheath but choosing a knife roll if you have many knives is economical and practical.
Of course, knife roll will keep all your knives in one place or bag and protect your blades from damage and yourself from accidental cuts. Also, having this is economical because you will only need one roll for all your knives and other tools you want to carry with you. It will be readily accessible once you need it and will save you a lot of space.
In addition, these knife rolls should be durable and timeless to keep you in style. So, it is perfect that one of your options will be a customized or a pre-made knife roll made up of leather ideal for any job you may have.
Let Us Talk About Marketing: The Reasonable Price To Sell Them
Having the skills to create handmade leather products, including knife rolls, will take you to another level. This is because you can start a leather business by crafting and selling different leather items online or in physical stores. A simple act of posting and selling your leather knife roll online is already a form of business which means you expect a profit and a fair wage for yourself, as the leathercrafter.
Begin With Determining all your Cost
Determine all the costs behind the handcrafting of a leather knife roll. These are the total amount of material cost to produce a knife roll, including the pieces of cowhide leather, a sheet of paper like butcher block paper, rivets & screws, and other accessories.
The cost of your cowhide material is around an average of $2.99 per square meter, $10 amount per roll of butcher block paper (this is optional, it is up to you if you will use this paper or look for another sheet that does not easily rip), the cost of rivets that is $1.65 and the cost of the screws which is around $9.95 for 25 pieces. Note, these accessories are up to you if you choose to rivets or directly sew your knife roll.
Aside from establishing all the costs of materials involved in this handcrafting, you should also include your labor. As the leather crafter, Yourself is also included in setting the price behind your item because not everyone can handcraft a knife roll or any handcrafted item. This is why we have the term “ skilled labor.” Most handcrafters rate their skilled labor an average of $12 to $20 per hour, but this depends on the project you are making.
Formula For The Right Pricing of your Item
If you are having a problem with how you will price your item, here is a general view. First, add the cost of supplies (to create a leather knife roll to the) to the skilled rate per hour time spent. The result would be your price A but not yet the cost of your item.
Next, multiply the cost of supplies to three, which is equal to price B. Then, determine the average of these two prices by adding price A and price B. The result would be divided by two, which would be the price. For instance, the overall cost of supplies is $6; the skilled rate is $10, which takes an hour in the making, so $6 + $10 is equal to $16, which is your price.
This will give you a value of Price A at $16 x 3, which equals $48. This is now price B.
Price A $16 + price B $48= $64/ 2 = $32, price C. Importantly, calculating the price includes tax so multiple price C to the sales tax of your place. (Example; $32/0.5 = $16 * 10 = $1.6, so $1.6 + $32 = $33.6 is your starting price). This is now the final price you can use in selling your items which is fair for you and your future customers.
Conclusion
Leather knife roll is not just for blade protection but also a great help in transporting your set of knives. It is a great tool bag used in any job that requires knives so that your knives are easily grabbed for they are arranged and organized correctly. It is quickly done when you have tools and materials, and of course, the skills in leather crafting. By following the steps listed in this article, you can create your leather knife roll, not just durable but also in style.