Candles are one of the simplest projects any person can do. Making one for personal use does not need high-level expertise but requires only basic skills to get the job done. Like me, who has been an avid fan of scented candles, this tutorial is perfect for you. Among the variety of scented candle options, you can choose to make citronella candles. These candles are fragrant and unique since they keep mosquitoes away. Just follow the simple steps in this guide, and you will surely get a citronella candle of your own that comes at an affordable price.
Step 1: Prepare the Materials for Candle Making
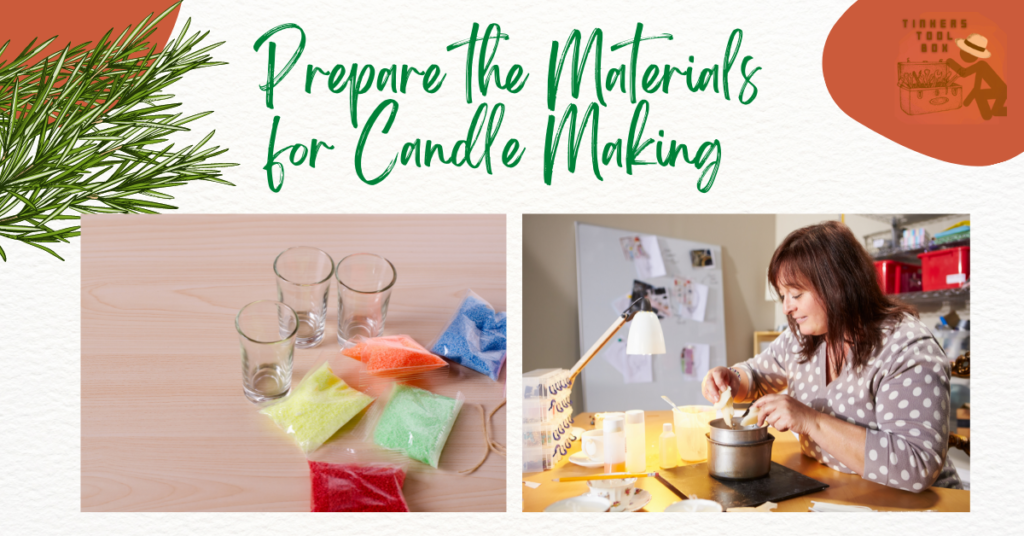
Before you start working on the wax, the first thing you should do is to prepare the materials you will need. The requirements for candle making are not just the wax itself but other tools that will help you get your candle.
The first thing you should secure is, of course, wax. The popular wax types you can work with are soy wax, beeswax, paraffin, and palm wax. These types have pros and cons over the others, which you must consider before buying.
Making a scented candle like citronella will be ideal to use soy wax since it is easier to melt and holds more fragrance than the others. One cheap option is paraffin wax since it can also hold scents and oils, but it melts faster than soy wax, making it unideal. It also produces soot, unlike soy wax.
The following materials are for molding, including the container, wick, melting pan, or pouring pot. When you melt the wax, you have to do it properly by using a pot with a handle to pour out the melted wax later on easily.
You can also have the shape you desire based on the container you will select. Most importantly, the wick has a major role to play in lighting up the candle. You will also need scissors to cut the wick as the final step.
Then, the additional compound, in this case, citronella, which you can buy readily from stores. Make sure to read the description of what you are buying. It will be better to purchase a pure citronella extract rather than diluted or blended for a start. It would be best to secure a thermometer that you will need to monitor the wax temperature regularly during the heating process.
These materials are nothing fancy, just the basic elements but the most crucial components you need to achieve your DIY citronella candle.
Step 2: Secure The Citronella Oil

The star ingredient in this project is citronella oil. It is just one of the various essential compounds from plant species under the genus Cymbopogon.
It is a known ingredient used in the food industry for aroma and additional flavor. Citronella is also added in cosmetics and is a famous compound that is mainly a mosquito repellant.
If you want to protect yourself from these nasty mosquito bites, this project is ideal. Even more, If you are a mom and you like to protect your kids, then this surely is the go-to candle you can make.
You only need a small amount of citronella in making the candle, so you do not need to purchase large volumes. Suppose making numerous candles; then you have to consider adding more.
The price of citronella oil will vary from different stores but usually ranges from $2 to $12 for a 10-ml bottle in Amazon, depending on the brand. A 10-ml bottle is already a good amount for your citronella project.
I know you might be curious about how much citronella oil you need; well, you have to use three to four drops of pure citronella oil in every 8 oz cup of wax. This is not a standard, but this is the ideal proportion according to experienced candle makers. You have to change it accordingly if you like it more concentrated or the other way around.
Step 3: Decide on the Container You Want For The Wax
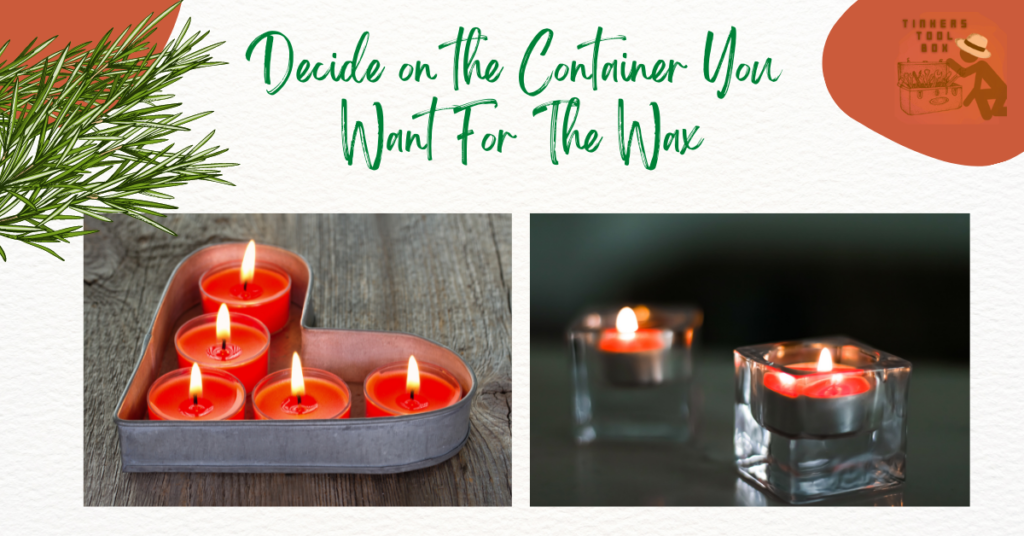
Now that you have the materials, wax, and citronella oil, the next thing you have to decide on is the wax container. The container will dictate how much wax you melt and what shape the candle will get.
Most citronella candles that are for sale are placed on glass jars and tin cans. You can also use something like this or use other containers available at home. Using recycled materials to add to what you can save in making this DIY citronella candle will be ideal.
Think about the purpose of making these candles, if it’s for personal use, you can make larger candles in glass jars, but if you want it to be on the go, you can use tin cans.
You can also make pillar candles for your altars and other purposes. If you want this, you will use a removable mold to remove them safely once the candle has hardened.
Step 4: Do a Little Math! Measure the Wax

A candle cannot be without wax, so begin now on working with your wax. It is the fuel your candles need, like gasoline to an engine. It might be hard to estimate the wax for a newbie candle maker, but you can use simple math to calculate.
Each gram will equal one ml, and one ml is equivalent to 0.034 oz, commonly used in candle making. Therefore, if you plan to make an 8oz candle, you will need 236 grams of hard wax.
If this is complicated for you, you can measure the wax by putting water in your glass containers and weighing it using a scale. Get the water measurement and discard the water. Then multiply the water weight by 0.8, since wax measures 80% of what water weighs.
In measuring, you can use a top-loading balance or an ordinary kitchen scale. Put the melting or pouring pot on top and tare to zero. Pour the wax and make sure that the correct weight of wax is achieved. You can also try other weighing scales that will work best for you. If you want to check out the best scales for candle making, you can find that information here.
Suppose you are making a lot of candles; adjust the weight of the wax. Wax is commonly sold per kilogram, which will be easier for you to picture this out.
Also, remember to base the wax you will use on weight rather than volume because they differ in density. If you measure it by volume, you will have an incorrect wax measurement. You also have to consider the amount of scent you like to add.
Step 5: Get It on and Heat The Wax

Once the wax is measured and ready, you can proceed to melt it. It will be ideal to use electric stoves and a hot plate rather than fire when melting wax because when the wax melts past their flashpoint, which is past 121 degrees Celsius, they vaporize and can produce flammable vapors. If this happens, it can easily ignite, making it dangerous. If you also do this, you will be wasting your wax since it will surely burn portions of the wax because of uneven heating.
Make sure to use the heat generated from electric sources if melting wax to ensure safety in candle making. By using such, if the wax reaches its flash point by accident, it is less likely to create fire.
What you can do is the double boiling method. Begin with a larger pot, and put at least three inches of water from the bottom. Select another pot with a handle or a pour pot and place inside.
The double-boiling method is recommended and practiced by candle makers since it evenly distributes the heat, minimizing the possibility of the wax reaching high and risky temperatures.
If you want to make more candles, I advise you to use a larger pot and place additional pour pots inside. As the water boils, it also melts the wax, gradually avoiding burnt wax. It will be the safest way you can make candles at home.
You can also use a microwave if you do not want to do double boiling, or you want it much faster. Set your microwave to 80 degrees Celsius and heat it for one to two minutes until the wax is all melted.
It is also important that you monitor the wax temperature from time to time to make sure it melts safely. You can do this by having a thermometer in your candle-making tools. Importantly, never leave melting wax unattended to avoid serious injuries and disasters.
Step 6: Add in the Star Ingredient Citronella Oil

While the wax is melting, you can pour in the citronella oil. Before adding the scented oil, take the temperature of the wax. Each type of wax will have different ideal temperatures where you can add these fragrances for efficient binding.
If you are using soy wax, the temperature should be around 82 to 85 degrees Celsius, while paraffin wax should be around 121 to 125 degrees celsius.
Add in two to three drops of concentrated citronella oil and stir it thoroughly. Add more drops if you want a stronger citronella scent. If planning to add colors, you can add it together with the oil; make sure that it is the appropriate coloring compound like candle dyes and dye blocks.
Add two drops first of color or candle dye, and adjust if you want to achieve a darker hue. However, do not overdye it since it may affect the smell of your candle. Lower down the heat and let it simmer for a while while you prepare your container and wick.
Step 7: Prepare The Wick And the Container
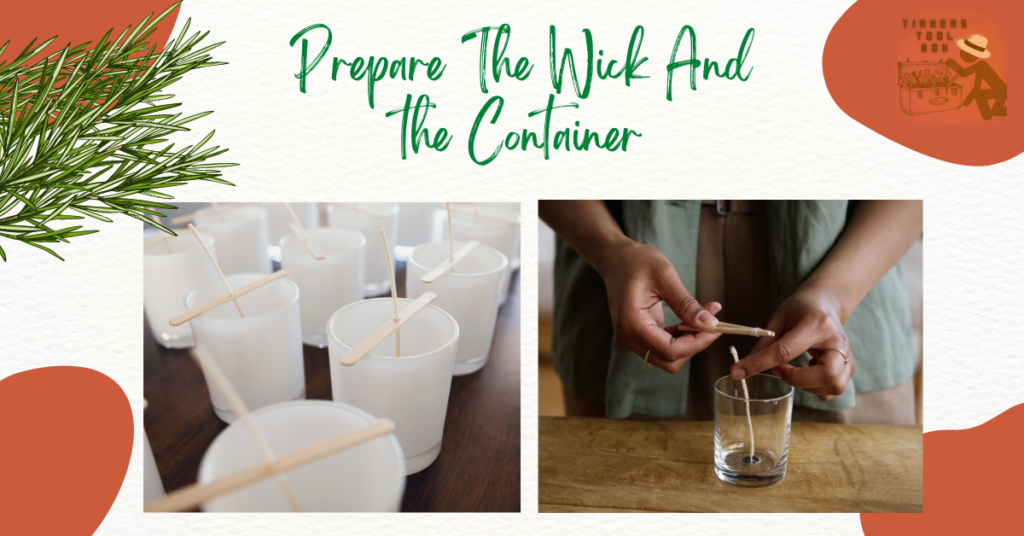
Arrange your chosen candle containers in your working area, and add the wick to the center. The wick holds the flame and has an essential role in how your candle lights.
Candle wicks are usually braided cotton or made up of butcher’s twine. You can DIY your wick, too; ensure that it is absorbent enough to convey the wax or oil to the flame. Your wick will be more efficient if you soak it in oil or pre-waxed them for hours before use.
You can buy candle wicks at a price range of $3 to $13 depending on the length and number per pack in Amazon. You can also use new wicks, like bamboo and wood wicks, that comes at a different tag that you can also consider trying next time.
Pin it in a clam, a clothespin, or tie the upper end on a stick to stay in an upright position. This way, when you add the melted candle, it will stay in place and achieve the correct position of the wick in the end.
Step 8: Pour the Wax Into The Container
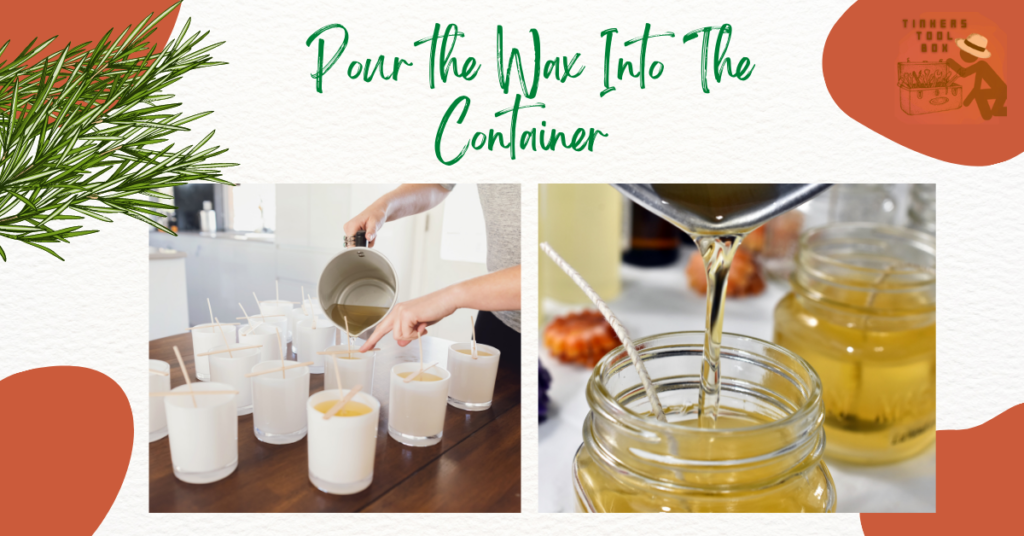
Pour in the melted wax up to the desired height. Let it harden and set for four hours. Candles take time to harden; paraffin candles may need 24-48 hours, while soy-based candles may take longer up to a week.
Observe your candles if it’s drying correctly. If you observe cracks on top, you can reheat and add another layer. Make sure that the candles are dry before processing to the next step.
Step 9: Trim the Wicks and Add Other Decorations
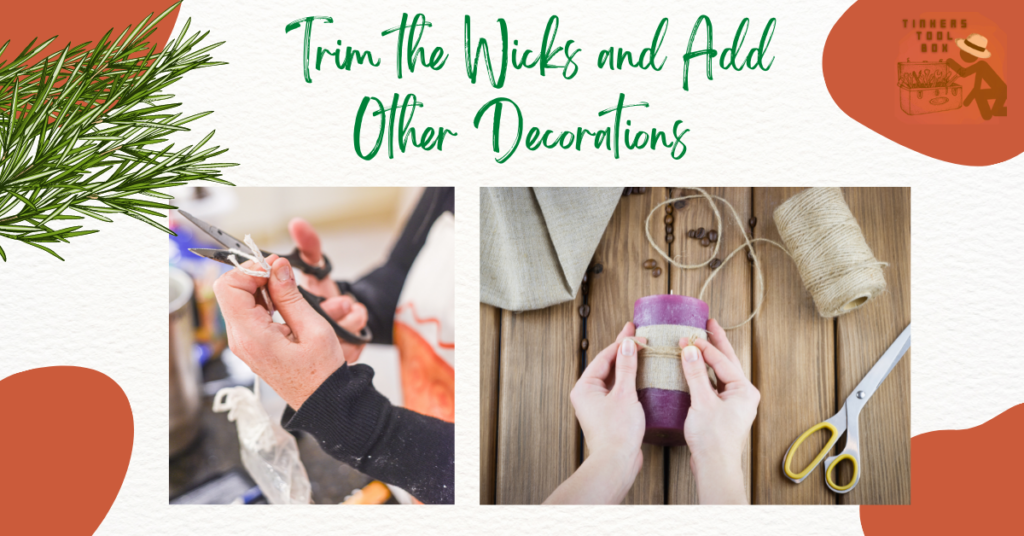
When the candles have dried, you can now start removing the wick placeholder and trim them. Make sure that you leave enough for the fire. This is ideally a quarter of an inch, not too long and not too short.
You can use plain scissors in cutting the wick. This is not only done during the candle making but should be practiced to lengthen the life and quality of your candles.
You can also add decorations to your candle. This is a fun part because you get to choose what your candles will look like with embellishments. You can tie a ribbon around the candle’s body for more aesthetics.
Step 10: Brace Yourself and Light It Up!

When the candles are already hardened, and the wicks are properly trimmed, you are now ready to light up your citronella candle. Take note of how the candle turned out and is the fragrance strength you desire achieved.
It will be best to write down your record of the amounts you used in making your candle to improve or enhance it the next time around. For now, light it up, sit down, relax and enjoy your DIY candles, maybe while you sip a cup of tea.
Step 11: Ponder on the Cost of Making a DIY Citronella Candle
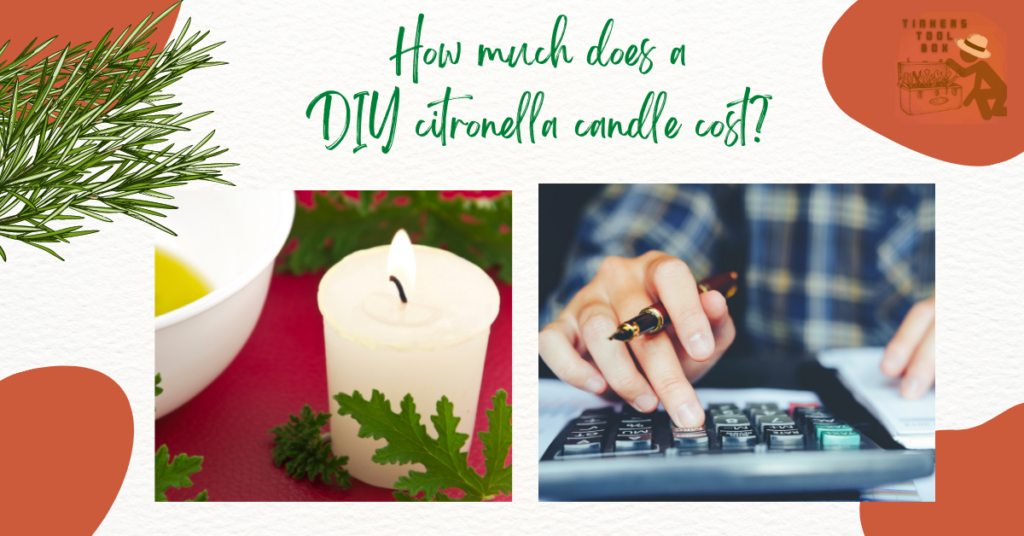
A question that may come while you decide to make or are in the process of making a citronella candle probably is if it is worth making. This is good since no one wants to spend time on something they will end up regretting. Also, one factor most makers will consider is the cost of making DIY candles. So, there is no problem if you worry about how much you will spend.
Most DIY projects will cost less. That is why there are many online tutorials you can utilize if you are low on budget. Candle making is one of the affordable hobbies you can have, although not always, but you can use your tools for the next project most of the time.
Making a candle will cost you less than the commercially sold ones, but remember that if you are starting, you most likely have to buy everything that will cost you double that of buying new ones. These expenses will include tools, the price of labor, and some equipment.
This 8-oz candle that you are making will cost you around $4 to $6, including all the costs, but you can lower this down by mass buying the supplies you need.
Step 12: Utilize Your Candle Making Knowledge
If you already know about making these citronella candles known, then it’s time for you to utilize this in other means. You can add this to your skill, and perhaps you will never buy any candles again. This can be a fun family activity, too, for the adults and kids.
Sharing this with others will enrich your knowledge and, at the same time, help those who want to try out new things or save more in making their candles.
The Final Product: A Personalized Citronella Candle Anyone Can Enjoy
The curtain now is about to close in this part, and you have had a walkthrough of the steps. So, it is now the time to put your skills to the test and start making your citronella candles. If you follow these simple steps and tips, you will undoubtedly produce a citronella candle that is handmade, special, and pocket-friendly. Once done, it will be one of the best candles you can flaunt. I think you can make a candle not only for yourself but for anyone to enjoy.