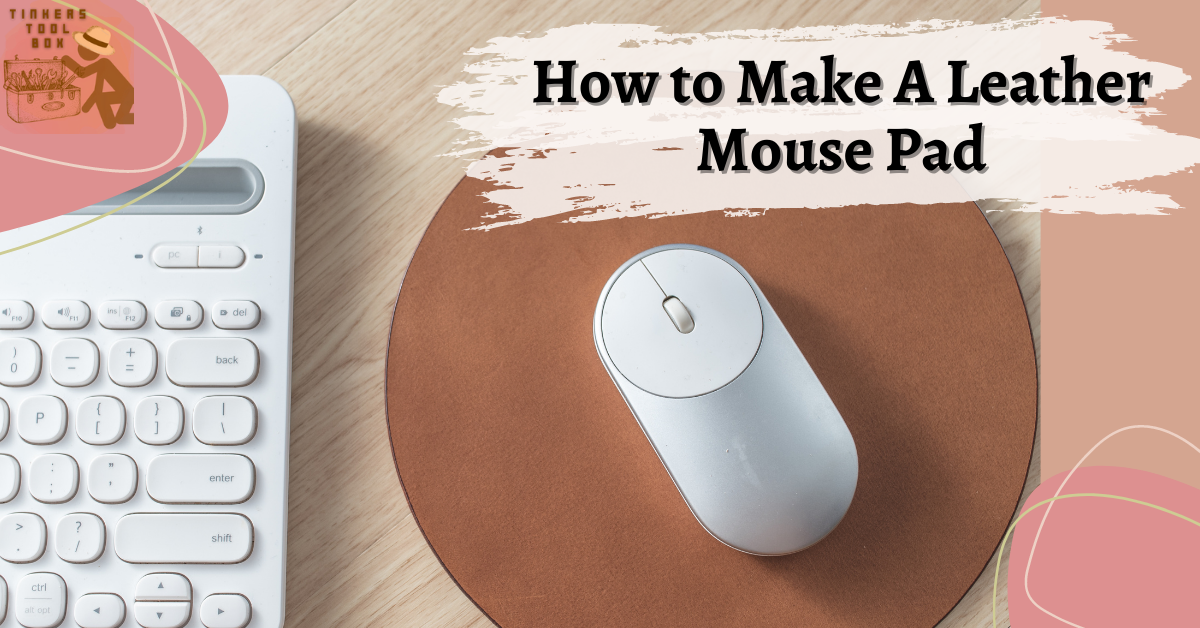
Being comfortable while doing our work is essential. One important accessory today in this time where almost everyone uses a computer is a mouse pad. Having a mouse pad that is classy and durable will surely be a great addition to your work essentials, and this is where a mouse pad made with leather comes in. Hence, getting and creating one yourself will be the best decision you can make. Here is how you can kick off with a great DIY start in making the perfect mouse pad.
Leather Mouse Pad: Not Your Typical Desk Accessory
Mouse pads can be of great help, especially in today’s modern adaptation of the online world. This product can come in handy. With the help of mouse pads, we can easily move our mouse and click the fastest way possible, and it ensures our mouse trackball or sensors to be extra safe from scratch or our mouse in general.
Choosing leather to be the material for your mouse pad will be a good choice since leather is durable and versatile. You will not worry about it being easily damaged even if you use it every day. It will undoubtedly be a different aesthetic on your desk, adding a fresh look to your workspace.
Leather Material Best For Mouse Pad
Firm leather doesn’t usually come in handy in situations and projects like this. Most of us don’t know what leather type to use, and we tend to choose the wrong ones. In this project, we need flexible leather to be stretched because we have to stretch to achieve a certain style and its exact measurement.
Polyurethane leather or PU leathers are of great choice when making leather mouse pads because their surface is smooth, highly durable, and flexible. It is also timeless, so it’s long-lasting and possesses a beautiful texture.
At the same time, vegetable-tanned leather is also an option because this is not quite firm. It can easily be stretched, is highly durable also, non-toxic. It gives that certain patina which makes it a great choice because it gives off a classier look, style, and good finish.
Faux leather can also be used; however, it’s a little too firm for this project, just giving you options here if it’s not available on the market or you don’t have any of the leather materials mentioned above. Faux leather is also durable but not as flexible as the rest of the said materials. So it’s up to you what you choose to use.
Step 1: Tools and Materials For the Perfect Mouse Pad

This is the list of the tools and materials you need to prepare for your DIY mouse pad. If you already have some of this, then good for you. If not, you can purchase them at an affordable price for starters.
- Leather Knife
- Rubber Hammer
- Bone Folder
- Diamond Chisels
- Metal Ruler
- Divider
- Needle and Thread
- Scissors
- Scratch Awl
- Edge paint Applicator
- 5oz or 3oz thick leather, you can opt to use scrap ones if you have some that can still be made into paddings of the mouse pad
- Brand new or high-quality leather for the top surface
- Leather Glue
- 400 Grit SandPaper
- Binder Clips
- Brown Edge Paint
Step 2: Trace and Cut Your Leather Piece To a Pad

First, you’ll have to cut your leather piece, but do make sure you have the right measurements because that would ruin the whole project if you don’t. So get your measuring tools and get the job done properly.
The most tricky part is having all the leather pieces of equal size or in their exact measurement. In this project, the mouse pad, it is up to you how big you want it to be, but you can use 9.5” squared as a standard if you do not have an idea.
For each leather piece, trace it out using a scratched awl, then cut it using a very solid ruler to make sure it doesn’t slip around, and always use a sharp knife to yield a cleaner cut.
This will be the perfect leather piece for your base; cut it to the exact size, which is the size you want it to be. Start with a 5oz of leather scrap, make sure that it’s the thickest and most firm piece. If you do not have an idea, you can use 9.5” x 9.5” again for a start.
If you’re done doing the first part, the cutting, then the next thing you’ll have to do is round out the corners as well. To do this, use a beveler and trace it around your leather’s edge in each of its corners. Then cut it out with a leather knife. There are multiple ways you can cut out the edges and get them rounded, and you have to do what works for you.
After doing all the previous steps, cut out a padding layer from a three oz thick leather or thinner. You would set the padding in just exactly as far as you’re stitching will be. If the pieces are already cut out, you will need to round the corners at this point. Just use the previous method to round out your edges.
Lastly, you would now cut out the top layer. Make sure it’s from the nice piece of leather, no longer from scrap. This leather will be set on top of your leather mouse pad but stretched over the two previous layers.
Remember to cut this one out slightly too large as they need to be stretched. Note that measuring the top part can sometimes be difficult, and it depends on what you like and how you want them to be.
Step 3: Glue The Separate Layers of the Mouse Pad Together

What you want to do on the next step is glue the three layers altogether. At this time, you want your top layer to be formed to the bottom two you have prepared. First, you have to glue the bottom layers, take the 5oz scrap piece and 3oz scrap leather piece, and glue both together. While applying this, make sure the 3oz is centered.
Begin attaching the top piece of leather. Make sure to use stretchy leather, so it will not be difficult to stretch it out. This will allow you to stretch the leather neatly and nicely. Now glue the rest of it.
Give the glue about 30 minutes to dry. However, if your leather is a bit firmer, you can glue the whole thing at once. To make sure it stretches out smoothly, glue one edge first, then let it dry.
Once your top piece is in place, use your bone folder and form it around your padding. To do this, all you have to do is press your bone folder firmly in the dip created by your padding along the edges.
Suppose your leather is not staying at all while doing this; wet your leather lightly on the surface of the leather with water to aid the process. Then add your binder clips to keep your edges down while waiting for the glue to dry.
Just be careful, though, if using firmer leather; usually, when this happens, binder clips form an indent. To avoid this from happening, you can put a cloth around your leather before you put your binder clips on. Again allow 30 minutes for the glue to dry, then when dry, cut the excess pieces from upside-down.
Step 4: Start Stitching The Mouse Pad

You’ll have to mark the stitching lines first before stitching to give you a guide. Use a divider, a pricking iron, or a stitching chisel to achieve evenly spaced stitches. This divider will sit in the dip, which is made by your padding. Once these lines are already marked, use your diamond chisels to make your stitching holes.
When you punch out the holes, you must ensure that your diamond chisel is perpendicular to your leather. It should not be kept at 90 degrees, or else your stitching backsides will be ugly. Then when you get the curves, start working with the two-pronged chisels.
Stitching this can be tricky. Once you’re already done making your stitching lines, be sure to backstitch. To backstitch your piece, stitch in the opposite direction once you’ve got the end of your stitching line for two or even three holes. Now trim the thread and burn the end and tuck it in a loose end stitching hole.
Step 5: Burnish Your Mouse Pad Edges

Burnishing the mouse pad edges would help the leather mouse pad look neat and clean. Also, it would give an enhanced, more classic, and elegant look to your leather piece. Burnishing is a way to finish your edges using friction to melt your loose fibers essentially. Stretchy or even supple leathers cannot be burnished well. If this doesn’t work for your leather piece, you have two options.
When you start sanding your leather material, don’t sand the edges when you burnish.
First, use your edge paint, turn the edges, paint the edges to create a fine leather material. Now start applying a layer of edge paint using a flat applicator, rod, or rolling edge paint.
Your first layer is about establishing a base and just covering it. Dip the applicator to the edge paint and then carefully set it on the entire edge of your leather piece. You don’t have to put in a lot, just enough. If your paint spills, wipe it away before it dries out.
Allow your first and second layers to dry first. Be generous in adding paint. Create a smooth and nice bubble as you go along the process. Once they are dry, take your sandpaper and try to even your edges. Make sure your edges are smooth as well. Apply one final layer of your edge paint and let it dry and lightly sand some imperfections.
Step 6: Beautify The Leather Mouse Pad More

After your edges are burnished, you can add more decorations or details to your mouse pad. You can paint it up, stain it or stamp it if you like. Just make sure that it will not affect the top layer of your leather mouse pad where the mouse will run along.
Time and Cost As Your Investments For Leather Projects
In any leather project you will work on, be it small or large, simple or not, you will invest time and, of course, budget. Here are the details for a leather mouse pad.
A Summary of the Cost
Materials would vary from different brands and types of material you will be using. However, it would be wise enough for you to use at least materials already found at your place. You can simply buy these items, tools, and materials at your local store; however, you also have the option to shop online.
Shopping online is more popular these days, but the only thing about online shopping is that it would take you a long time before starting your project. Below are some of the items’ prices if you still need a breakdown or clue how much it would cost you.
Leather will depend on what leather you choose; you can buy a piece of it for $20. Brown edge paints are roughly around $25 to $38, depending on where you buy them. 400-grit sandpaper is only $10 to 15$ at a local store near you.
If you don’t have one for the tools, your leather knife can only be bought for about $5. Diamond chisels aren’t as expensive as their name suggests; you can buy them for $15 to $35. A bone folder is about $2 to $7, and binder clips are only $2 to $5. The good thing about buying these tools and materials is that you can use them in your next project.
Time Spent in Making The Mouse Pad
The amount you will spend on making your mouse pad is proportional to the size of the pad. Therefore a larger one will be longer to make. If you are a beginner, it will take you a long time, a few days maybe, but if you already have experience in simple leather projects, you will work on it easily and faster.
Be Proud! Lay Out the Mouse Pad and Flaunt It
Once all things and steps are done, you can now enjoy your leather mouse pad. This leather mouse pad will indeed look and function well. It can also be a perfect gift to your family and friends who love to play many computer games, especially now that the Christmas season is just right around the corner. Surely, you made a leather mouse pad perfect for you and developed your leatherworking skills, making you ready for more leather projects to come.