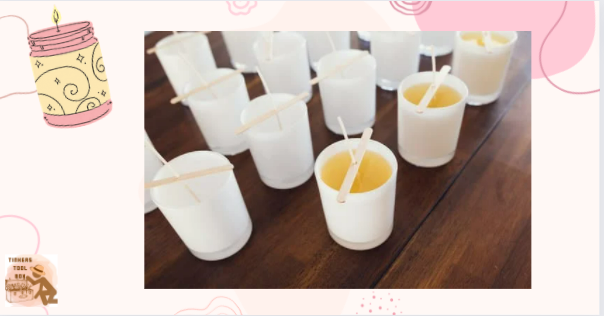
Candles come in different forms and sizes, one of which is container candles. These are stylish candles placed in aluminum or glass containers and are often scented ones. You may find them aesthetically pleasing until you discover a bad side of them, having wet spots. Let us find out how these spots come about in candles and if they affect the candle performance.
Wet spots are adhesion problems that occur when the candle wax pulls away or shrinks from its container, creating a space where air and moisture occupy. This is purely an aesthetic problem and will not affect the burning performance of your candles.
This article talks about what you need to know about wet spots. We will discuss the origin and causes of wet spots and how they affect the candle’s burning performance. Midway through the article, we’ll tackle the steps in removing these spots and, in the latter, discuss the easy fixes for candles with wet spots. Lastly, the article will provide tips and tricks to avoid having wet spots on your candles.
- Wet Spots on Candles: Adhesion Problems You Should Take Care Of
- Removing Wet Spots on Candles: The Easy Way
- Causes of Wet Spots: Their Easy Fixes
- How Candles Obtain These Wet Spots: All the Wet Spot Sources
- Preventing Wet Spots from Entering Your Candle Container: The How-to’s
- Ensure the Candle Container is Clean and Dry: This Makes the Most Improvement You May Think Of
- Preheat the Container Before Pouring the Melted Wax: Preparing the Container to Receive Hot Wax
- Pour the Melted Wax at a Lower Temperature: Make All the Necessary Adjustments
- Choosing Your Wax Blends: Always Be Smart
- Tap on the Containers: Remove Air Bubbles from Your Candles
- Follow the Recommended Cooling Practices: Ensure Spotless and Well-Burning Candles
- Proper Curing of Candles: The Proper Time, Place, and Temperature
- Conclusion
Wet Spots on Candles: Adhesion Problems You Should Take Care Of
Wet spots are known to be an aesthetic problem in container candles. This happens when the wax does not adhere properly to the container, creating a space where moisture occupies, creating wet spots.
The adhesion problem happened when the candle wax started to pull away from its glass, aluminum, ceramic, or cement container. Regarding candle burning performance, wet spots are a mere concern, but extreme cases can cause the candle to fall out of its container.
Although wet spots are just physical issues, they would still not look good to candles, especially those you use for decorations. Furthermore, container candles come with a higher market price, and it would be a waste to spend much on faulty candles.
There are several reasons why candles experience this, and of course, there are solutions to those. Let us look at the steps to remove these unwelcome spots on your candles.
Removing Wet Spots on Candles: The Easy Way
You can easily remove the wet spots on your container candles; however, there are consequences since the candle is already pre-made when fixing this problem. Let us know how to ease these wet spots following these simple instructions below.
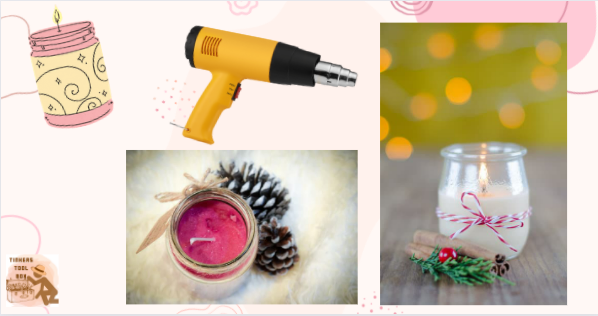
There is only one tool you need to prepare in this process, a heat gun. If you don’t have one, you can use a blower as an alternative or any equipment that can heat both the container and the candle.
Start by plugging in your heat gun or blower. Set the temperature around 130-200 degrees Fahrenheit, depending on the melting point of the wax your candle is made. As a guide, beeswax melts at around 144-149 degrees Fahrenheit, 115-142 degrees Fahrenheit for paraffin, and 113-127 degrees Fahrenheit for soy wax.
Setting the correct heat to contact your candle is crucial to successful fixing. If you apply too much heat, the candle wax may overheat when not melted according to its specific melting point. So be careful with this step.
Place the container candle in a flat working area and start working as soon as the heat gun or blower is heated. Apply heat to all sides of the container up to the area with wet spots. The heat would melt the wax, filling the area with poor adhesion.
Heat the top surface of the candle to melt the wax and even it out. The heated wax would conform to the container and fill in all the gaps that have wet spots or air bubbles trapped inside.
Lightly tap the container on the table to remove any air present in the candle. Then, let the wax cool and set in the container. It is recommended to place them in a warm area while they cool to maintain the temperature of the wax.
The candle wax should gradually cool down and not abruptly be placed in a cool area as the sudden change in temperature from hot to cold would cause the candle wax to shrink on the container, producing wet spots again. A warmed oven would be a suitable place to let your candle settle and cool. Do not move it unless it has been completely set.
Finally, store the candle in a cool place when the melted wax has finally set onto the container. This prevents the candle wax from melting to the glass when not burned, possibly causing spots on the container.
Causes of Wet Spots: Their Easy Fixes
Wet spots do not naturally come in container candles. Some candle making processes would have been wrong or incomplete, leading to this problem. The choice of candle wax also plays a big role, so you shouldn’t skip this part. This section will find out more about these causes and their easy fixes.
How Candles Obtain These Wet Spots: All the Wet Spot Sources
There are several factors why candles obtain wet spots throughout their life. This comes from improper handling of the candle making process resulting in faulty candles. Let us dig deeper into these factors and understand how each affects your candle performance.
Improper Pouring Habits: Take Note of the Proper Temperatures
Improper pouring habits pertain to actions that do not adhere to the correct pouring techniques in candle making. When done wrong, these actions may lead to wet spots on candles and other problems that will arise as you burn them.
Some inappropriate pouring conditions you might be doing are pouring the melted wax on its container at the wrong temperature or pouring it when the container is too cold. These habits would make your candle shrink with the inconsistent temperature, which candle wax is known to be sensitive to.
Unclean Candle Containers: You Just Have to Wipe Them Clean!
Dirty containers are a pain to look at and cause more candle problems than you could imagine. If you are pouring your hot wax straight into a container that has recently been stocked in your cabinet, dust, dirt, or grime may have built upon it, which would lead to severe adhesion problems.
Your candle may not stick religiously to the container as some dirt is blocking its way. The easy fix ensures that all containers are clean and dry before pouring your hot wax.
Improper Cooling and Curing: Give Your Candles Time and Space to Cure
Proper cooling and curing of candles will prevent wet spots and avoid further problems with your candles. Candles must be given enough time to cool and harden, which may take an hour to a whole day, and cure for a day to a week, depending on your candle wax needs.
If you let your candles cool and cure in a place with constant temperature fluctuations or near drafts, you risk your candle’s appearance as well as its burning capacity. Improper cooling and curing are the main cause of candle adhesion problems, leading to wet spots.
Wrong Choice Wax Type: Special Wax Blends are Often the Easy Solutions
Using pure wax like soy wax or beeswax alone would not guarantee a wet spot-free container candle. Most manufacturers use special wax blends, specifically made for container candles, with all the additives needed to counter adhesion problems. So if your wax is not doing good, you could go for the alternative wax widely blends available in the market.
Preventing Wet Spots from Entering Your Candle Container: The How-to’s
Here are some tips to prevent wet spots from ruining your candles’ beautiful image and ensuring that no further damage would be done to your candles.
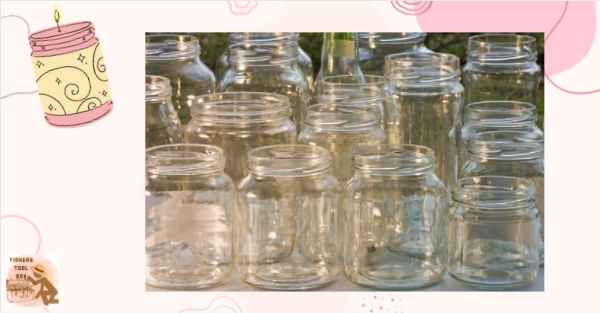
Ensure the Candle Container is Clean and Dry: This Makes the Most Improvement You May Think Of
Before pouring your melted wax, make sure that the containers are clean and dry. Pulling them out of storage and directly using them would mean accumulating dust and other debris on the container, mixing with the wax.
Wash them with mild soapy water and dry thoroughly using a cloth. This step also ensures that no moisture, like the remaining water on the container after washing, would contact the melted wax upon pouring.
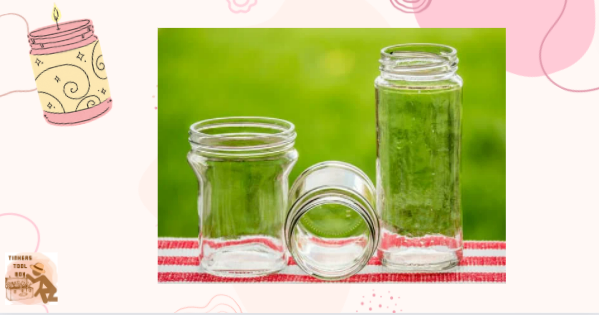
Only use glass containers with uniform thickness to encourage the even cooling of candles. Jars with uneven, thick, and thin spots would cool at different rates, causing the wax to pull away and shrink.
Preheat the Container Before Pouring the Melted Wax: Preparing the Container to Receive Hot Wax
Preheat the candle container using a heat gun or leave them in the oven over a low setting (100-110 degrees Fahrenheit). This step is done before pouring the melted wax on the container to cool down the wax gradually.
The wax would cool and set more evenly when all sides of the container are heated as the sudden change in temperature, from hot to cold, would make the candle shrink as it cools and hardens.
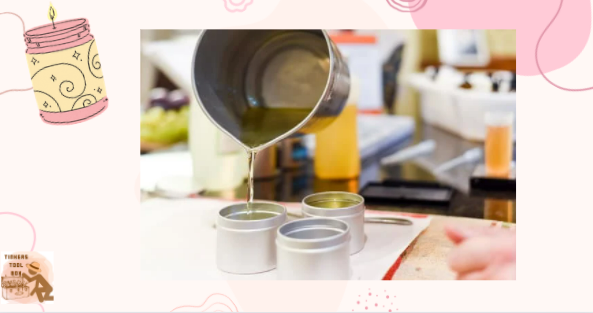
Pour the Melted Wax at a Lower Temperature: Make All the Necessary Adjustments

Every wax has its specific pour temperature, often found on its packaging. However, pouring the melted wax in these exact temperatures would increase the chances of candle shrinkage leading to wet spots.
It is recommended to pour the melted wax at a slightly lower temperature to decrease the chances of separation when the candle cools. This tip works well together with preheating your container, as both have the same purpose, to slow down the cooling process and prevent wet spots.
Remember to pour the melted wax carefully into the container to minimize the air bubbles that occupy the container.
Choosing Your Wax Blends: Always Be Smart
Using pure vegetable wax for container candles is not a smart move as the waxes naturally produce a white substance called frosting as they age. It may not be the same as wet spots but it is also another aesthetic problem you wouldn’t want to experience in your stylish container candles.
Suppose you are using pure soy wax and keep getting wet spots. It’s time to consider using other wax. Many different candle companies use and produce wax blends specifically designed for container candles, with all the considerations in mind as they produce them.
These wax blends combine different waxes to achieve the perfect mix for container candles, as these types are a little tricky to produce, considering the wax’s adhesion to the container.
Tap on the Containers: Remove Air Bubbles from Your Candles
After pouring the melted wax into the container, lightly tap its side on your table to help trapped air bubbles rise to the surface of the candle. These air bubbles would create a wet spot on your candles if not removed and set together with the cooling wax.
Removing air bubbles in the wax would also help solve other candle problems like sinkholes and tunneling, which you will encounter as you burn the candle.
Follow the Recommended Cooling Practices: Ensure Spotless and Well-Burning Candles

When producing many candles at a time, the problem of temperature differential, where one side of the candle cools faster than the other, arises. This is probably because you are placing the hot container too close to each other that they start drawing heat from one another.
Placing poured candles too close would not encourage an even cooling of the melted wax and would cause adhesion problems and wet spots. The part of the candle that cools faster may shrink out of the container, while the part exposed to the heat from other candles may still stay melted for long.
This uneven cooling practice would damage your candle’s appearance and performance. Counter this by placing the cooling candles in a cooling rack, where they can have their own space and not influence other candles’ heat.
Do not leave them on tables or countertops, as solid surfaces would pull the heat from the bottom of the jar, causing the candle to cool too fast, pull away from the container, and shrink.
It is recommended to place cooling candles four inches apart from each other. In addition, make sure that the room where the candles are cooling is not too cold. 70-72 degrees Fahrenheit would be the best temperature for cooling candles.
Proper Curing of Candles: The Proper Time, Place, and Temperature
Curing time is important for candles to harden and disperse the fragrances throughout the candle continuously. Container candles would take weeks to cure. During this time, the candles should be placed in a cool area, away from any cause of temperature fluctuations, as this is a crucial time that determines the candle’s performance.
Temperature fluctuation during the curing time would again cause wet spots on candles. You need to place them in an area with a steady temperature that doesn’t change all day. The basement of your house or a cabinet in your bedroom would be a great place for them to cure.
Note that exposure to the sun and its heat could also alter the temperature and disturb the curing process.
Conclusion
In dealing with wet spots, it is always better to avoid having them by following the suggested tips above rather than fixing a candle with adhesion problems. It is most important to consider a variety of wax blends specifically made for container candles as they perform better than other pure waxes like soy wax or beeswax. In the end, it is still a matter of trial on what works best for you.