
Knowing how to make beeswax from honey is very important in candlemaking. Beeswax candles are one of the most creative and sustainable candle-making projects you can ever make. Unlike normal waxes such as paraffin wax and soy wax, beeswax requires added steps since you must harvest beeswax yourself. Everyone also knows that beeswax can be gathered from honeycombs, and you cannot just burn a whole beehive to get your beeswax. This article will teach you the steps on how to make beeswax from honeycombs that you can use in candle-making projects. It can be hard, but I promise you that it will be worthwhile.
For this activity, you will need the following tools and materials:
- Fine cheesecloth
- Brand new pair of pantyhose
- Nylon strainer
- Containers for the melted beeswax
- A pair of metal tongs
- An old large metal pot
- Honeycomb, either fresh or not
- Chip clips or some twisty ties
Step One: Preparing the Honeycomb

The first thing you should do is prepare the honeycomb, where you will get your beeswax for your candle-making projects. On a clean, flat surface, spread out a large piece of cheesecloth. Place the honeycomb in the center of the cheesecloth. Since the beeswax will be filtered out, it does not matter if any dead honeybees or other debris are included with the honeycomb.
Now that you have your honeycomb on the cheesecloth, you can proceed to extract the beeswax by simply heating it. The way I do it is quite simple–I usually put the honeycomb in a large metal pot and turn up the heat to medium-low for about an hour.
This method should be good enough because all of the melted wax will drip into the bottom of your pot. Ensure that there are no dead bees or debris in this liquid gold before moving forward because these impurities cause poor-quality candles. Also, make sure that you use cheesecloth instead of other types of cloth to prepare the honeycomb.
This is because the normal cloth will absorb the beeswax, and you can never get it back. You will need your cheesecloth for filtering later on.
Step Two: Filtering and Pouring the Honeycomb
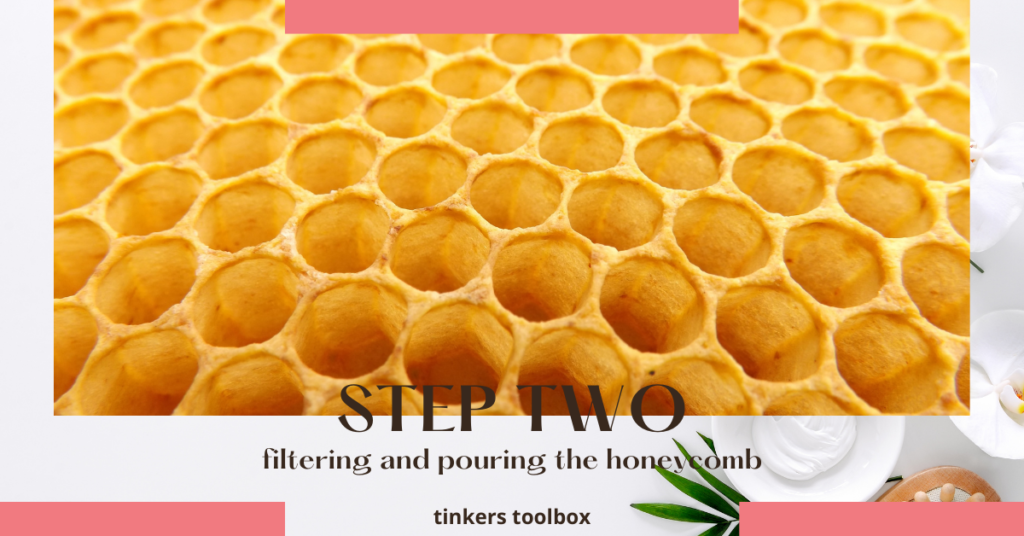
Take out all melted honeycombs from your pot and let them fully cool down. Once you have separated all of the drippings into two or three containers, place a chip clip over one container to prevent any spillage. Now that we have the purest form of beeswax available, which usually looks like an opaque yellow liquid with some specks of debris inside, we can now pour this wax onto our candle-making mold.
Since I am making taper candles here, I made sure that I used my mold’s instructions on how much wax I should pour in. Continue pouring the beeswax into your mold, then place it somewhere safe to let them dry and harden overnight.
Beeswax has a very low melting point of about 144-degrees Fahrenheit, so make sure you keep them away from heat while they are drying up. It would help if you kept checking them now and then to avoid being too hot and causing accidents such as burns and scalding.
Step Three: Removing the Wax from the Mold
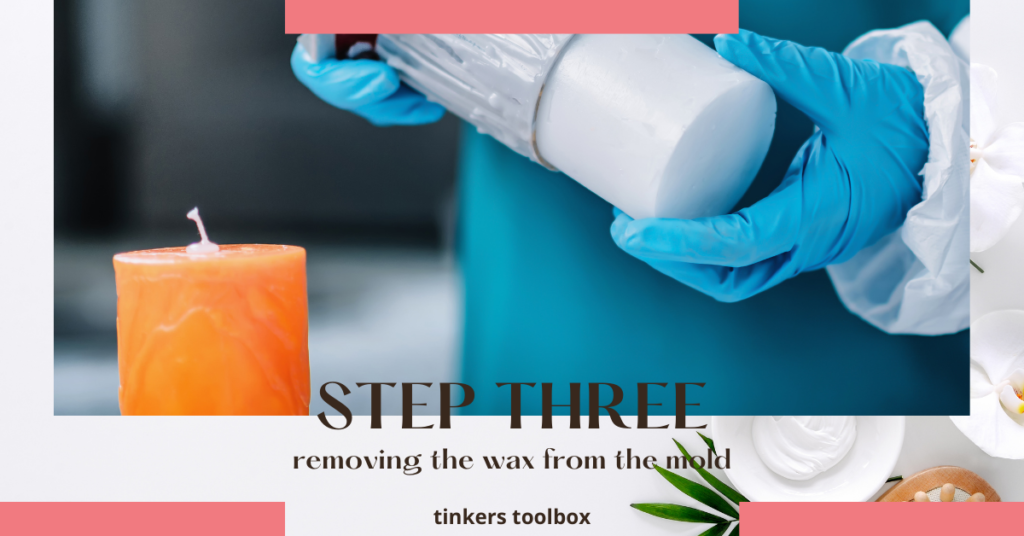
Once you have waited patiently for a few hours or even overnight, your beeswax will be ready to take out. Take off your clips and carefully remove the wax block from the mold by slicing sides with a craft knife. If any excess wax still sticks to the sides of your candle’s mold, wait until they cool down again before attempting to remove them.
The next thing you will use the fine cheesecloth again to filter out any debris left in your beeswax candles. Once all of the impurities are taken out, place the filtered wax over a double boiler and melt it once more for about ten minutes or until they are clear-colored. You can then pour this melted wax into an empty, clean mold of your choice if you wish to make more candles with another design.
Remember that when dealing with hot wax, it is always advisable to use protective gear such as gloves and goggles to avoid injuries and accidents caused by scalding or burns.
If there is one important tip I could give you about making candles, it would be to do it safely and carefully. Frequently, you can also make candles from beeswax that has already been extracted through the use of a candle-making machine. If you come across some at your local craft store (almost all major craft stores carry them), follow the instructions on making tallow candles using these machines.
Step Four: Melting Your Beeswax
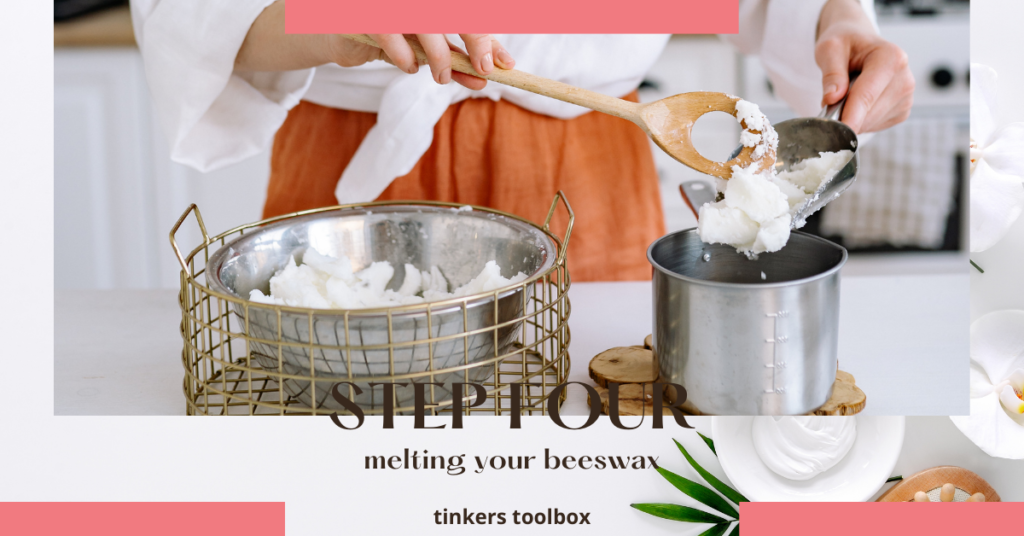
Your liquid gold is now ready for the next step, which is melting down your liquidized beeswax so you can filter it again. To get started, turn up the heat to medium-high and clip the chip clips or twisty ties on each end of your honeycomb. The goal is to keep the honeycomb suspended over the old metal pot filled with melted beeswax.
If you do not clip up your honeycomb, it will fall into your liquidized wax and ruin all of your hard work. Your honeycomb should now be hanging above the metal pot, ready for the next step.
Using an old large metal pot can help you contain most of the wax so that you won’t need too much space for melting wax. All that is left to do after placing your old metal pot is to wait for around 45 minutes before removing your bee remains from the stovetop.
If there is a noticeable change in color from your honeycomb, then it means that you have to place them back on the stove. Also, use an old pot rather than the ones you use in cooking dishes because it might stain your pots, and it will not look as good as new ones again.
Do not forget to take off your pot’s lid for this duration of time so evaporation can occur, and excess water will evaporate before more steam is produced. This entire process usually takes up to an hour or so, depending on how much liquidized wax you have poured inside the metal pot.
Step Five: Filtering Your Beeswax
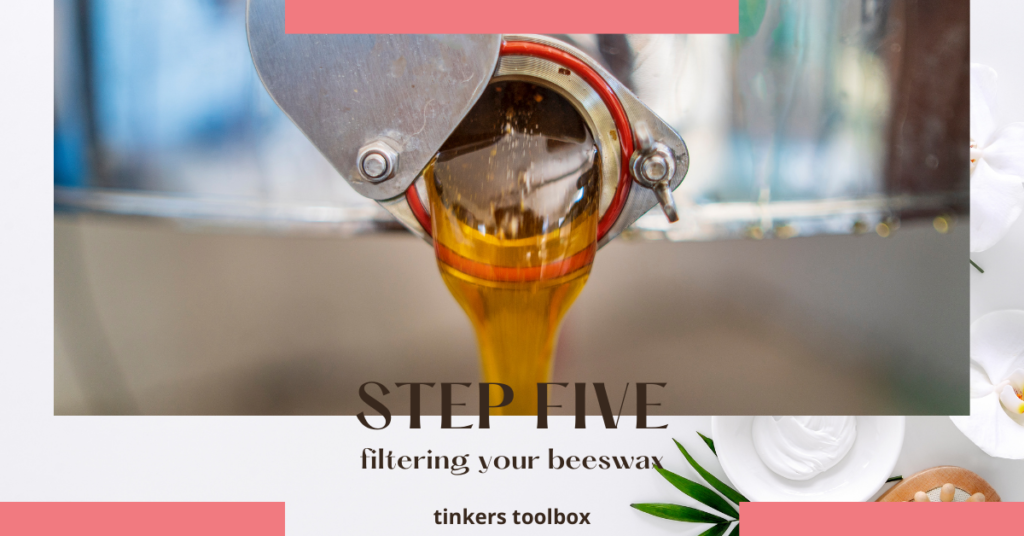
After letting your beeswax cool down some more, you can now proceed with the next step, which is filtering out impurities yet again so you can reuse your melted wax. But this time, we will use different materials that will also help us speed up the filtration process instead of waiting for too long. For example, you can use a clean pillowcase or cheesecloth to filter out these residual particles. This way, you will be able to extract more candles from less material and save some money simultaneously.
Just like before, make sure that you place the old metal pot filled with melted beeswax on top of an electric stove, and no gas stoves, and wait for about an hour or two. And of course, don’t forget to clip the honeycomb using the chip clips on each end, so they remain suspended inside the melting pot.
I recommend increasing the layers of cheesecloth by two or even three when processing beeswax from the brood comb.
This is something I learned the hard way. I had to wait for the beeswax to solidify after discovering small pieces of debris in it. Then, using two layers of fine cheesecloth and breaking it down into pieces, I prepared it. We ended up with a beautiful, dark one-pound block of beeswax that was clean and pure. Next time I am going to process beeswax, and there is a brood comb in a pile, I will double or even triple the amount of cheesecloth from the beginning, just to be sure.
Step Six: Separating Beeswax from Other Waxes
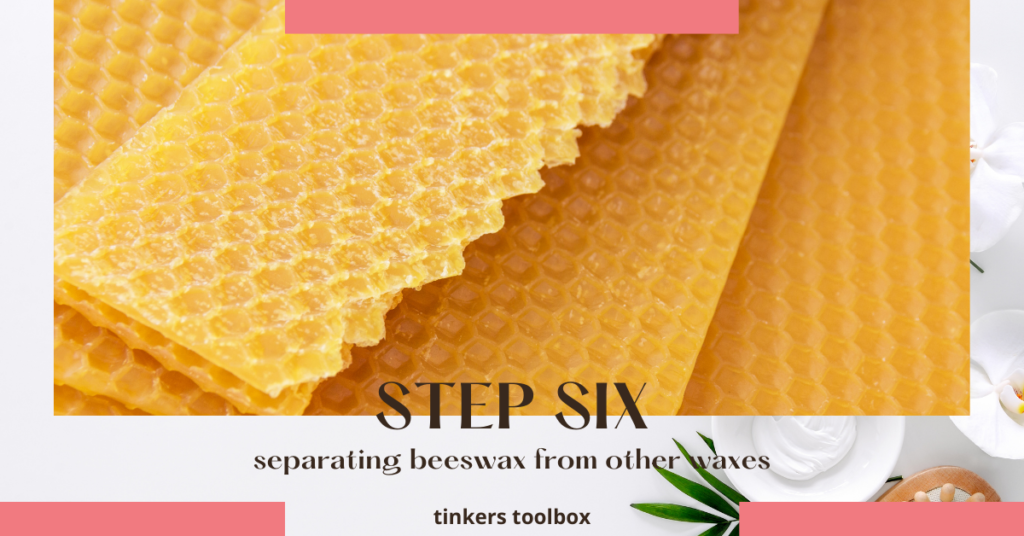
Once we are done with the tedious task of boiling our beeswax extracts into liquid form, we must now filter out everything else, like plant material and dirt particles that may be present in the wax.
The simplest way of doing this is to use a very fine-mesh filter so you can extract the liquidized wax from its solidified impurities. You will also need two separate containers in which you will be pouring your melted beeswax into depending on what kind of candle-making method you are planning to do for this project.
For example, if you plan to make taper candles using wooden wicks, then pour the liquidized wax into another container that will enable easy pouring during step five. This time around, it is important that we separate our blended batches because not all waxes are compatible with other ingredients and materials. The last thing we want is to have different colors or unwanted syrupy residues present between each newly made candle.
I used an old Cool Whip tub as a funnel to pour the mixture into a clean container. It is of little consequence if I melt it or break it. To begin, I looked for a funnel and washed and dried it before stretching a clean pair of knee-high pantyhose over it. This would prevent any floaters from getting caught in the wax.
After my brand-new pantyhose had cooled, I removed them and trimmed the excess. With one hand holding a funnel, the other pouring wax into it, I poured the wax carefully into the pan with a tiny indentation in the middle to prevent it from dripping down the sides.
Even though the wax had begun to cool, it had clogged the nylon, so rather than moving it a little bit each time, I moved it a tiny bit further. My thanks go to nylon for gathering a substantial quantity of “sediment” from at least half of the hot wax mixture.
I now have two containers of blended wax. One is reserved for taper candles, while the other contains the rest of my batches.
Step Seven: Finishing Touches

Since I wanted small cubes for my wax, I searched for some containers that I could use as molds. I was fortunate that I had some one-ounce containers with lids that I had purchased from a garage sale earlier in the year. They had been left over from a bridal or baby shower, respectively. I had hoped to put them to good use at some point. However, you can use other shapes, and not only cubes.
All ten containers were perfect, and the cost was only $.25 each! The use of silicone ice cube trays is another excellent option in this situation. I am not sure about you, but I have a stack of them in various sizes and shapes.
I used pure yellow beeswax to fill all ten of the containers. It was gorgeous. I reheated the wax in the microwave, though I should have used a double boiler method for safety reasons rather than the microwave. After that, I have to decide whether or not I want to keep them or give some away to friends.
Step Eight: Storing the Beeswax for Future Use
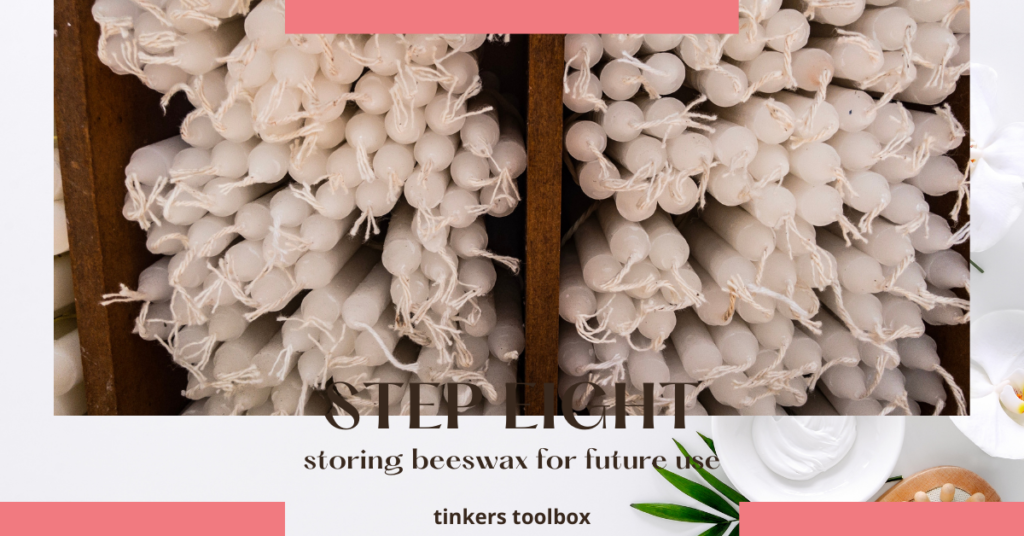
Of course, you are not expected to use the beeswax you got from the honeycomb after getting them fresh. You have to store some that you can use in future candle-making projects. You can keep beeswax at room temperature in a dark, out-of-the-way location for a long period. Wrapping or placing the blocks in plastic will help to prevent dust from adhering to the wax.
Melted beeswax will keep in the refrigerator for up to three months. It is possible that you can also freeze it and use it later on, but I would never attempt this since wax expands when it freezes and might crack a glass container.
There are several types of containers made expressly for storing your beeswax blocks. One such example is the Clear Jar. It has a wide mouth that facilitates easier access to your stored wax. If you want, you can put more than one block in each jar until it is full.
However, I believe that beeswax blocks should not be stacked against each other in containers since they will adhere together when melted and subsequently lose their shape. By using this type of container, you have greater control over just how much wax is poured into your candle-making molds.
Think about melting down large blocks of chocolate and pouring them into smaller molds – this makes it easier to store and incorporate into recipes in the future. Candles, soaps, and other hard cosmetics can all be wrapped in paper to keep them safe from the elements.
Be Sustainable and Organic by Using Beeswax from the Honeycomb
Beeswax candles are a very sustainable alternative to traditional soy or paraffin candles. They are not toxic. You can eat them if you want to (though I wouldn’t recommend it), and beeswax has soothing, antibacterial qualities that help eliminate any kind of pollutant in the air. Therefore, using them in your projects will help you be that organic and sustainable candle maker for your candle-making projects. You can add a sustainable and organic cosmetic touch to your candle-making projects by using beeswax from the honeycomb. Enjoy your honeycomb extraction! You can also learn how to make beeswax candles from the article I wrote, which you can read here.