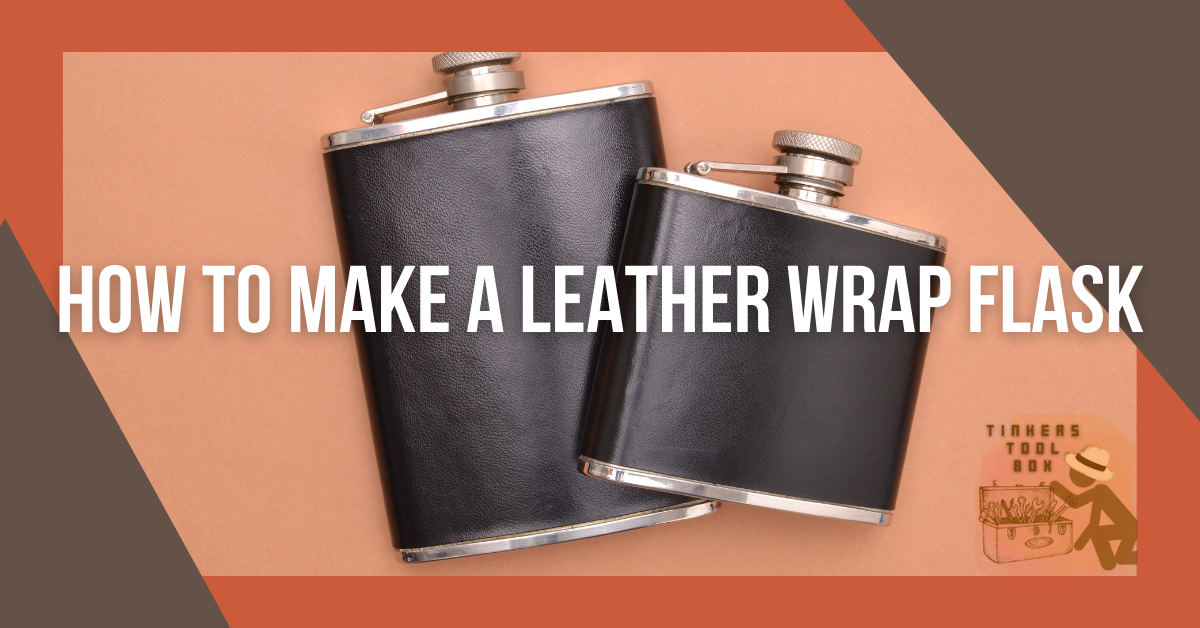
Going eco-friendly is one of the biggest help we can give to the planet. One uses environmentally good products, especially refraining single-use plastics and just shifting to reusable product items. Flasks are one of the many liquid containers you can get in the market and more often, it is paired with a wrap flask. The good news is that this wrap flask can be made out of leather, keeping you in style while being environment-friendly.
- A Leather Wrap: The Perfect Pair For Your Flask
- Step 1: Prepare the Tools and Materials You Need For The Project
- Step 2: Measure Your Leather Flask Dimensions
- Step 3: Cut The Leather Properly To Fit Your Flask
- Step 4: Trim and Polish the Leather Flask Wrap Edges
- Step 5: Add Decorations On The Leather Wrap
- Step 6: Make Guides for Stitching on the Flask Wrap
- Step 7: Start Sewing The Ends of the Wrap
- Step 8: Wax Your Leather Wrap Flask For A Finished Look
- Step 9: Fit Your Wrap to The Leather Flask
- Step 10: Take Good Care of Your DIY Leather Wrap Flask
- An Optional Step: Add A Strap To The Leather Wrap
- Frequently Asked Questions
- Marvel At The Final Look of Your Flask
A Leather Wrap: The Perfect Pair For Your Flask
Leather wrap flasks are one of the many innovations people come up with to drink comfortably while minimizing waste as a replacement for disposable sleeves and wraps. A leather wrap is a simple project yet very useful as an everyday item.
You can use it anywhere with your flask, both for protection and fashion. Hence, making a personalized one will be a good idea following these steps.
Step 1: Prepare the Tools and Materials You Need For The Project
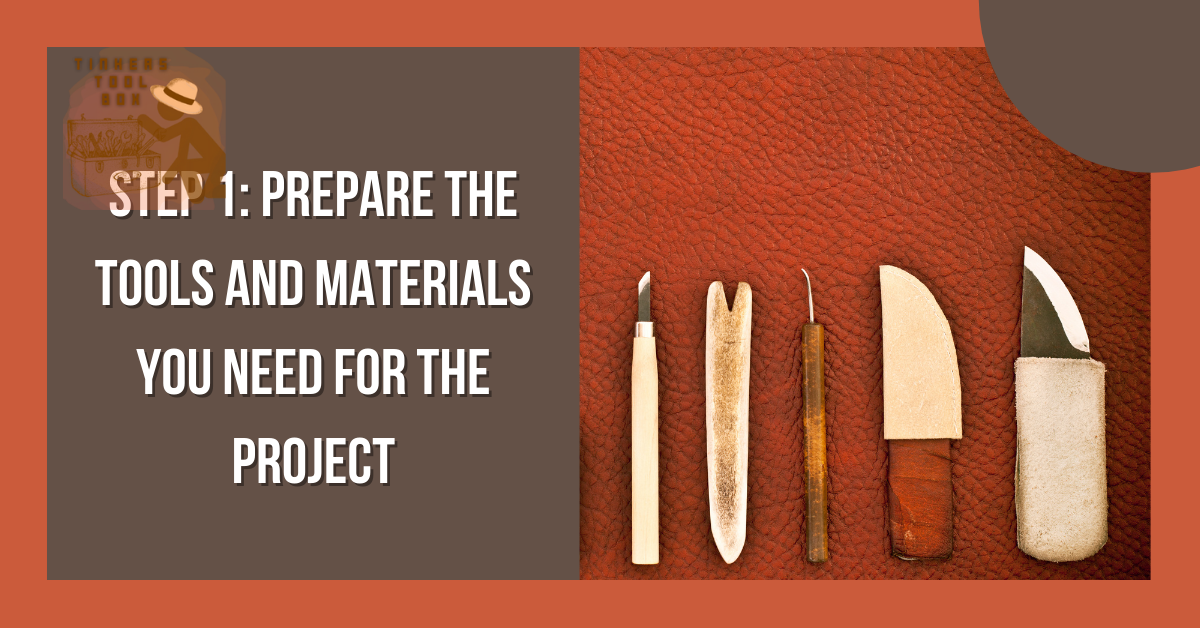
Making a leather wrap flask does not have to be the boring design that you dread, and you can make one that will still show your skills and creativity with the right tools and materials. Here are the leather-making necessities that you have to prepare to achieve the almost perfect product you want.
Making a leather wrap flask does not have to be the boring design that you dread, and you can make one that will still show your skills and creativity with the right tools and materials. Here are the leather-making necessities that you have to prepare to achieve the almost perfect product you want.
In doing this project, the first thing you should do is grab or choose a flask you want to make a wrap. This can be a new one, your favorite flask, or intended for a gift.
Aside from the flask, leather is an equally important material for this project. You can use scrap leather or a new one depending on what type you want to use long enough to wrap your flask.
Next is to prepare the cutting tools like a rotary cutter, a leather knife, Xacto knife, and scissors. You do not need to have all of this; one or two with spare blades will do. Also, prepare to cut in your cutting mat to preserve the sharpness of the cutting blades.
Get ready with the marking and stitching tools like pricking iron or chisel, waxed threads, and needle. Lastly, prepare the edge beveler, burnisher, and beeswax, which you will need for the polishing part.
Step 2: Measure Your Leather Flask Dimensions
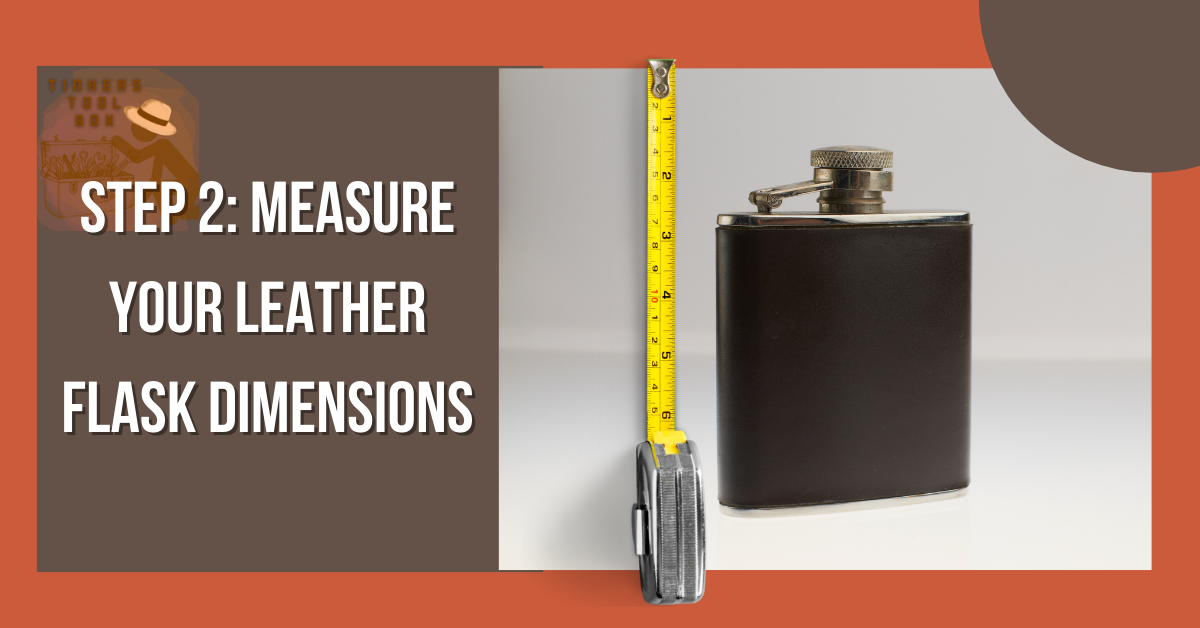
With the flask of choice, measure accurately using a tape measure or ruler the length and width of the wrap. Put the leather on the cutting mat and with the use of a pencil or marker, make a mark on the leather where you will cut.
Step 3: Cut The Leather Properly To Fit Your Flask
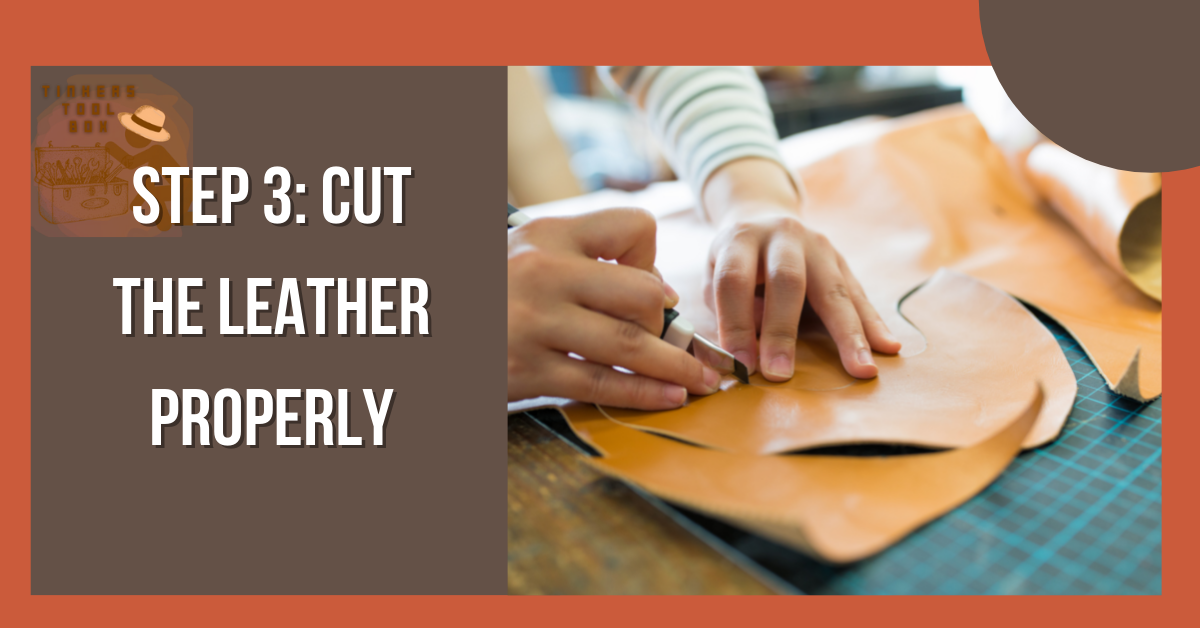
With all the marks in the leather, you can now start cutting. Place the leather in a cutting mat and use a rotary knife or any cutting materials you have, and cut along the lines. You can use a metal ruler to be your guide in obtaining straight cuts. Remember that cutting in a mat will not only achieve a smooth cut but will ensure that your blades are safe as you cut along the material.
Step 4: Trim and Polish the Leather Flask Wrap Edges
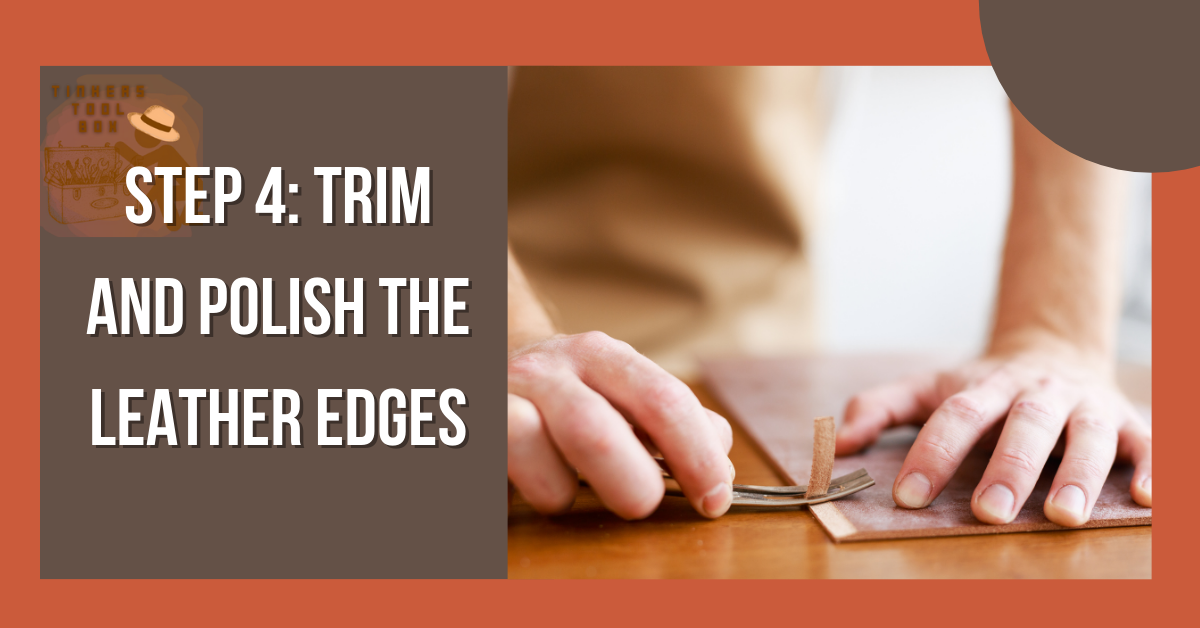
Once you already cut the leather, initially wrap the leather around the flask and look for uneven edges that need trimming. If there is, trim and straighten them accordingly. You can also use an edge beveler to obtain a rounded edge slightly.
Add enough beeswax using a dabber, cloth, or your fingers, and polish the edges with a burnisher. Make sure to paint or dye the leather before adding wax to the edges.
With a burnisher, run along the leather edge with beeswax and make sure to aim for a smooth and beveled edge. Once done, you are now ready to add decorations if you like and, most importantly, stitching.
Step 5: Add Decorations On The Leather Wrap

You can use any tooling materials that you want to get the design. Lay the polished leather wrap on your work table and start adding the decoration you want. At this point, you can stamp, engrave and make a monogram or other design on the leather. These designs will make it even more personal. Once done, you can proceed with stitching.
Step 6: Make Guides for Stitching on the Flask Wrap
After adding the decorations to your leather, you can now put stitching guides. Using a pricking iron or chisel with a mallet, add stitching marks on the areas you want to stitch, particularly the wrap’s edges.
Make sure not to work on the cutting mat but on an area of your table where you can efficiently punch holes. You may add scrap leather underneath your project to prevent the pricking irons from penetrating underneath.
Step 7: Start Sewing The Ends of the Wrap
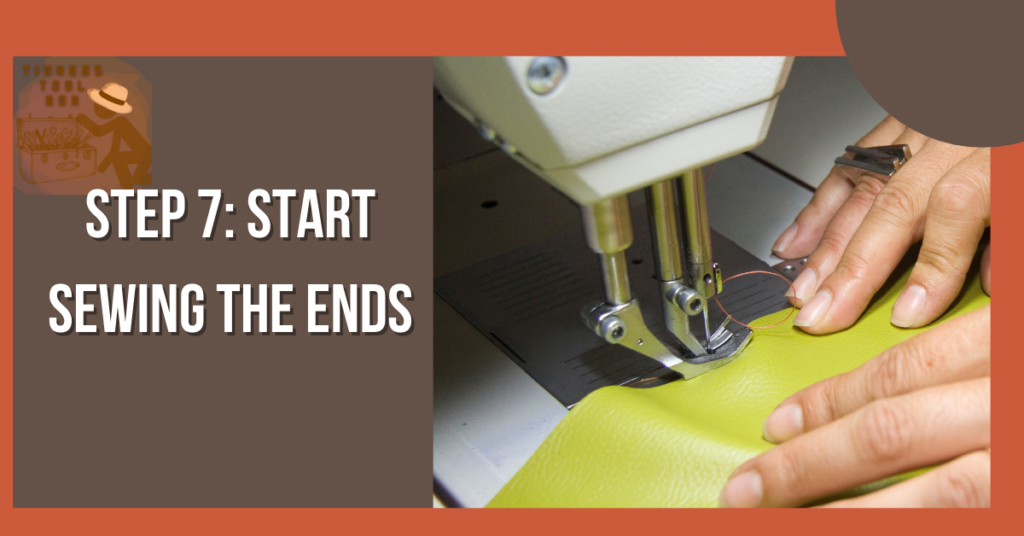
Now get the needles and thread. In stitching leather, you should make sure to get the ideal thread and needle types. Waxed threads are ideally used in stitching leather because they make the thread more durable, stiffer, and water-resistant, which gives your product ease of sewing and protection.
For needles, make sure to buy leather needles. These are slightly larger than regular needles that will accommodate the size of waxed threads. You can now start doing manual stitching, and it is easily done using a clamp.
Place the leather in the clamp and start threading the needles through the holes you punched with your stitching chisel or pricking iron. You would need a long length on both sides.
Please insert it into the first hole, pull it until it is centered, then feed both needles through the next hole. This is also called saddle stitching. The technique here is to be consistent with your motion and insert the needles the same way.
If you do not like to use a clamp, you can do this by directly sewing your leather wrap ends; make sure to pull away from the needle to avoid injuries. You can also stitch it using a machine that will be faster if you do have one. Keep going until you reach the end of the leather.
Step 8: Wax Your Leather Wrap Flask For A Finished Look

Waxing will be a crucial part of your leather wrap flask if you want to use it for an extended period. You’ll need to wax it, and this will be the most difficult step. In waxing, you will need beeswax, and your goal is to get the molten beeswax in a large potton melt them in. Then dip the leather wrap flask in it and turn it over.
If you don’t have a bigger pot or enough beeswax, then what you’re going to do is melt a bunch of wax, dip the leather wrap flask in and turn it over again and dip the other side.
The wax will cover it in a thick coat and not soak in. Preheat your oven for about 170 degrees, get cardboard, put the wrap on top, and put it in the oven. Check every five minutes for25 minutes starting the wax should be melting and soaking in by then.
Once the wax is gone, you already have a nice sheen left on it. Shake it to make sure there’s no more wax left. And wipe it with a paper towel, rub it well to take away the sheen.
Step 9: Fit Your Wrap to The Leather Flask
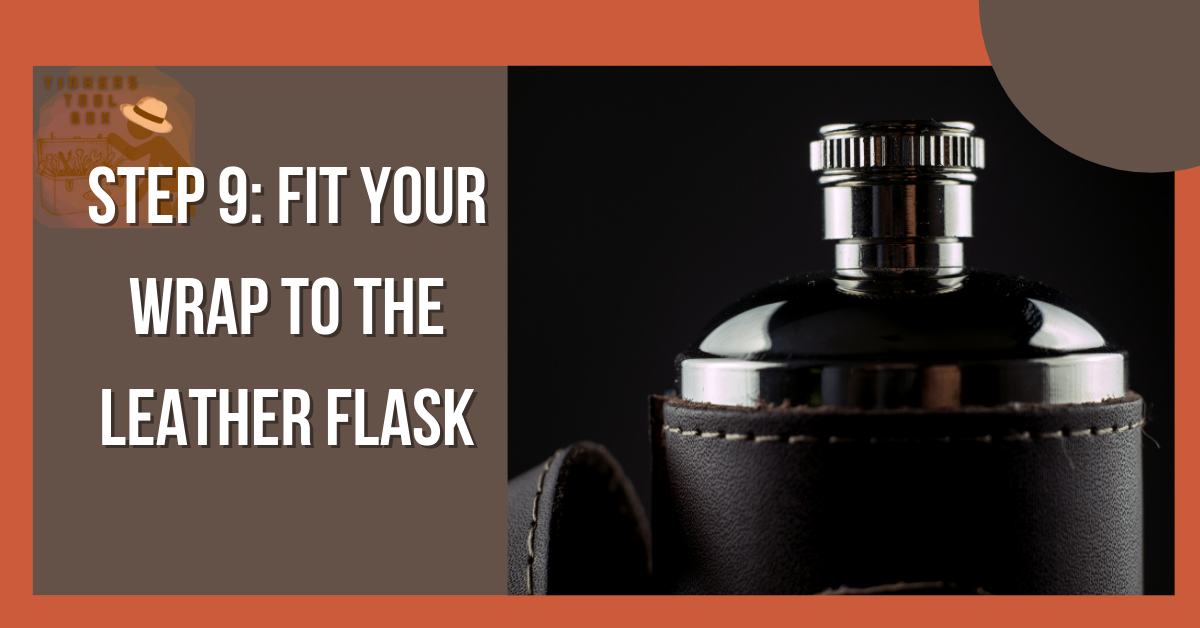
Once already done with waxing and the final touches, you can now fit your leather wrap on the flask. See if it fits nicely and makes adjustments if needed.
The leather wrap may be a little tight at first, but this will break-in time and get the perfect fit for your flask. Make sure that it is not too tight or too loose, though. If you already did this step and all is good, then it’s time to flaunt your DIY leather wrap flask.
Step 10: Take Good Care of Your DIY Leather Wrap Flask

You have to maintain your leather wrap flask; otherwise, it will easily wear off and only last for a short period. Make sure that it is more durable and long-lasting because anyone wants to save off-budget from making another one.
Here are some things you can do that are simple yet crucial. If some liquid gets spilled on, don’t wash them off right away, you can wipe the spill off with a paper towel or some wet wipes.
If it was accidentally soaked, do not dry off direct sunlight; instead, just put it outside but not too exposed to the sunlight and wait for it to dry.
You can use olive oil to maintain the sheen look of your leather but do not put on too much as it can damage them too; just the right amount will do.
An Optional Step: Add A Strap To The Leather Wrap
One additional step you can make is adding a strap to your leather wrap, which is optional since some prefer not to have one. This will also help you carry your flask in an easier way and for added style and look.
Use a leather cord or leather strap from your remaining leather and get an accurate measurement of how long you like it to be.
Be as creative as you can be. If you don’t have spare or extra leather for this, you can try other materials you have at home, like linen. Attach the straps by stitching or through a knot or lobster claws.
Frequently Asked Questions
In many DIY leather projects, there might be questions that can arise before, during, and after the process, and here are some of the answers to most of the common queries you might have.
Why Should I Include a Leather Wrap Flask In My DIY List?
A leather wrap flask is used to protect your flasks from scratch and protect them from getting damaged, especially when you accidentally drop them. These leather wraps ensure that your flask is safe and secure. These leather wraps also give added style and look to your flask and also can be a status symbol for you for the most part.
If you DIY a leather wrap flask, it is just not economical given the cost you can save but also eco-friendly, which means you will also be minimizing single-use products on the planet.
You can also give this to your friends or loved ones as a customized gift with a personal touch and character. Lastly, it is easy to make and will develop your leatherworking skills.
What Type of Leather Should I Use?
Vegetable-tanned leather is typically used in leather accessories and wraps. It gains color as it ages in use, and the leather seems to get grippier when wet. The natural characteristics of this leather will make your leather wrap flask more appealing over time.
This is one of the leather choices that can last a good time if cared for properly, and they are commonly used in high-end and handmade leather goods such as these leather wraps for your flask.
Making this leather product is more complex, thus making this item more valuable and prestigious. The amount of time it would take to make it on and the tanning process it has undergone before it’s achieved is quite difficult.
How Much Will A Personalized Leather Wrap Cost?
Having some of the tools and materials at home is a big advantage, plus this would help you save your budget up a bit. It will be wise to innovate on what you have at home that you can use and will come in handy if you lack the other materials.
For the most part, a leather on local stores that you can buy pieces on would usually just cost you an average of $35 to $90, or some might even be up to $125 depending on the type. Beeswax comes at $20, and waxed threads may cost around $30.
If you buy everything from tools to materials, it will cost you $70, but this will surely be lower if you already have other essentials.
How Long Will It Take To Make or Complete A Leather Wrap Flask?
Given the skills and the availability of materials and tools, a skilled leatherworker can make it in less than 30 minutes. If you are a beginner, it may take a while, but do not fret because this will be one of the simple projects that you can easily make.
Marvel At The Final Look of Your Flask
Once done with all the steps, you will develop a leather wrap having a snug fit on your flask. It will be useful in everyday adventure wherever you go as you carry your flask with you. This final product will be the perfect pair for your favorite flask.